WARDOGS Driver Tank Guide: Drive, Aim & Protect the L2A6
Illustrated WARDOGS guide to driving and fighting the L2A6 tank as the Driver class: crew seats, hull-down gunnery, ammo modes, fuel, repairs and protection.
FAQ
Is the tank part of the Driver class in WARDOGS?
Who drives and who shoots the tank in WARDOGS?
How much does a tank cost to unlock and spawn in WARDOGS?
How do you refuel and repair a tank in WARDOGS?
A tank wins WARDOGS matches, but only if the crew keeps it alive. The main battle tank is the Driver class’s end-game prize: a three-man armored box that prints cash when it is pointed the right way and torches hundreds of thousands of dollars of bank when a single RPG catches the rear engine block.
The hard part is that nobody teaches you to crew one. The gunner can shoot but cannot see where the hull is going, the driver keeps the tank alive but cannot aim, and the vehicle drinks fuel and pops compartments faster than you can read the HUD.
This illustrated walkthrough rebuilds one full 33-minute tank life into seven actionable steps, pairing each with a verified in-game screenshot and a deep link to the exact moment it happens.
Source and Verification Card
| Field | Detail |
|---|---|
| Vehicle | L2A6 heavy armored vehicle (main battle tank) |
| Class path | Driver sub-class (end-game unlock) |
| Crew | 3 — driver, gunner, commander |
| Armor model | Front > sides > rear; ~3–4 clean hits to kill |
| Source channel | PsiSyn — “Tank Gameplay in WARDOGS is INSANE!” (~195K views) |
| Cross-checked against | Fringe-Patriot Gaming — Driver-role vehicle progression guide |

PsiSyn — Tank Gameplay in WARDOGS is INSANE! (full tank life)
The screenshots and tank-crew facts below are drawn from PsiSyn’s recorded tank session. Driver-class progression context (how driving and transporting level the class) is cross-checked against Fringe-Patriot Gaming’s Driver-role guide. Both creators are credited; no footage, logo or on-screen text from either channel is reproduced on this page.
Step 1: Field the Tank and Pick the Right Seat
The tank is a Driver-class purchase, so you buy it from the vehicle vendor with bank cash and spawn it at your FOB. Once it is on the ground, the crew decision comes first: the driver moves the hull, the gunner aims the main gun, and a third body can ride the commander position. Press Q (Change Seat) to hop between them — a two-man crew has to keep re-seating to both drive and shoot, which is exactly the bottleneck you are trying to avoid.
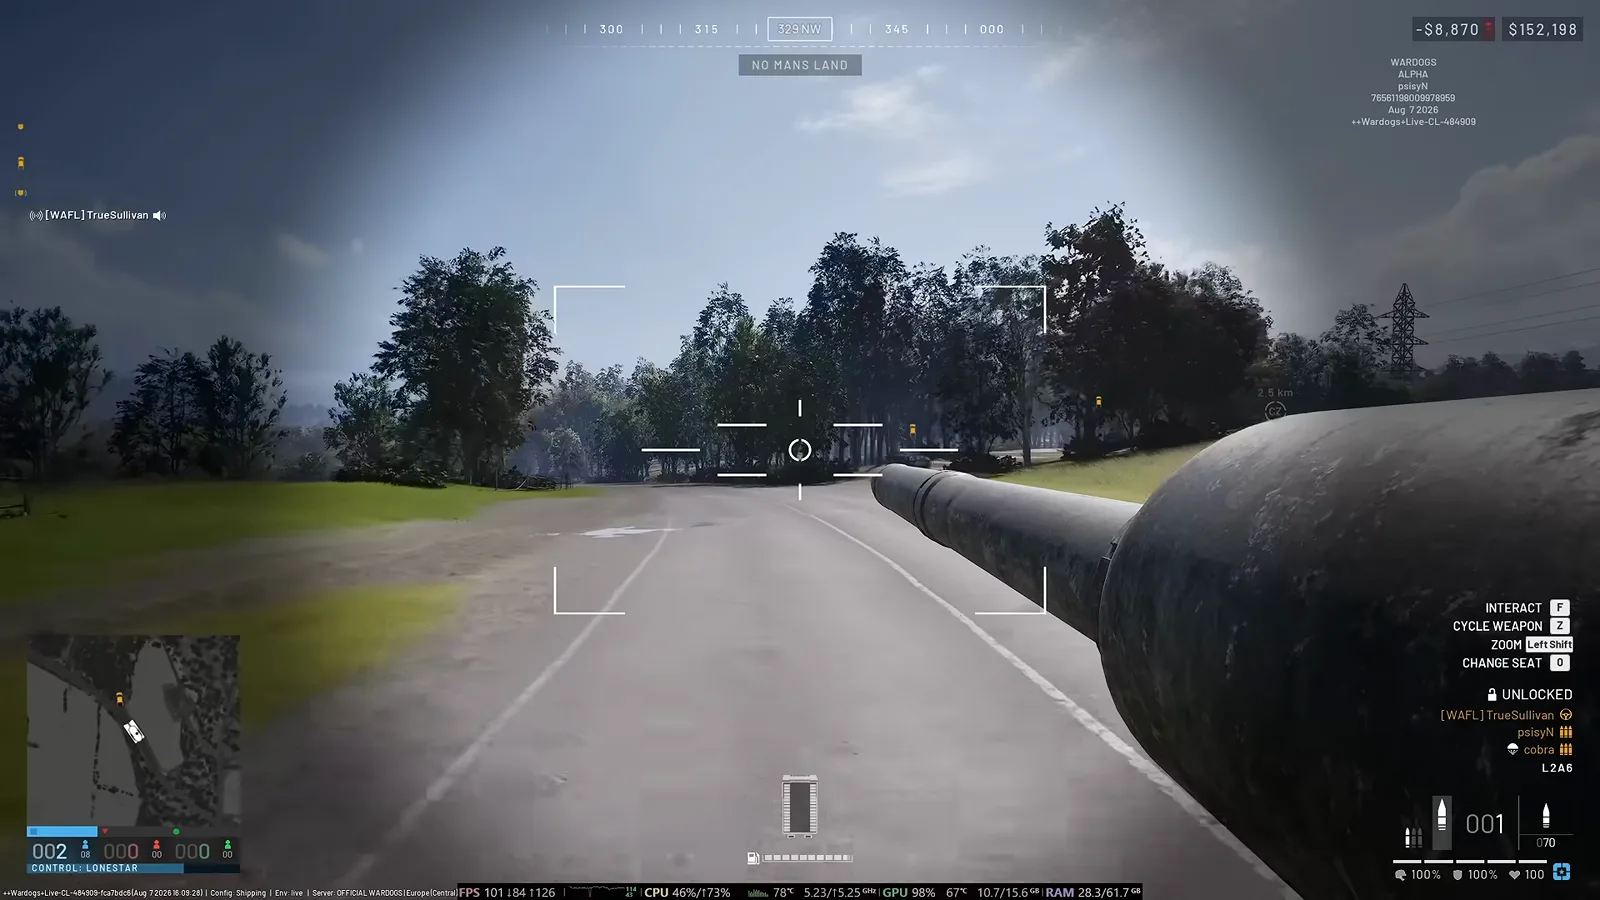 Step 1 (Timestamp: 06:15) — The right-hand HUD lists the crew and the seat/weapon bindings; keep a dedicated driver so the gunner never has to look away from the sight.
Step 2: Drive Hull-Down and Let the Turret Do the Work
The single biggest rookie problem is visibility: from the gunner seat you cannot see the bottom of your own hull, so you are constantly guessing how much of the tank is exposed. The fix is positioning. Park on the far side of a ridge or behind terrain so only the turret breaks the skyline, keep the hull masked, and let the barrel poke over the top. The source crew worked exactly this way — gun over a sunflower field, hull hidden, turret traversing onto the objective.
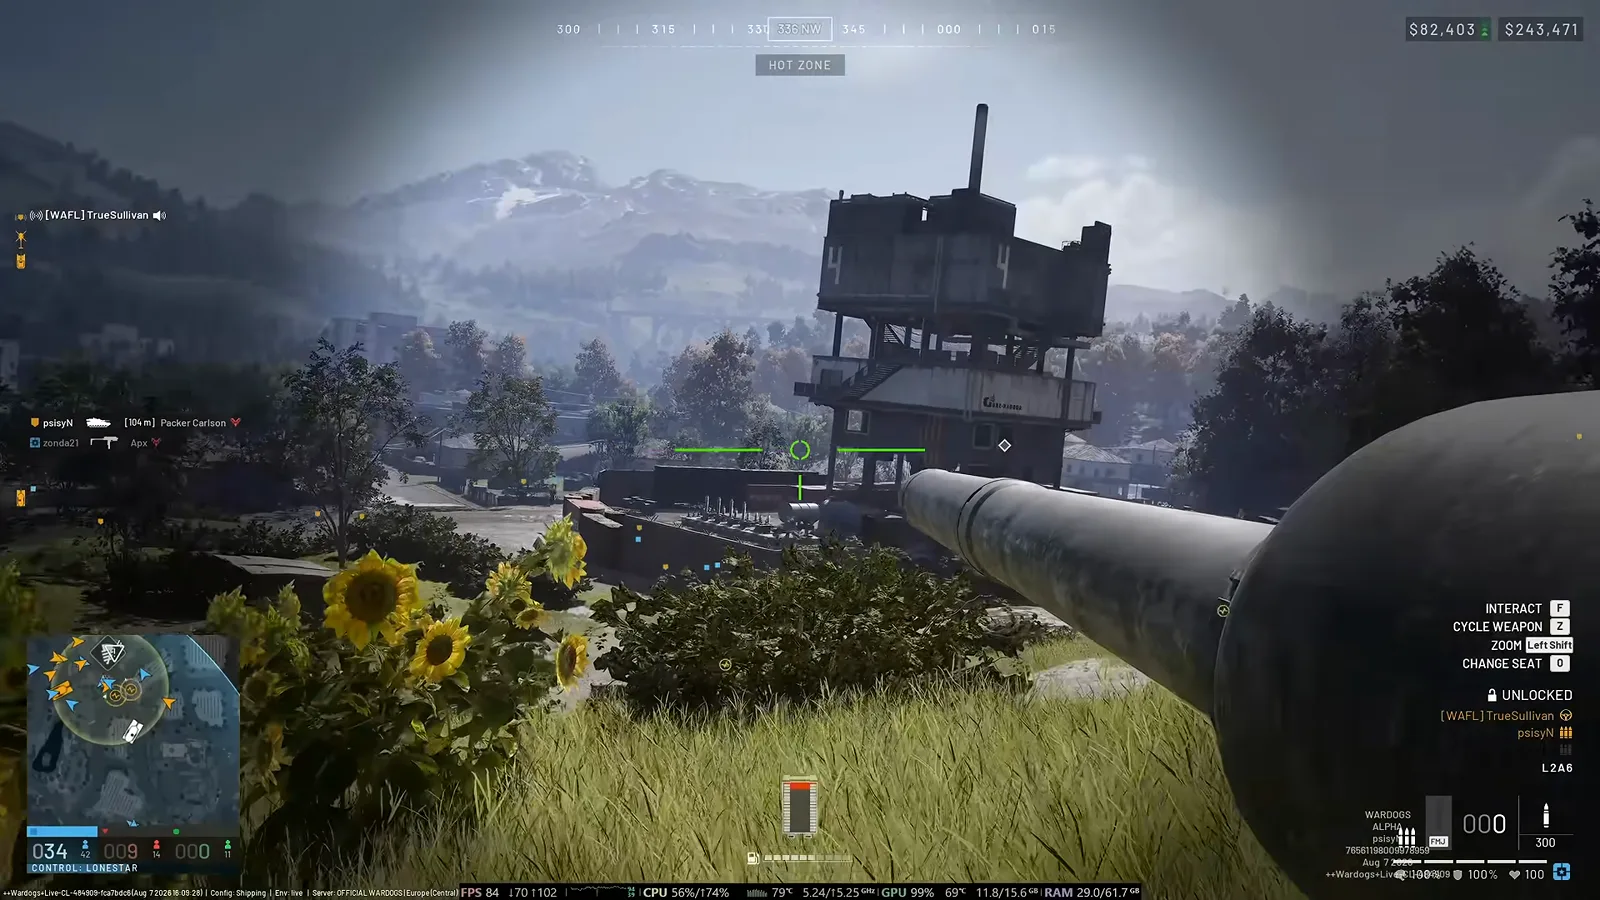 Step 2 (Timestamp: 15:00) — Hull-down on the reverse slope: the barrel clears the field while the vulnerable lower plate stays behind the ground.
Watch hull-down positioning (15:00)
Step 3: Coax the Soft Targets, Save the Shell for Armor
You have two guns on one vehicle: the coaxial machine gun and the main cannon. Switch between them with Z (Cycle Weapon). Against infantry, trucks, supply pallets and an enemy spawn vehicle, use the coax — it is cheap, forgiving and racks up kill cash without wasting expensive main-gun ammo. The footage shows the crew racking up “easy money” purely by coaxing soft logistics targets across a depot.
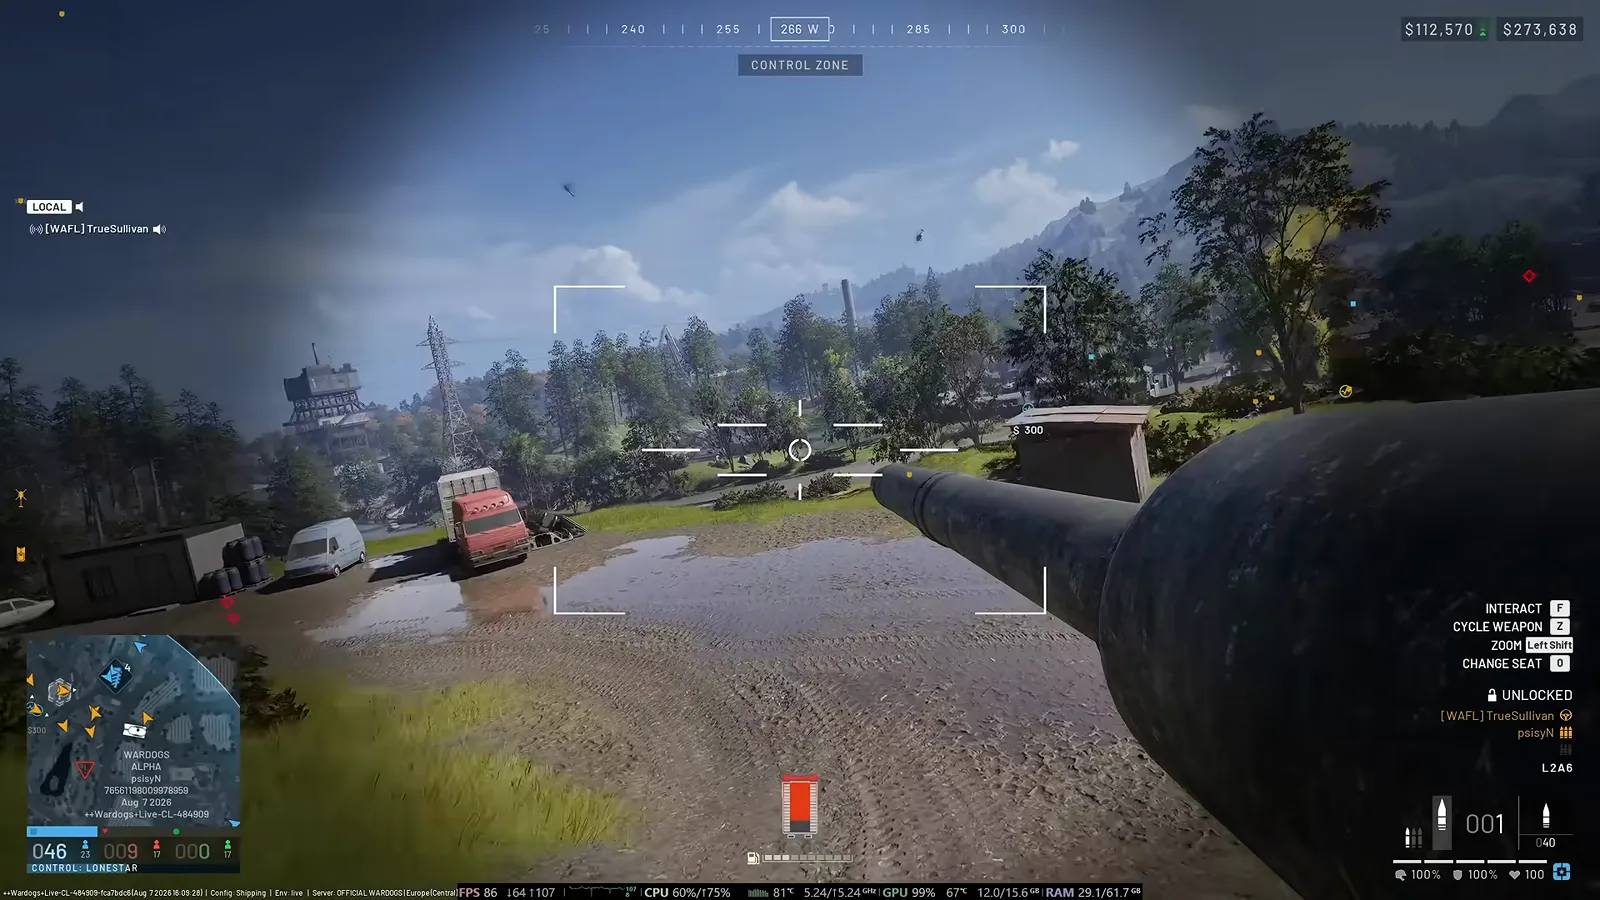 Step 3 (Timestamp: 17:30) — Unarmored transports and enemy spawn trucks fold under the coax; keep the main gun loaded for something that can shoot back.
Watch coaxing soft targets (17:30)
Step 4: Spend the Shell on Structures and Objectives
When you do fire the main gun, HE shells flatten towers, buildings and light cover — the map is destructible, and a control tower is just a big target. The crew in the footage walked a tower down until it was burning, which is how you clear a contested zone before your infantry push in. Read the range and elevation off the zoomed sight, fire, then walk the next round onto the impact.
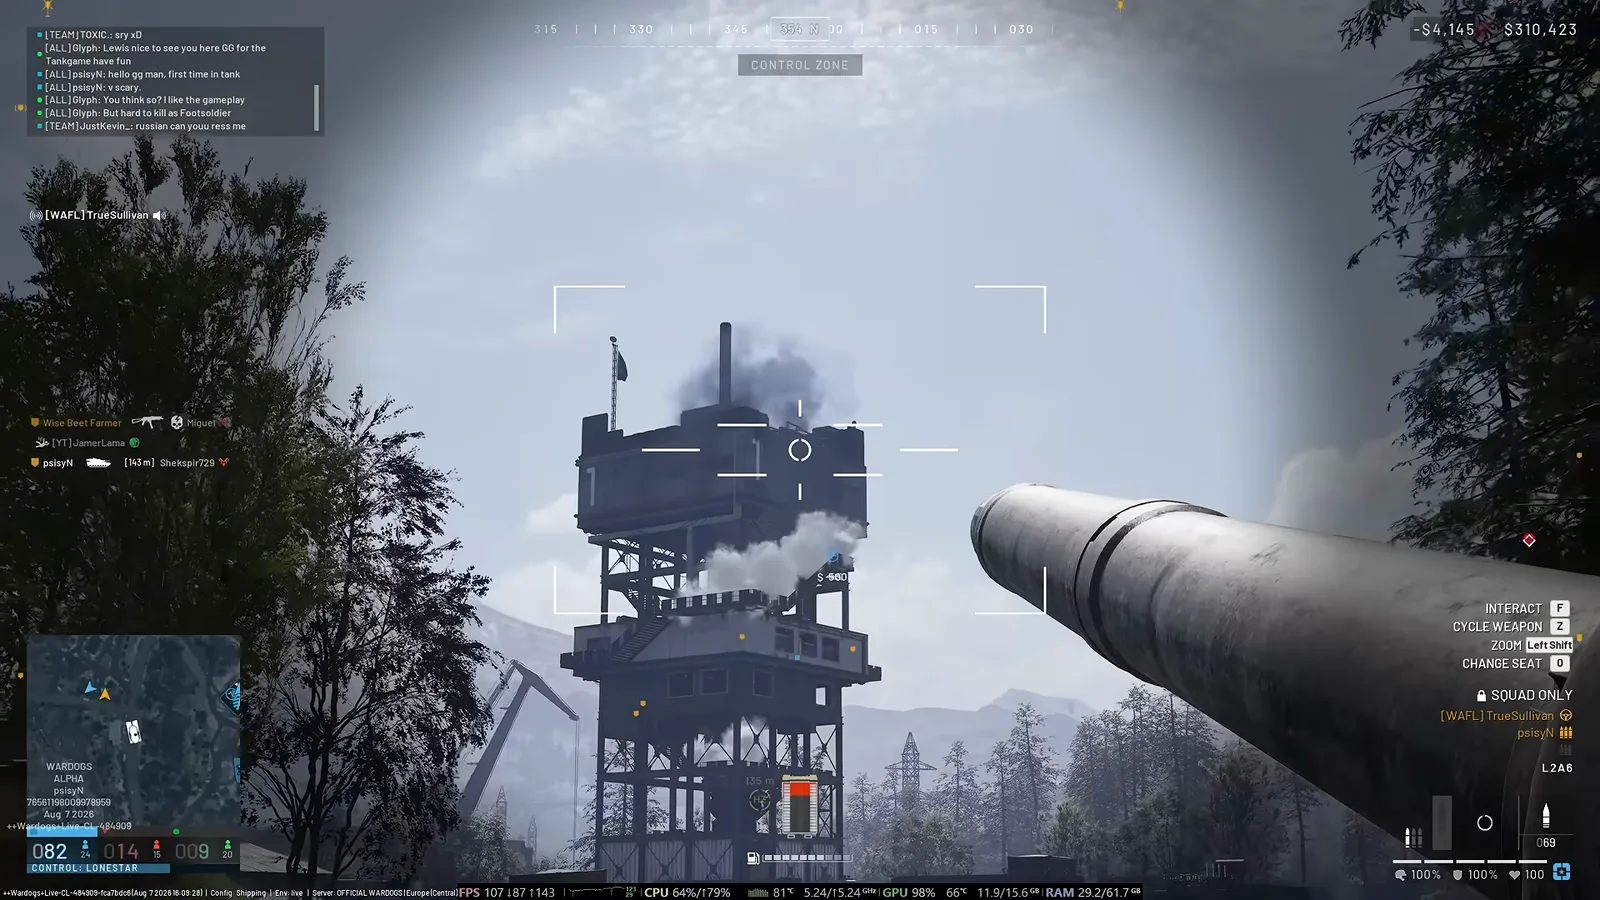 Step 4 (Timestamp: 26:40) — HE on the objective: a few main-gun rounds turn a captured tower into a burning landmark and open the zone for your team.
Step 5: Respect Armor Angles and Enemy Tanks on the Map
Tank-vs-tank is a geometry problem. Front armor is the strongest, the sides are weaker, and the rear is the softest — angle the hull toward threats and never present your flank or engine. Good hits take roughly three to four rounds to kill a tank, so the first crew to angle and shoot first usually wins. Help yourself by reading the map: once anyone spots an enemy tank, it marks for the whole game, so play for position instead of driving blind into it.
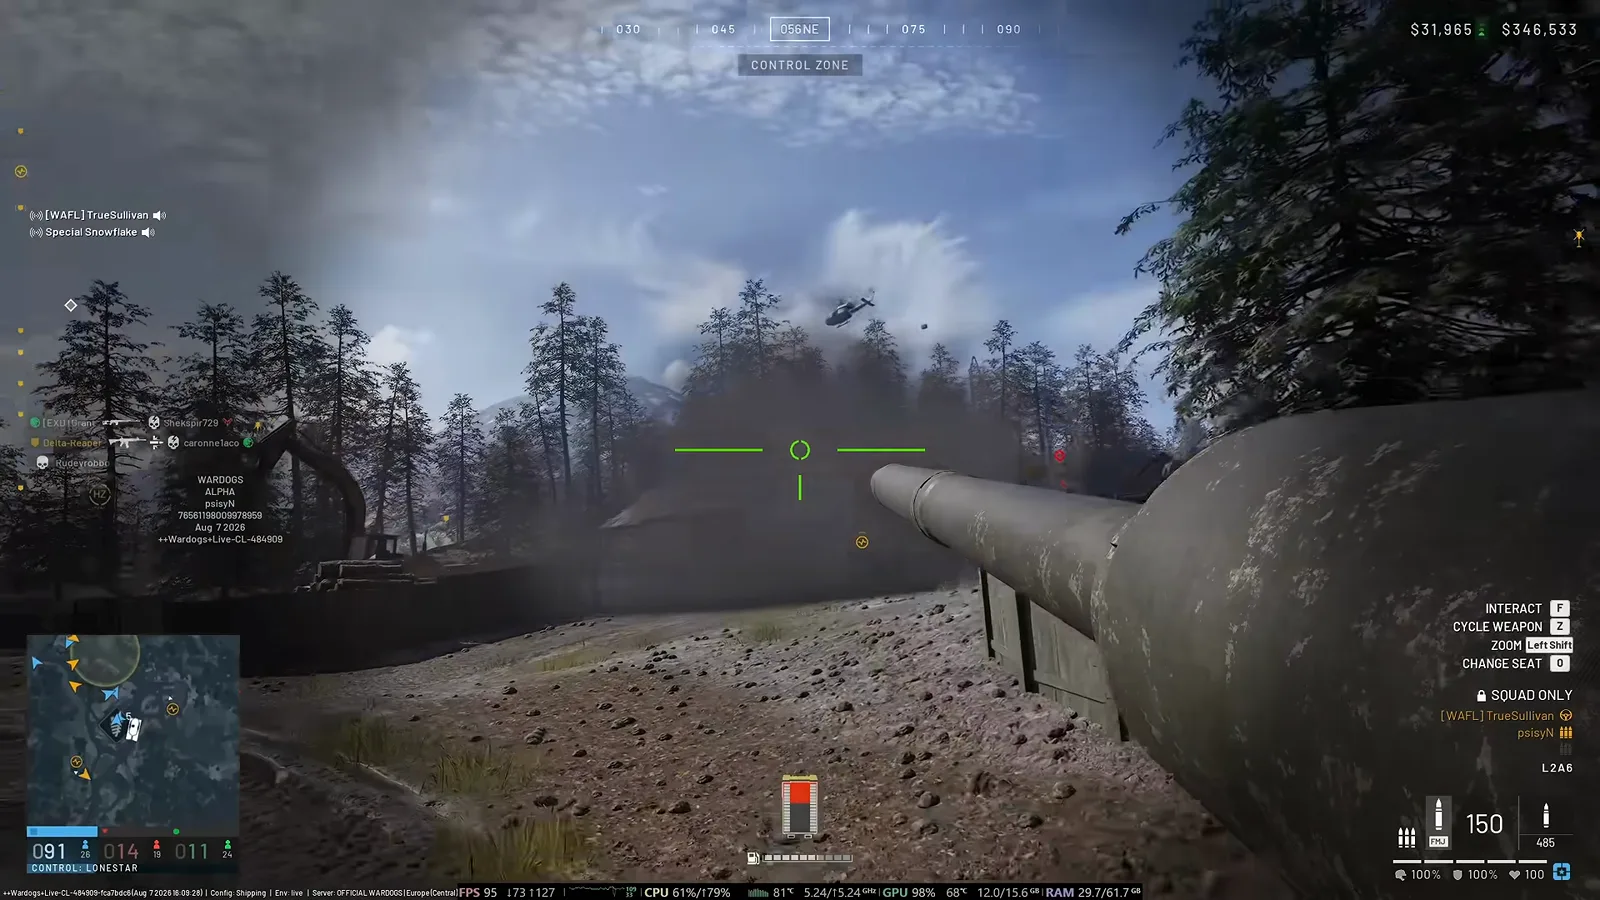 Step 5 (Timestamp: 29:48) — The main gun can track low helicopters, but dedicated air defense belongs to the AA-tank variant; keep your FMJ loaded for armor and save HE for the rest.
Watch tracking air and armor (29:48)
Choosing the right round: HE vs coax vs FMJ
- Coaxial MG (Z) — infantry, trucks, spawn vehicles, supplies. Free-ish damage, no reload drama.
- HE shell — towers, buildings, entrenched squads, light armor. Splash and structure destruction.
- FMJ / AP shell — enemy tanks and IFVs. This is the round you want pre-loaded before a duel.
- Reload discipline: swapping to the shell before the reload animation finishes resets it. Commit to a round, or you will sit empty while a tank aims at your rear plate.
Step 6: Read Your Ammo and Fuel Before You Complain
Two gauges decide how long a tank life lasts: the ammo counter and the fuel bar. The HUD shows your loaded round type and reserve (the footage displays a 150-round FMJ bandolier with a deep reserve), and the fuel widget in the corner drains fast because the tank “guzzles fuel.” When ammo runs low you do not have to drive all the way back to base — a helicopter or a supply car can drop pallets right at your position, which is what the crew used to stay on the front line.
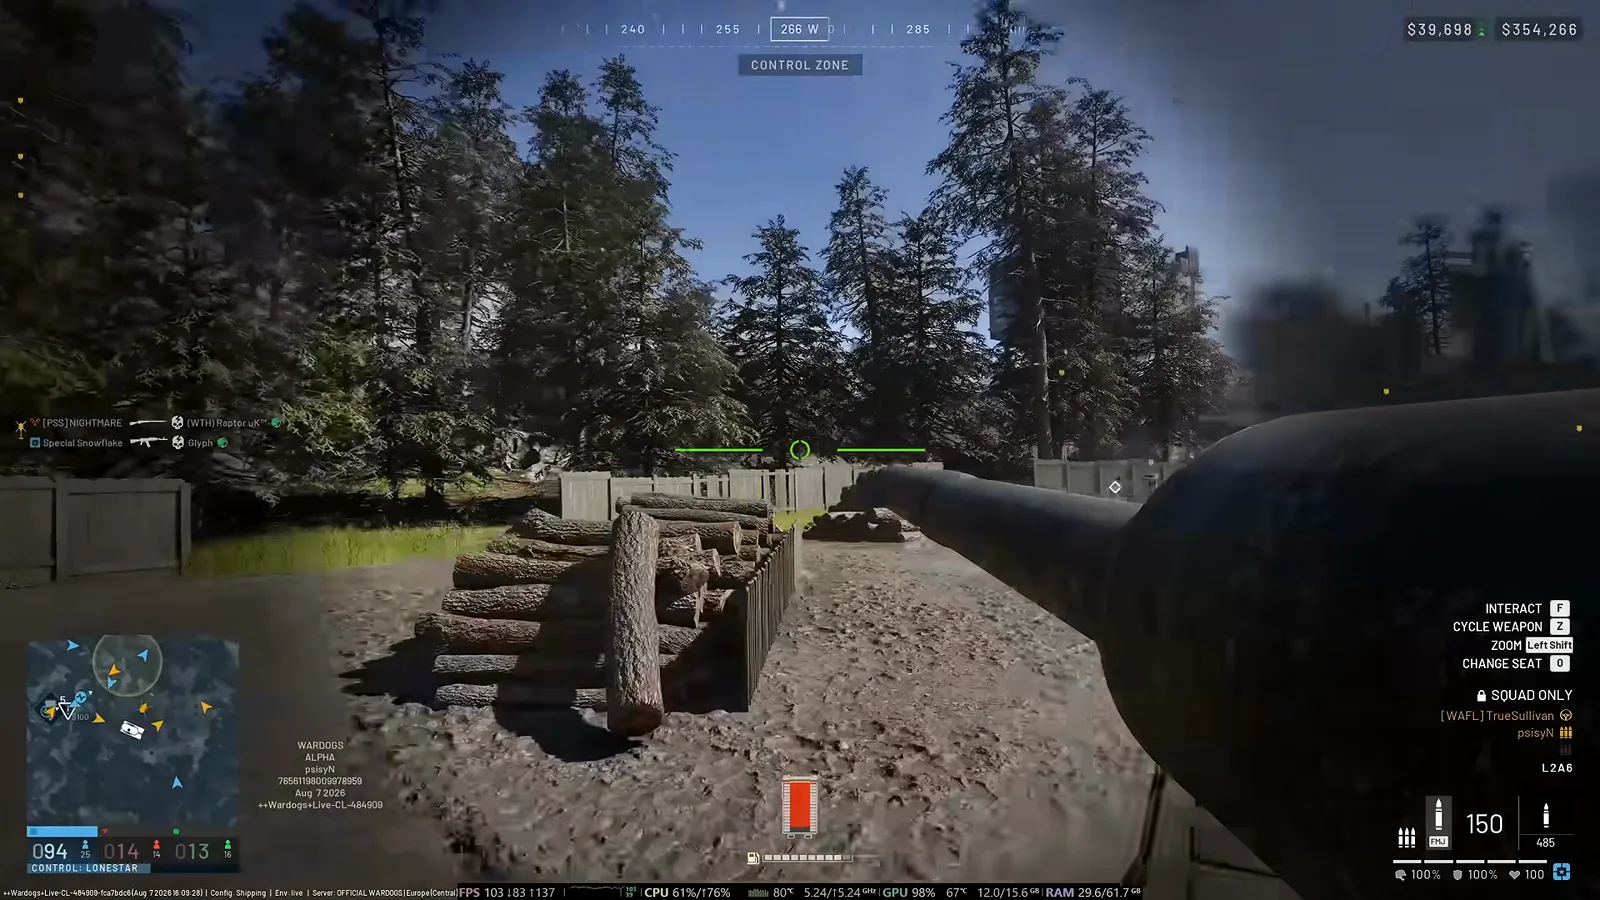 Step 6 (Timestamp: 31:40) — The ammo counter names your loaded round (FMJ here) and your reserve; watch it alongside fuel so you never beg for a resupply mid-duel.
Watch ammo and fuel management (31:40)
Step 7: Dismount to Refuel, Repair and Protect the Hull
A tank is a team asset, and sometimes the crew has to get out. Climb onto the hull with a fuel can equipped to top the tank back up, and use a repair wrench to bring a damaged compartment back to roughly 75% — the turret, tracks, engine and hull are repaired separately, so an engine at zero is a mobility kill even while the gun still turns. Keep infantry close while you work: an unescorted, stationary tank is exactly what the anti-tank squads in our anti-tank guide are hunting.
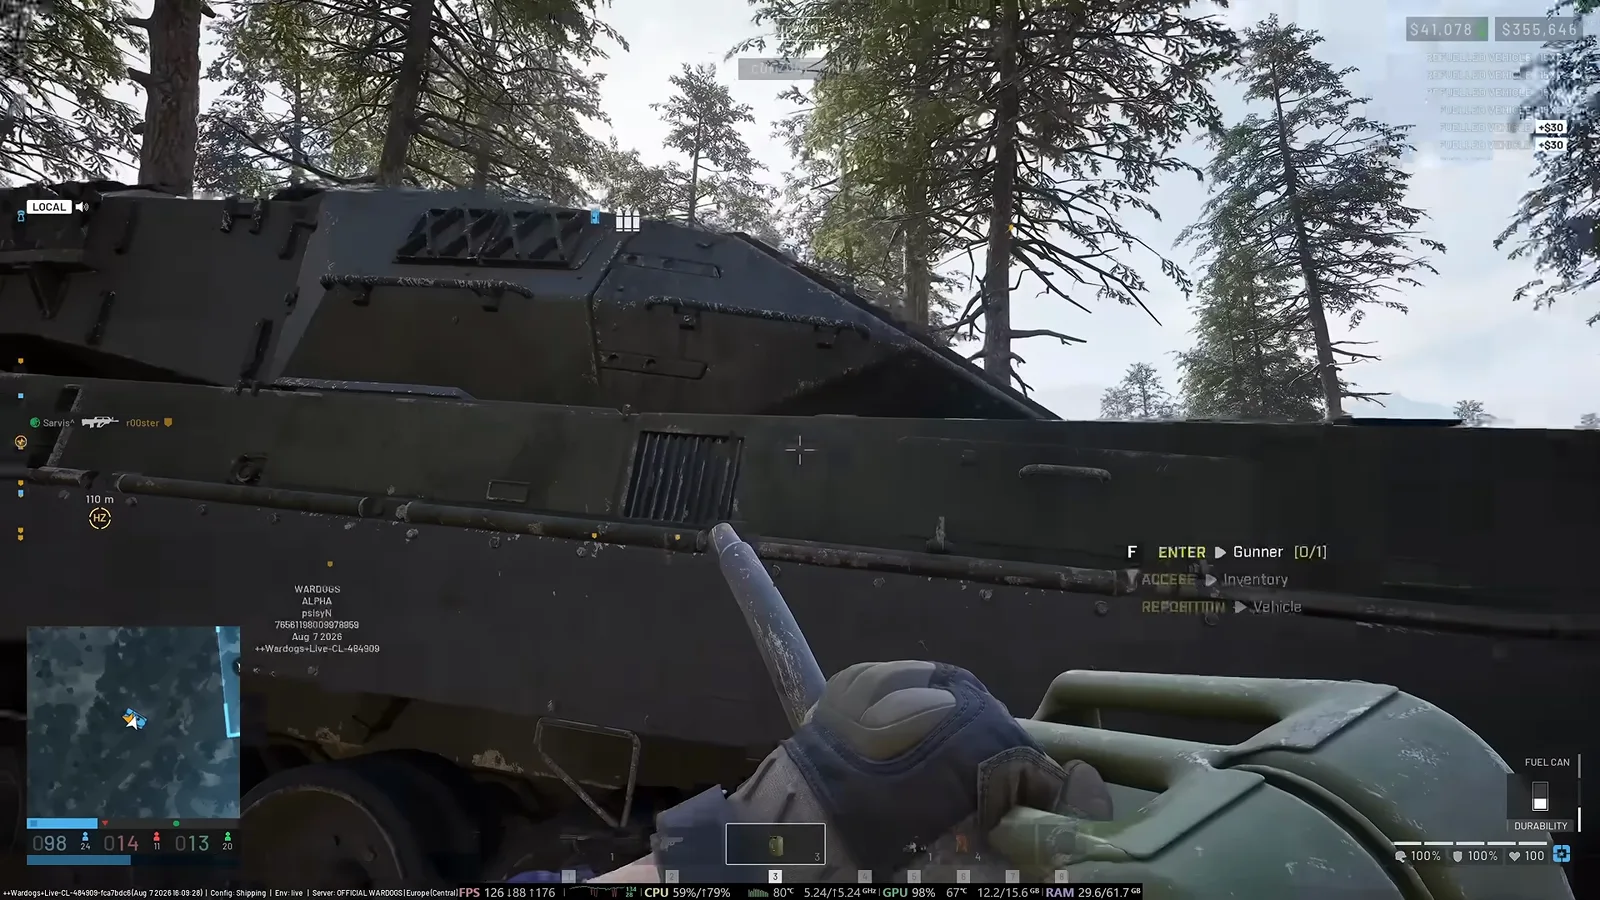 Step 7 (Timestamp: 32:30) — Out of the hatch with a fuel can: the interaction menu lets you re-enter the gunner seat, access the vehicle inventory or reposition the tank while you refuel and wrench the compartments.
Watch the dismount and refuel (32:30)
Tank Keybinds and Stats
| Control / Stat | Value | Notes |
|---|---|---|
| Interact | F | Enter/exit seats, loot, use objects |
| Cycle Weapon | Z | Swap coaxial MG ↔ main gun |
| Zoom (optic) | Left Shift | Gunner sight magnification |
| Change Seat | Q | Driver ↔ gunner ↔ commander |
| Crew | 3 (driver, gunner, commander) | Community-reported |
| Armor model | Front > sides > rear | ~3–4 clean hits to kill |
| Repair (wrench) | Restores a compartment to ~75% | Turret / tracks / engine / hull separate |
| Top speed | ~65 km/h | Community-reported, closed alpha |
| Unlock / spawn cost | ~$250,000 + ~$20–30k per spawn | Community-reported, closed alpha |
Tank Crew Rules of Thumb
- Never be your own driver and gunner. Lock one player to the driver seat; a tank that has to stop so someone can change seats loses duels. Class choice is covered in our best class guide.
- Angle the hull, hide the rear. Front armor bounces, the engine block does not — reverse the moment your flank is exposed.
- Fuel and ammo are logistics, not afterthoughts. Carry cans and call a drop instead of driving home; keep the FOB stocked via our FOB building guide.
- Repair the compartment that matters. Engine first if you need to move, tracks if you need to stop, turret if you need to shoot.
- Play the map, not the muzzle. Spotted enemy tanks mark for everyone — read zones and towers in our maps and tactics guide.
- Level the Driver class on the way up. Driving distances and ferrying squads/supplies feed Driver XP; the fastest route is in our XP leveling guide.
This tank guide was reconstructed frame-by-frame from PsiSyn’s recorded WARDOGS Early-Access tank session and cross-checked against Fringe-Patriot Gaming’s Driver-role progression video. Unlock costs, crew size, top speed and the ~15-hour unlock time are Community-reported closed-alpha figures and will be updated as the L2A6 and its variants are rebalanced.
Related Articles
guides
WARDOGS Best Class Guide: Which Career to Play First
WARDOGS has six careers and no single best class — your level is the sum of all of them. Here is which career to build first and the level gates that decide it.
guides
WARDOGS FOB Attack Guide: Scout, Breach & Destroy Enemy Bases
Attack and destroy an enemy FOB in WARDOGS: scout the contested tower, insert by helicopter, breach the gate with C4, and kill the spawn truck.
guides
WARDOGS Game Modes Explained: Control Zones, Ticks & How to Win
New to WARDOGS? Learn how matches are won: three teams fight over one control zone, a 30-second tick scores points to 100, and the hot zone doubles cash.
Was this helpful?
Thanks for the feedback!