WARDOGS Game Modes Explained: Control Zones, Ticks & How to Win
New to WARDOGS? Learn how matches are won: three teams fight over one control zone, a 30-second tick scores points to 100, and the hot zone doubles cash.
FAQ
How do you win a WARDOGS match?
What is the hot zone in WARDOGS?
Does dying cost money in WARDOGS?
WARDOGS is not a deathmatch. Running up a huge kill count means nothing if your faction never holds the ground that scores, and a squad that never fires a shot can still win the evening if it parks bodies in the right circle at the right moment. The whole match format is built around one question: who controls the zone when the clock ticks?
This illustrated guide reconstructs the official BULKHEAD “Game Mode Explained” breakdown into six steps, pairing each mechanic with a verified screenshot from the video and a deep link to the exact second it is demonstrated. It covers the objective, the scoring tick, the win condition, the cash economy, player-defined roles, and the moving hot zone — the mechanics that decide how you actually win.
Source and Verification Card
| Field | Detail |
|---|---|
| Game mode | 100-player, three-team control-zone warfare |
| Objective | One control zone per match |
| Scoring tick | Team with the most players inside earns 1 point every 30 seconds |
| Win condition | First team to reach 100 points |
| Source channel | BULKHEAD (official WARDOGS developer channel) |
| Source video | WARDOGS — Game Mode Explained |

BULKHEAD — WARDOGS | Game Mode Explained (official)
Step 1: Understand the Objective — One Control Zone, Three Teams
A match drops 100 players split across three teams onto the battlefield, and all three fight over a single control zone. Open the tactical map and the whole premise is visible at once: the large ring is the control zone, the yellow disc inside it is the moving hot zone, and the green, red, and blue markers are the three factions jockeying for position. You are not defending a lane or hunting a target list — you are one of a hundred bodies trying to be inside that circle.
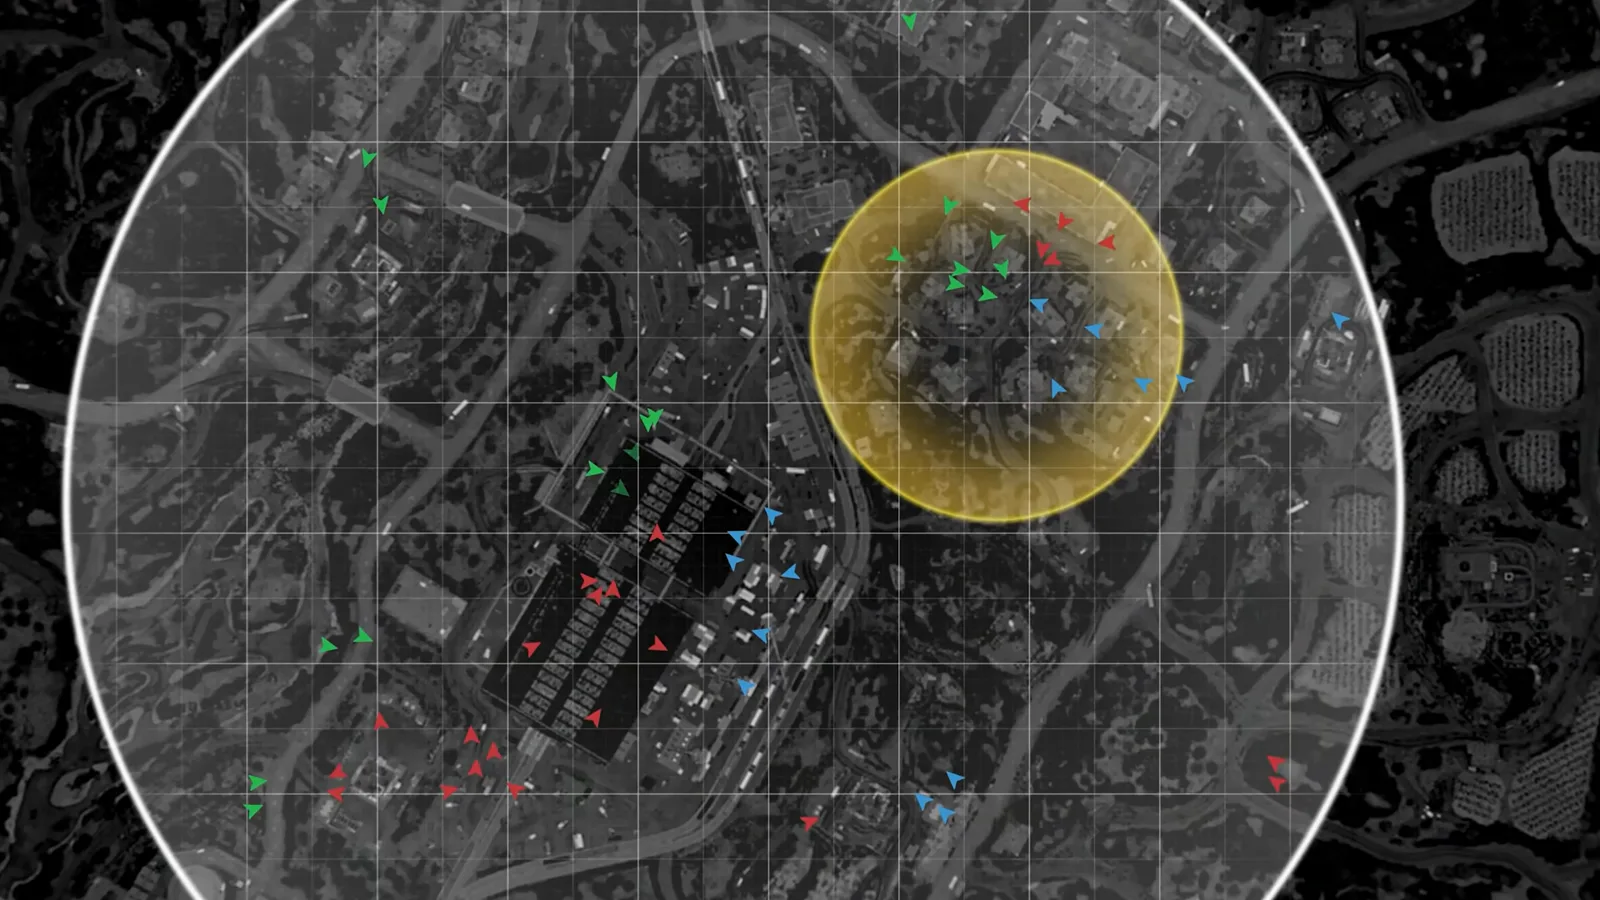 Step 1 (Timestamp: 01:30) — The map is the strategy: read where the yellow hot zone sits inside the control zone before you commit your squad’s route.
Step 2: Learn How You Score — The 30-Second Tick to 100
The scoring rule is the heartbeat of the mode: every 30 seconds, the team with the most players in the control zone earns one point, and the first team to reach 100 points wins the match. The round-end scoreboard makes the three-way race obvious — three faction bars, green, red, and blue, filling at different rates while the losers trail. Kills only matter because they thin the enemy count inside the circle; the point is awarded for presence, not for your K/D.
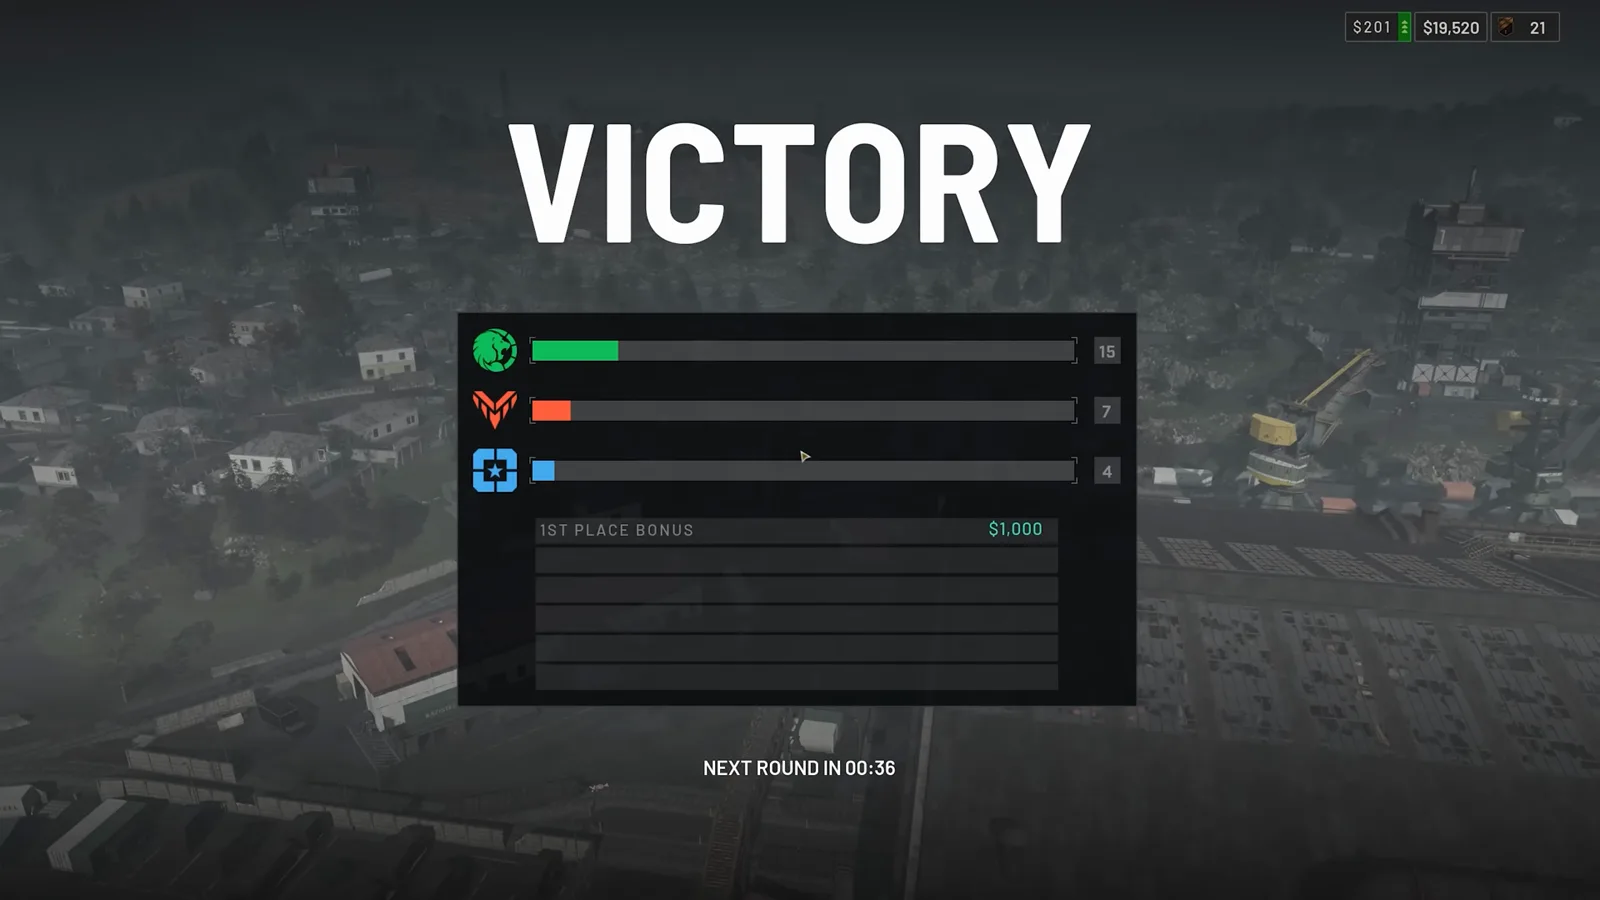 Step 2 (Timestamp: 00:58) — The scoreboard is a race to the top bar: hold the zone through each tick and your faction’s bar climbs toward 100 while the other two stall.
Step 3: Spend Banked Cash at the In-Match Vendor
Before you drop back into the zone, you assemble a custom loadout at the in-match vendor, buying whatever weapons, gear, and equipment you want with cash. The vendor screen shows each item’s price and weight — a launcher here runs $800 and 17 kg — with an Add to Loadout prompt. This is a persistent economy: everything you earn in a match is banked into your account to spend in the next one, so the balance you walk away with tonight is the balance you deploy with tomorrow.
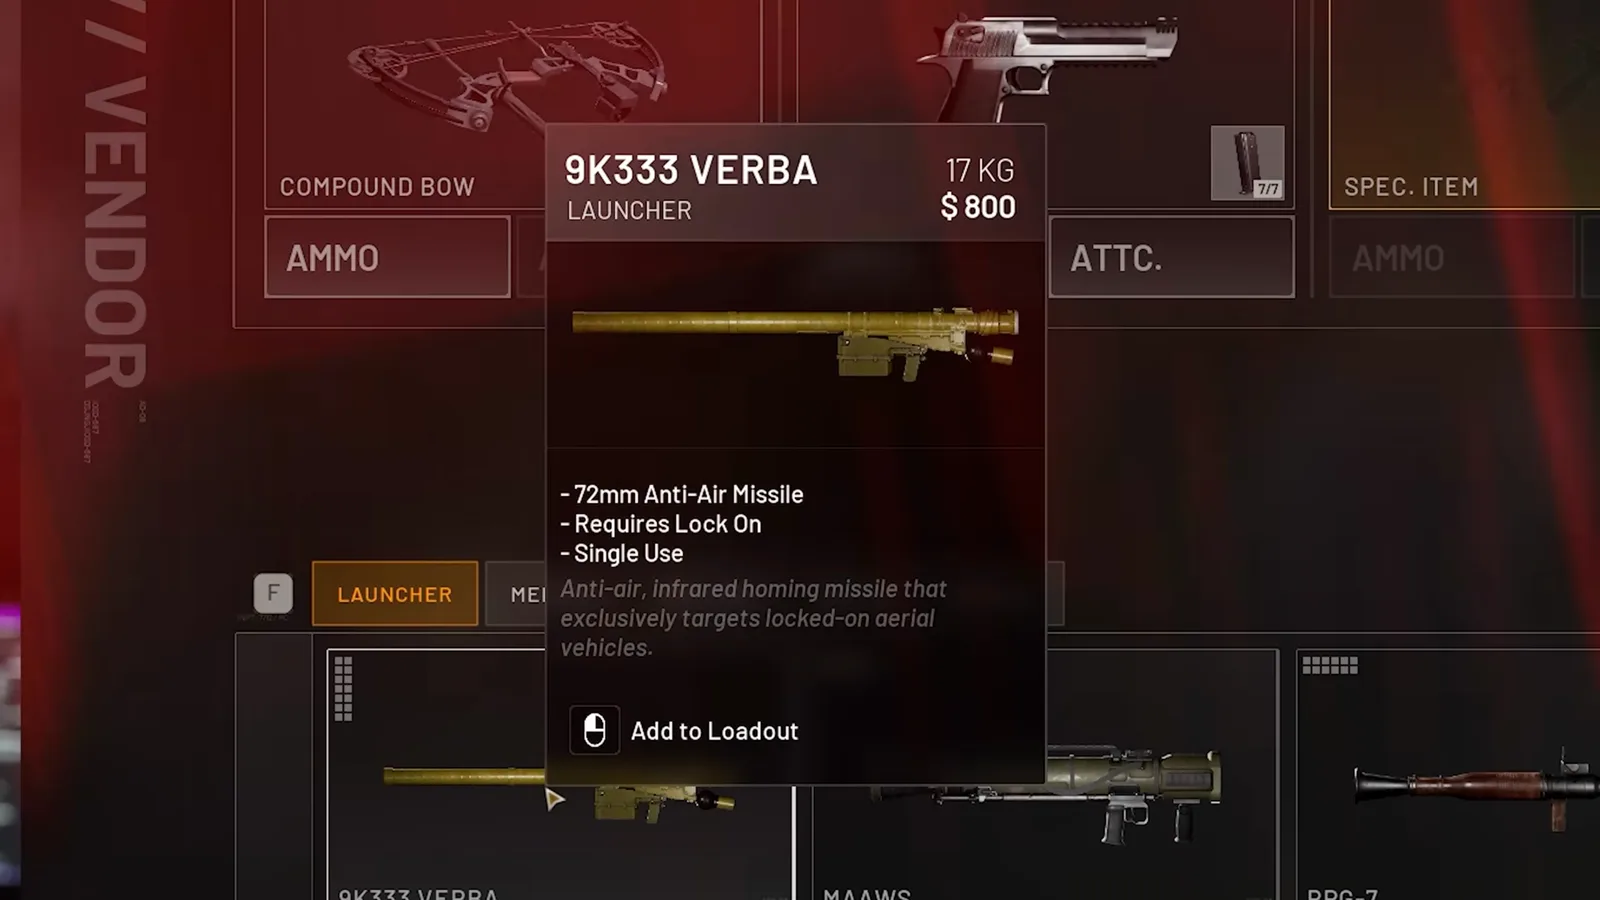 Step 3 (Timestamp: 01:54) — Every purchase is a bet: the vendor prices gear in the same cash you bank between matches, so overspending on a loadout you die with sets your whole account back.
Step 4: Play the Role You Build, Not a Locked Class
Roles in WARDOGS are entirely player-defined — there is no class you are locked into. The progression screen shows separate Assault and Medic tracks, each leveling on its own XP bar toward the next unlock, and the game runs six progression tracks in total. Every item you add to a loadout offers its own way to earn cash and XP, so a medic, a sniper, an artillery operator, a tank commander, or a builder is just a set of purchases, not a menu choice. To unlock more of the vendor, you play the track you want to grow.
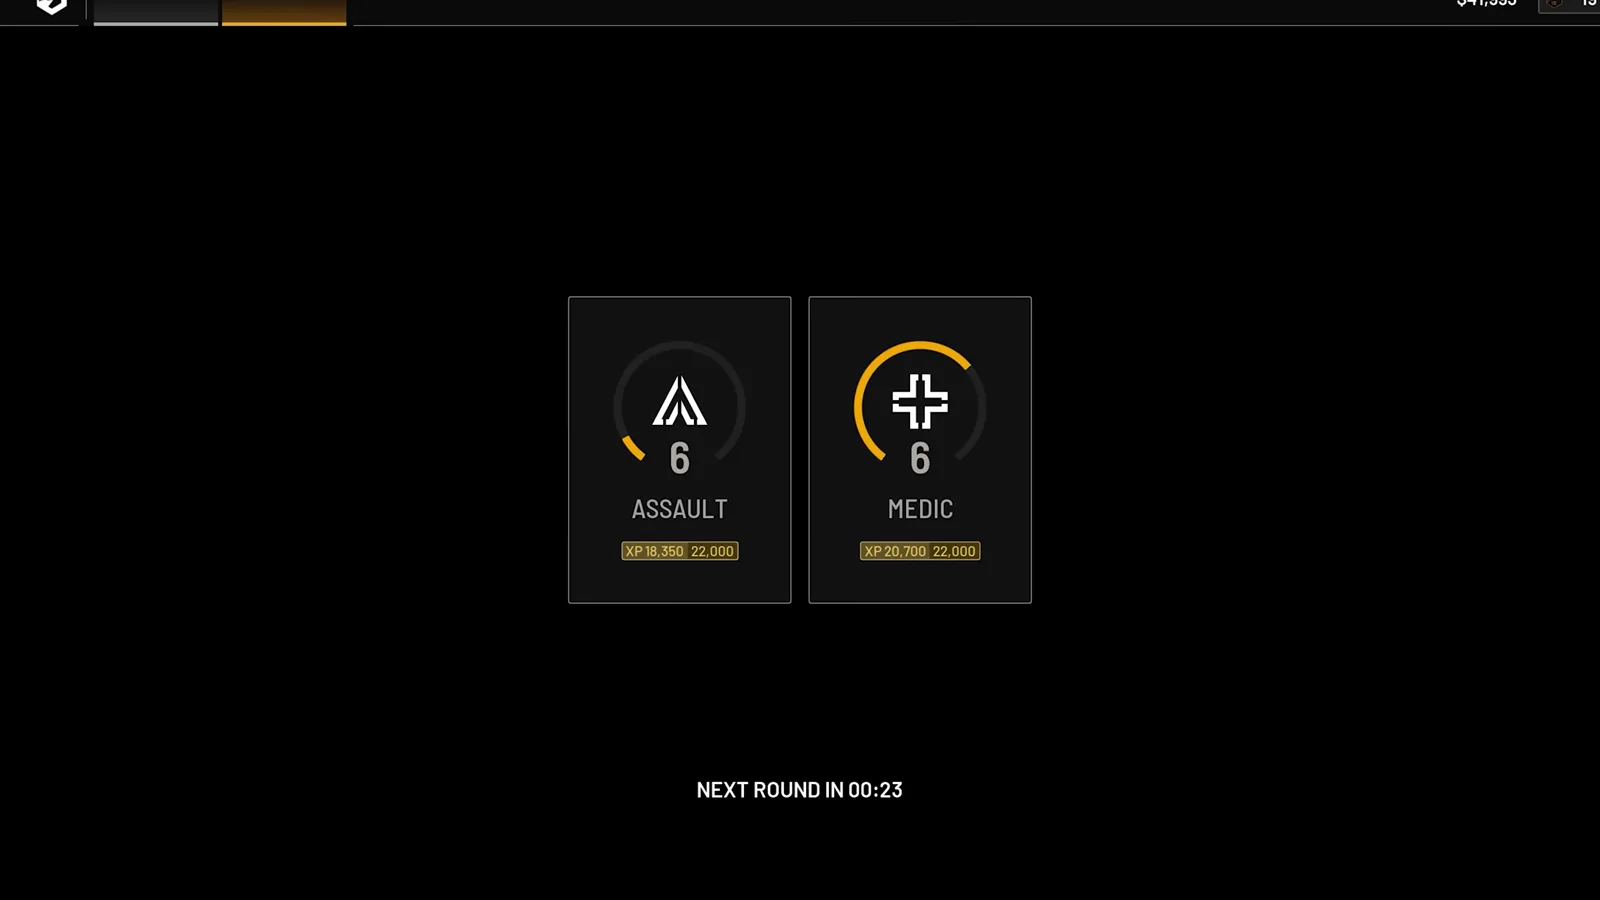 Step 4 (Timestamp: 01:58) — Each role track has its own XP bar, so the gear you buy and the way you earn XP together define your role far more than any class select screen.
Step 5: Move Numbers Into the Zone — Squads and Insertion
Because the tick rewards whoever has the most players inside, getting bodies into the zone is the real objective. Squad sizes are unlimited, so no teammate gets left out, and squadding up adds squad UI, vehicle squad locking, and voice chat to keep a large group coordinated. The video shows a transport helicopter lifting a full squad low over the valley toward an industrial town — piloting players into the control zone is itself a cash-earning team action, and a squad that arrives together holds together.
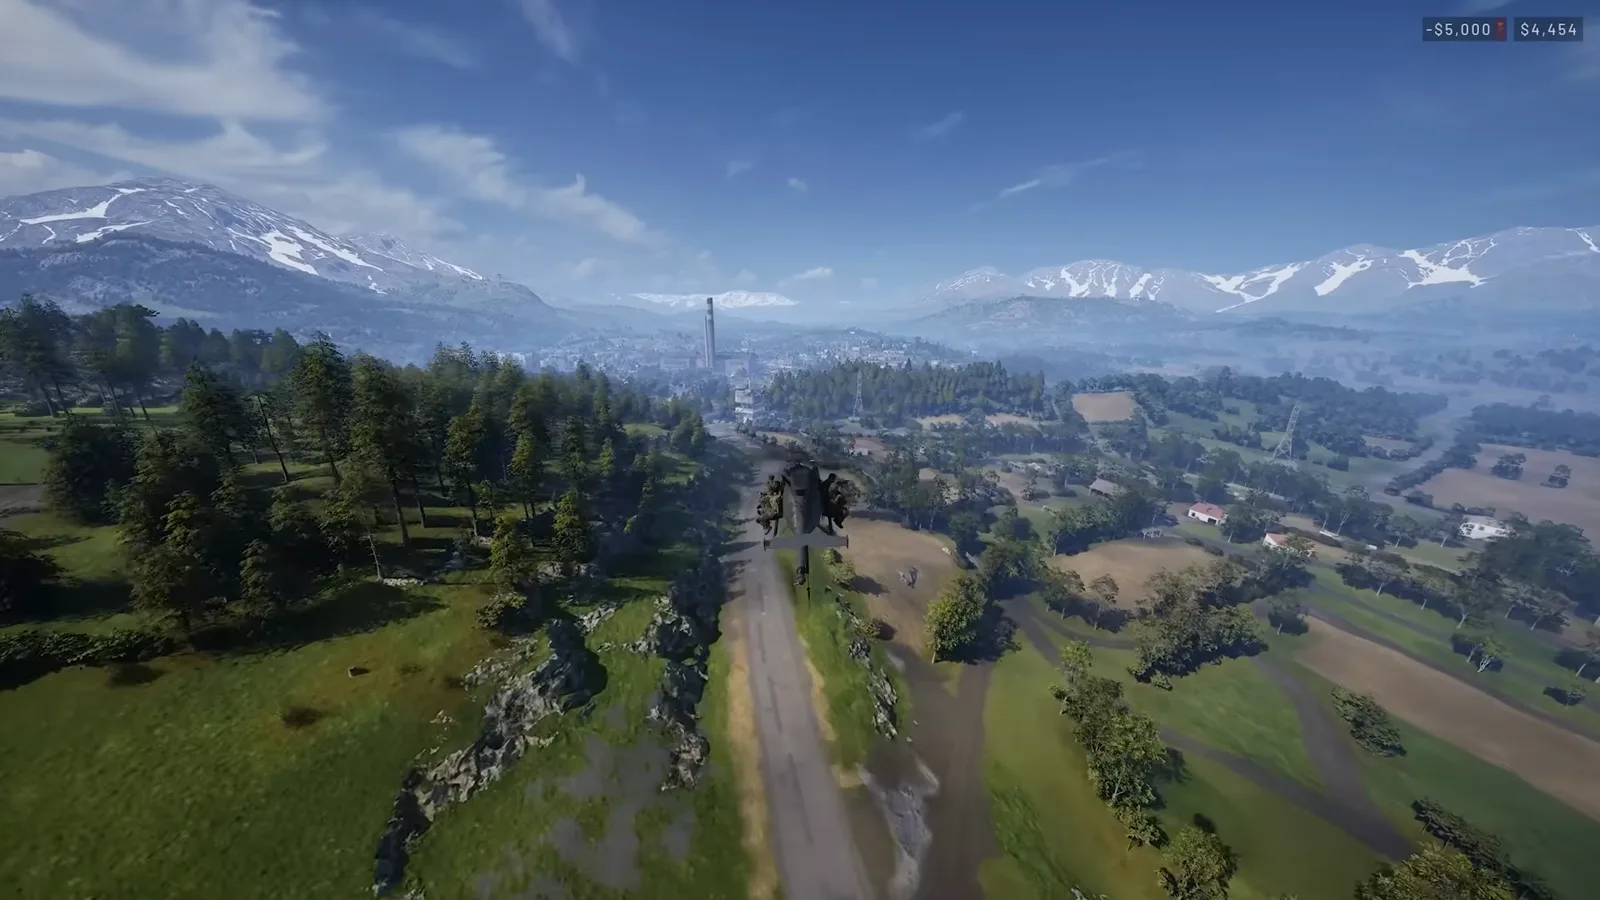 Step 5 (Timestamp: 00:52) — Arrival speed is a weapon: dropping a whole squad at once beats dribbling in alone, and driving teammates into the zone pays cash on top of the point.
Step 6: Win the Tick With the Hot Zone
The hot zone is a moving sub-zone inside the larger control zone, and it is where the match is actually decided. Stand inside it and you earn double cash, and — more importantly — your players count as double toward your team’s presence. A squad that grabs the hot zone can out-score a numerically larger enemy spread across the rest of the circle. The HUD flags it directly with a Hot Zone Presence payout while your team pushes the high ground. Chasing the hot zone is how a smaller, smarter faction swings the outcome.
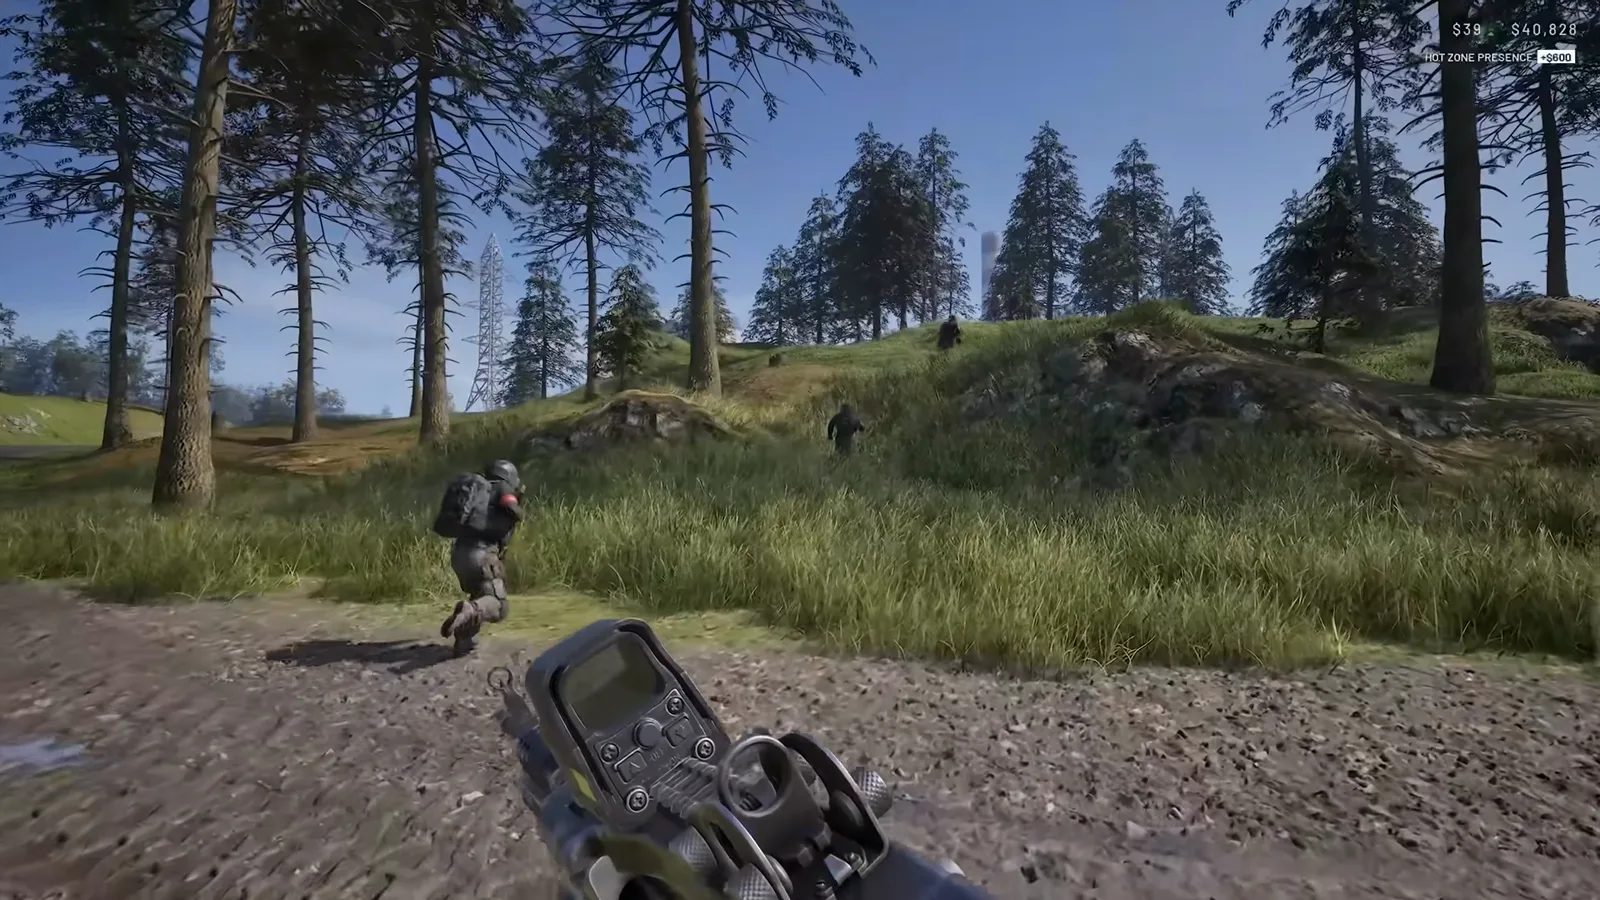 Step 6 (Timestamp: 02:30) — When the hot zone moves, move with it: double presence is the single most efficient way to tip a contested tick your way.
Key Game-Mode Mechanics at a Glance
| Mechanic | How it works (official BULKHEAD breakdown) |
|---|---|
| Teams | 100 players split across three teams |
| Objective | One control zone per match |
| Scoring tick | Most players inside earns 1 point every 30 seconds |
| Win condition | First team to reach 100 points |
| Hot zone | Moving sub-zone inside the control zone; double cash and double counted presence |
| Economy | Persistent cash; bank profits each match, spend them at the in-match vendor |
| Roles | Player-defined; six XP progression tracks gate vendor unlocks |
| Squads | Unlimited squad size, with squad UI, vehicle squad locking, voice and proximity chat |
How to Actually Win — Playing for the Tick
- Contest numbers, not kills. The point goes to whoever has the most players in the circle at the tick. Fight only the enemies standing between you and the zone.
- Ride the hot zone. Double counted presence means a squad parked in the hot zone can out-score a larger enemy spread across the rest of the circle — follow it when it moves.
- Treat cash as a budget, not a scoreboard. Spending big on gear is a risk because profits bank into your next match; a cheap loadout that survives beats a premium one you die with. The tick-20 survival refund in our beginner guide is the economy’s core safety net.
- Move as a squad. Unlimited squad sizes plus vehicle squad locking exist for one reason: arriving together holds the zone together. For the transport and armor options that fill a circle fast, see our vehicles guide.
- Anchor the push with a FOB. The video does not cover FOBs, but holding ground between ticks is where bases earn their keep — a nearby FOB gives your squad a respawn point and resupply so you can keep re-contesting the same zone. Our FOB building guide covers placement and supplies, and the FOB combat walkthrough covers defending it under fire.
Where to Go Next
Once the format clicks, tune how you play it: pick a build around our best class guide, level the six XP tracks faster with our XP leveling guide, and dial in your display and FOV in our best settings guide so you can actually see enemies entering the circle.
This game-mode breakdown was reconstructed frame-by-frame from BULKHEAD’s official “WARDOGS | Game Mode Explained” video, with the FOB respawn note cross-referenced from our own in-game testing. Scoring values (30-second tick, 100-point win, double hot-zone cash and count) reflect the developer’s stated design at Early Access launch and may be rebalanced in future patches.
Screenshots © Bulkhead / Team17, from the official WARDOGS channels.
Related Articles
guides
WARDOGS Best Class Guide: Which Career to Play First
WARDOGS has six careers and no single best class — your level is the sum of all of them. Here is which career to build first and the level gates that decide it.
guides
WARDOGS Driver Tank Guide: Drive, Aim & Protect the L2A6
Illustrated WARDOGS guide to driving and fighting the L2A6 tank as the Driver class: crew seats, hull-down gunnery, ammo modes, fuel, repairs and protection.
guides
WARDOGS FOB Attack Guide: Scout, Breach & Destroy Enemy Bases
Attack and destroy an enemy FOB in WARDOGS: scout the contested tower, insert by helicopter, breach the gate with C4, and kill the spawn truck.
Was this helpful?
Thanks for the feedback!