WARDOGS How to Repair a Tank: Wrench, Drills, FOB Radius
Illustrated WARDOGS guide to repairing a tank or vehicle: read the red compartment icon, buy a wrench or drill, then use the FOB repair radius.
FAQ
How do you repair a tank in WARDOGS?
What is the difference between the wrench and the drills?
Do vehicles repair automatically in WARDOGS?
How many repair stations can one FOB have?
Does repairing cost money in WARDOGS?
A tracked vehicle in WARDOGS does not die in one hit — it degrades. One wheel goes, then the engine, then the turret stops traversing, and the crew is sitting in an expensive box that no longer moves. So the question is not whether you will need a repair but which of the game’s two repair systems you are using, because they are completely different: one is a tool in your hands, the other is a building you have to construct before it exists.
Most guides describe only one of them. This page documents both from the same set of recordings, plus the part almost nobody checks — which compartment is actually broken.
Source and Verification Card
| Field | Detail |
|---|---|
| Question answered | How to fix a damaged tank or vehicle, by hand and at base |
| Manual method | Buy a repair tool at the Equipment Vendor → TOOLS row, equip it, aim at the damaged compartment |
| Passive method | Park inside a friendly FOB radius that contains a repair station |
| Tools on screen | WRENCH · LIGHT DRILL · HEAVY DRILL (plus FUEL CAN in the same row) |
| Repair station build | Large hammer · Scout level 8 (commentary) · one per FOB — second placement returns EXCEEDS FOB LIMIT |
| Screenshots from | PazarGamingGuides · Quick Tips (repair station) · TimeToFixThis! (FOB auto-repair) |
| Text-only source | Mattzila 999 — supplies deep-dive. Rejected as a frame source: burned-in captions (“1 Shot = $5,000 900 Mechanical parts”, “#1 Build #2 Ammo…”). Facts credited, no footage used |
| Not covered here | Which compartment takes which hit — see the anti-tank guide |
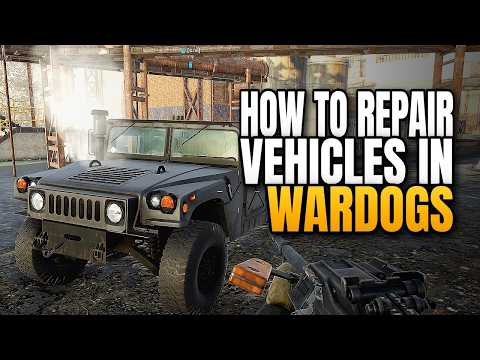
PazarGamingGuides — How to Repair Vehicles in Wardogs (98-second tool walkthrough)
Every screenshot below was read at full resolution before its caption was written. No channel logo, face or burned-in caption from any source appears on this page.
Step 1: Find Out Which Compartment Is Broken
Before you buy anything, look at the vehicle. WARDOGS marks each damaged part with its own icon, and the icon turns red when that compartment is gone.
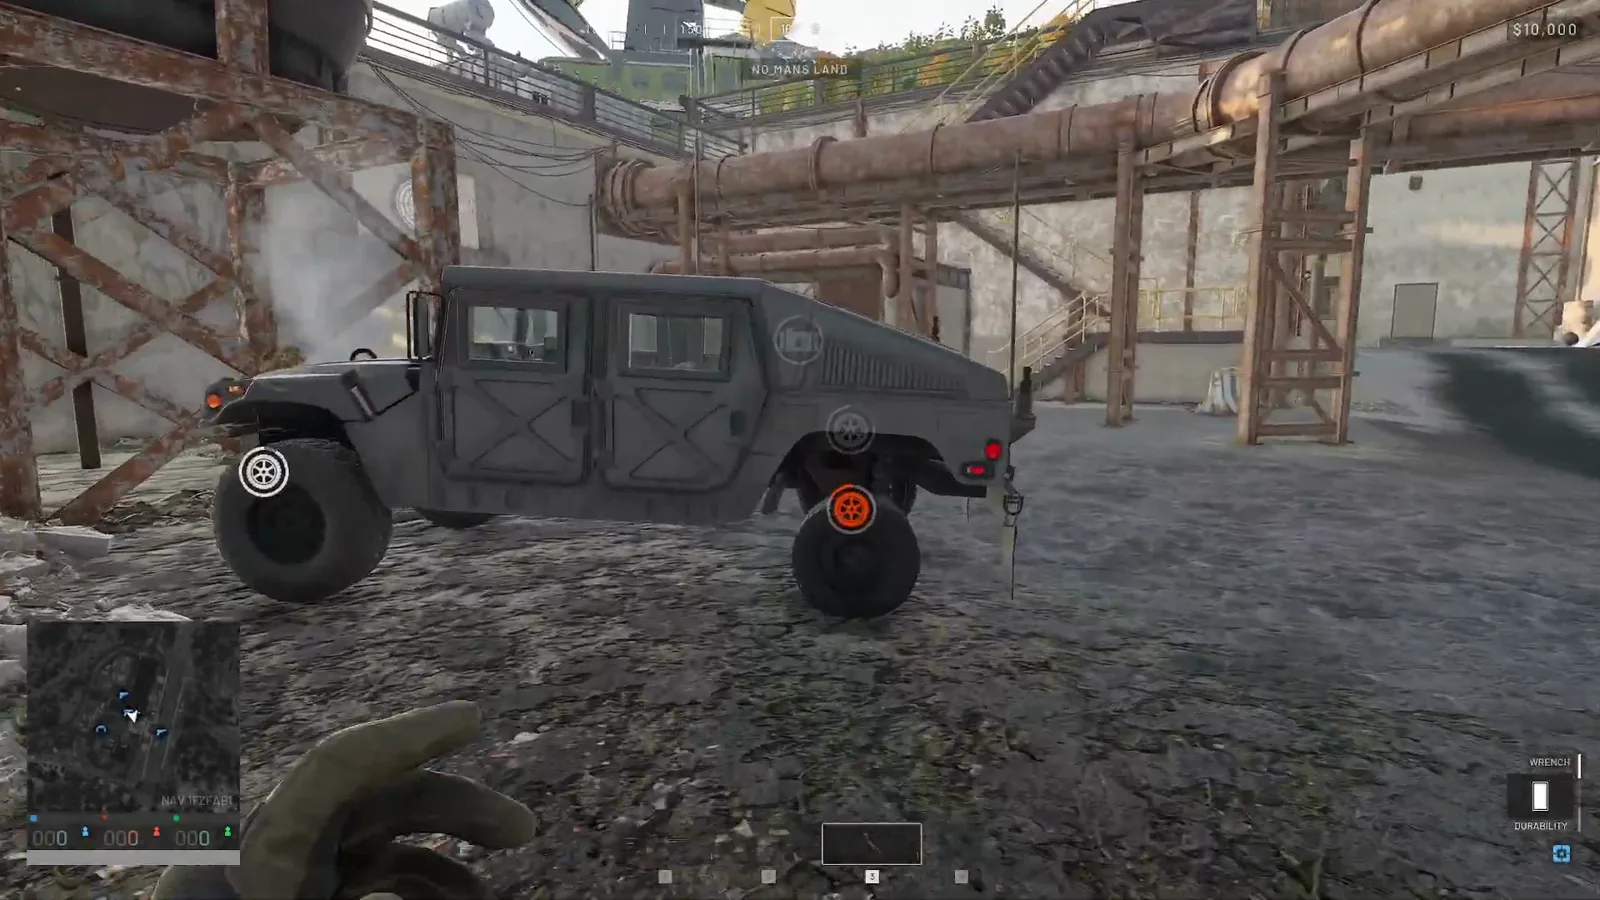 Step 1 (Timestamp: 1:15) — Smoke plus a red wheel marker. The intact wheels still show their grey icons, so the damage list is per-compartment, not per-vehicle.
That distinction matters in a fight. A mobility kill and a firepower kill are different repairs, and the anti-tank guide documents the flip side: a track hit starts self-healing the moment the shooter stops firing, while a rear engine hit shuts the engine off until a crewman fixes it.
Watch the damaged vehicle and its red marker (1:15)
Step 2: Buy a Repair Tool in the TOOLS Row
Open the Equipment Vendor — the same stall that sells your guns — and go to the EQUIPMENT tab. Under it sits a row of filter chips: LAUNCHERS · MEDICAL · BUILDING · RECON · TOOLS · TACTICAL. TOOLS is where the repair gear lives.
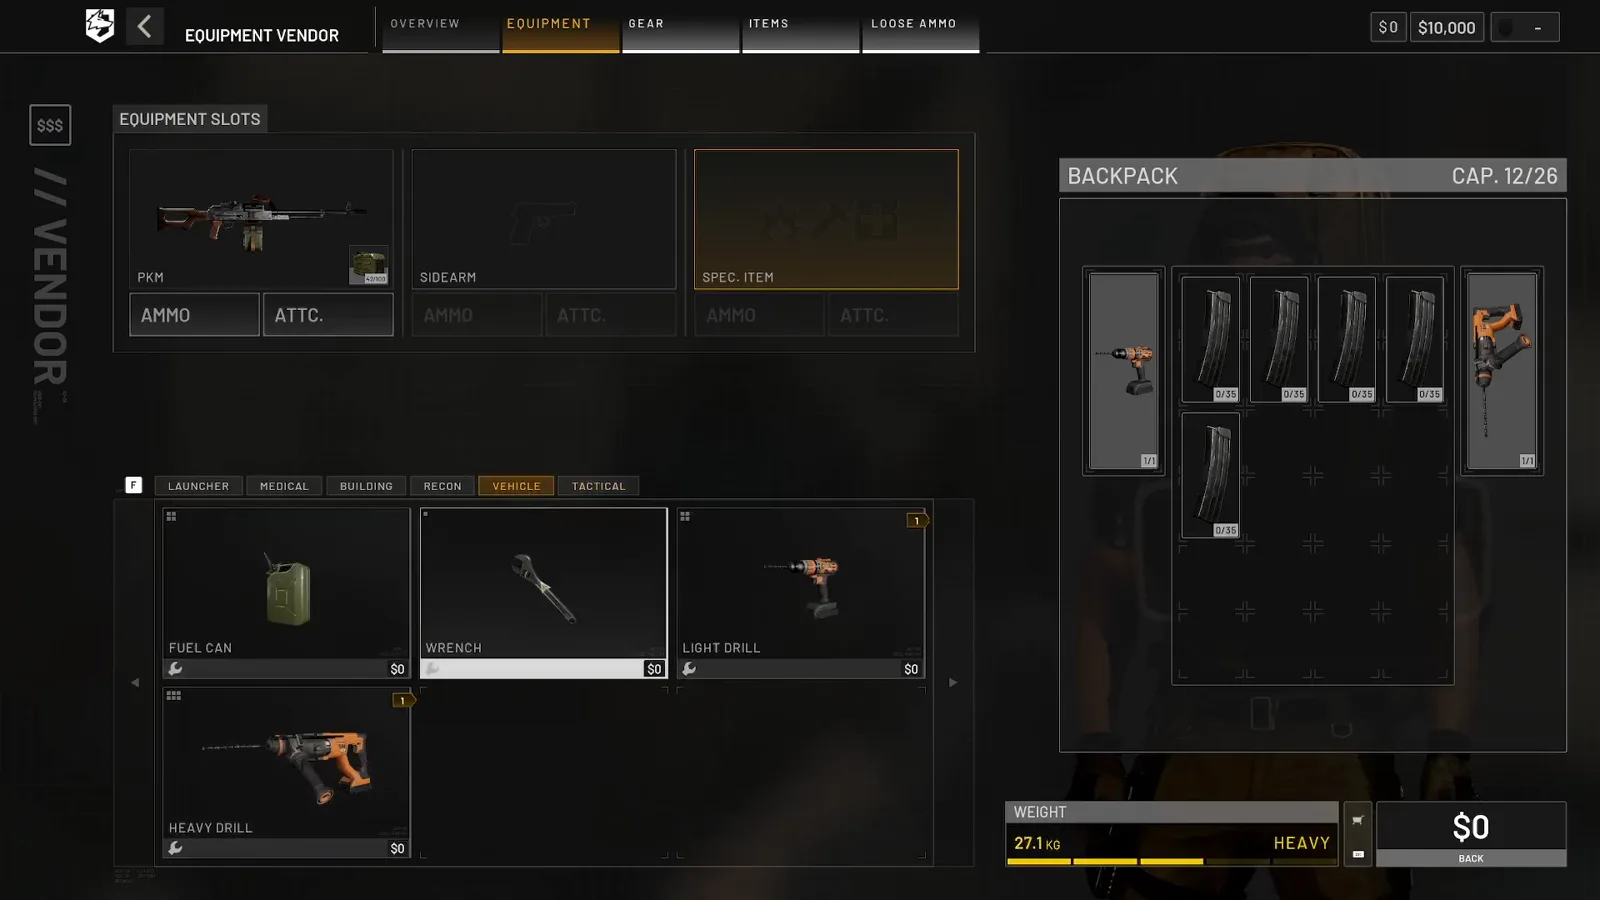 Step 2 (Timestamp: 0:45) — Three repair tools and a fuel can, in the same place. Players look for a “repair” category and never find one because it is a filter chip inside the gun menu.
Note what is not here: no Engineer-exclusive item, no class requirement printed on the row itself. Any class can carry a wrench.
Step 3: Pick the Right Tool — Wrench or Drill
The two tooltips tell you exactly what each tool trades away.
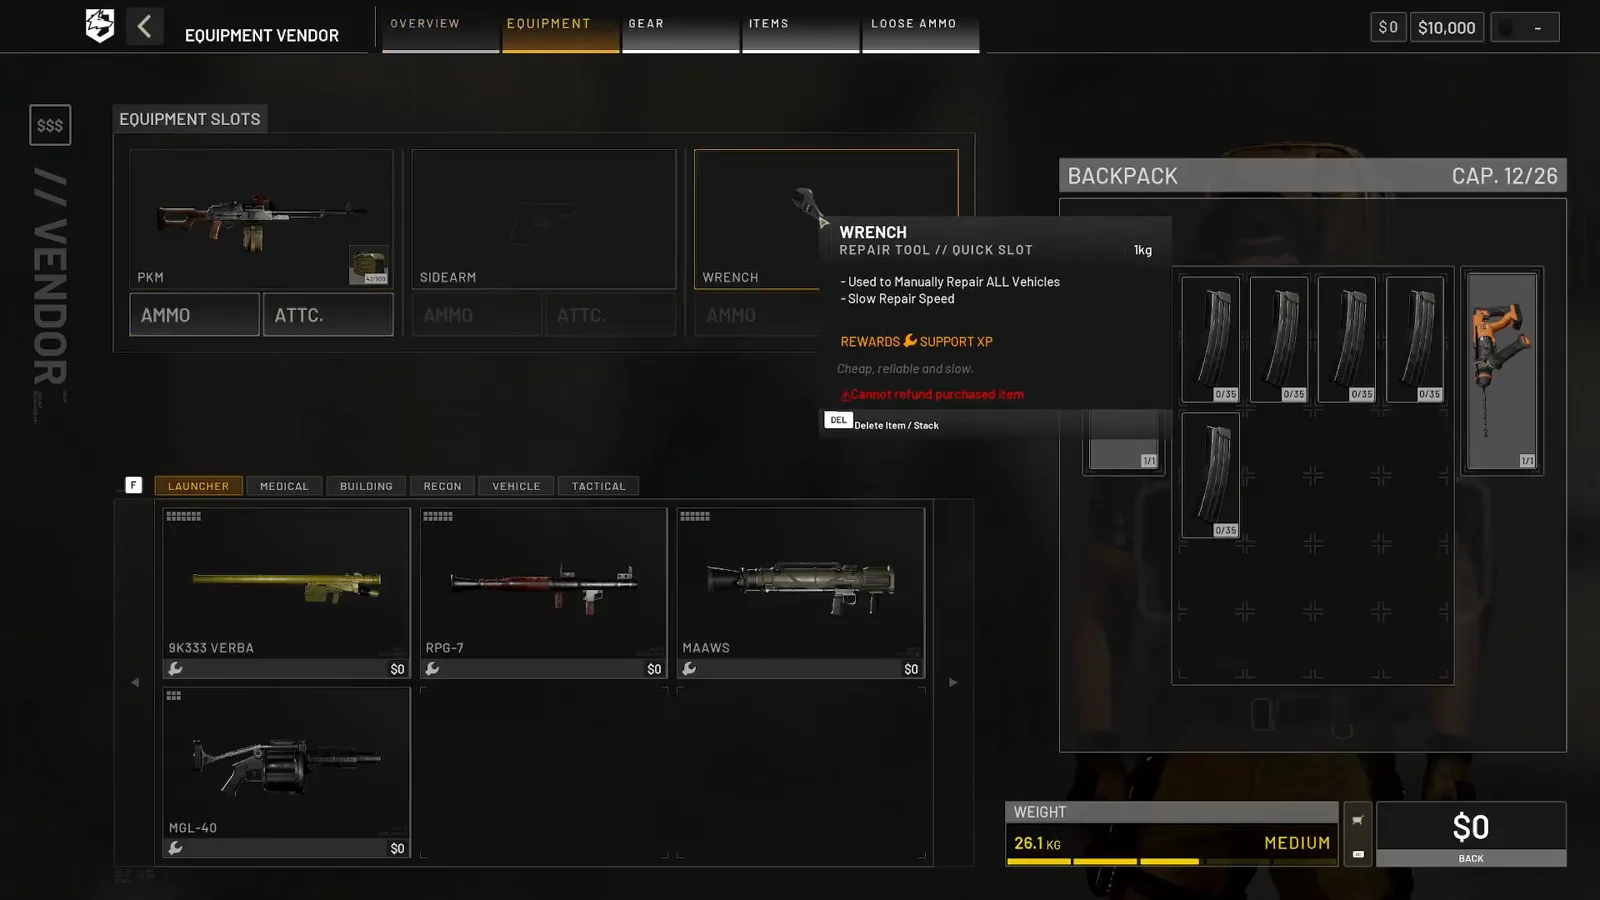 Step 3 (Timestamp: 0:31) — The wrench works on every vehicle and needs nothing but your hands. Its cost is time.
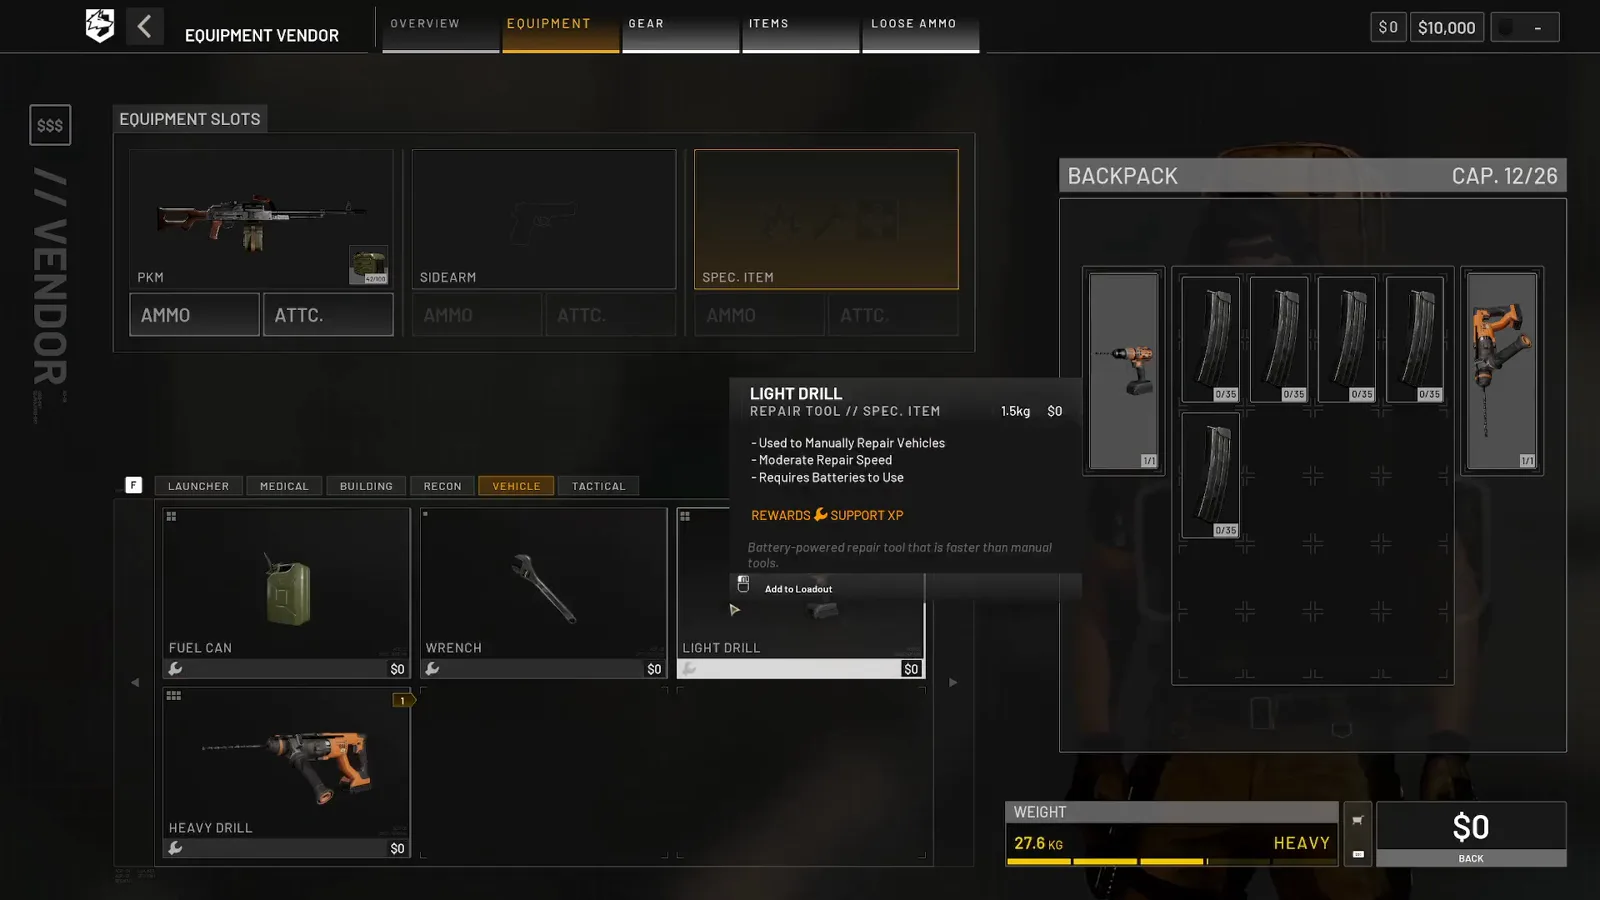 Step 3 (Timestamp: 0:50) — Faster, and it costs you two things the wrench does not ask for: a spec-item slot and a battery supply line. 1.5 kg is the least of it.
| Tool | On-screen description | Status |
|---|---|---|
| WRENCH | Repair tool // quick slot · manually repairs all vehicles · slow repair speed · Support XP | Confirmed on screen |
| LIGHT DRILL | Repair tool // spec. item · 1.5 kg · moderate repair speed · requires batteries · Support XP | Confirmed on screen |
| HEAVY DRILL | Present in the same row; tooltip not opened in our footage | Confirmed it exists, stats Unconfirmed |
| Prices | Every card reads $0 in this recording | Unconfirmed — test-range vendor |
Watch the wrench and drill tooltips (0:31) · Watch the light drill card (0:50)
Step 4: Equip It and Aim at the Damaged Part
The source commentary walks the menu path: Equipment Vendor → your overview → the third slot, the specialist slot → pick the vehicle repair item → buy → press 3 to pull it into your hands.
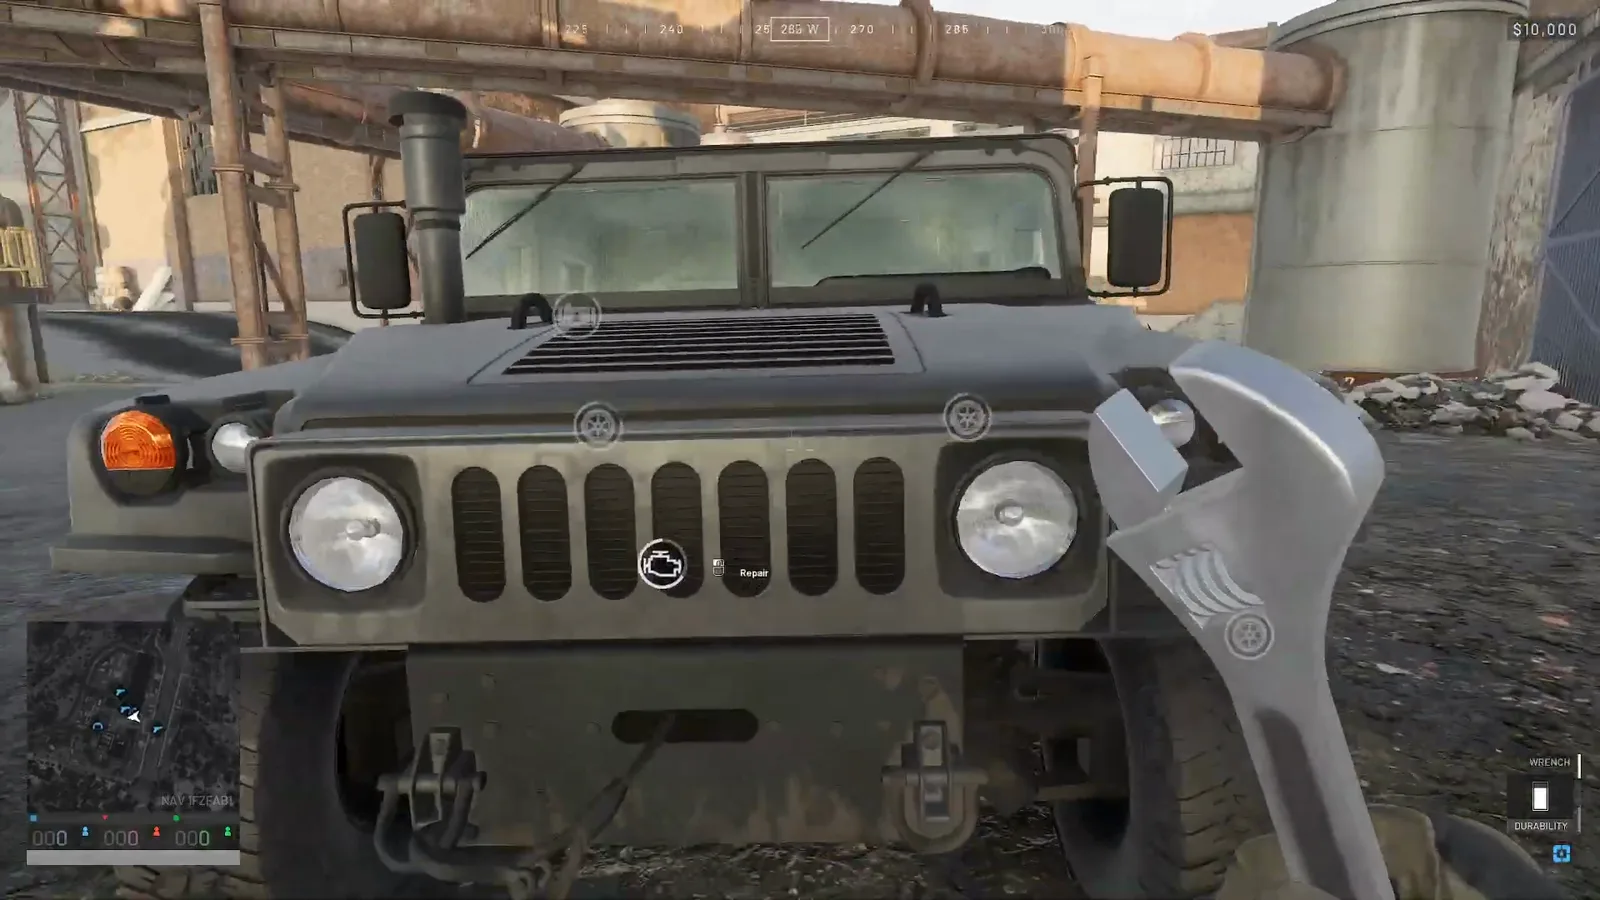 Step 4 (Timestamp: 1:31) — The Repair prompt only appears when the reticle is on a damaged component. Aim at the part, not at the vehicle.
This is where tank crews get it wrong: repairing is per component. Walk around the hull and fix each red marker; one long interaction on the front does nothing for a destroyed track.
Step 5: Hold Until the Icon Goes Grey
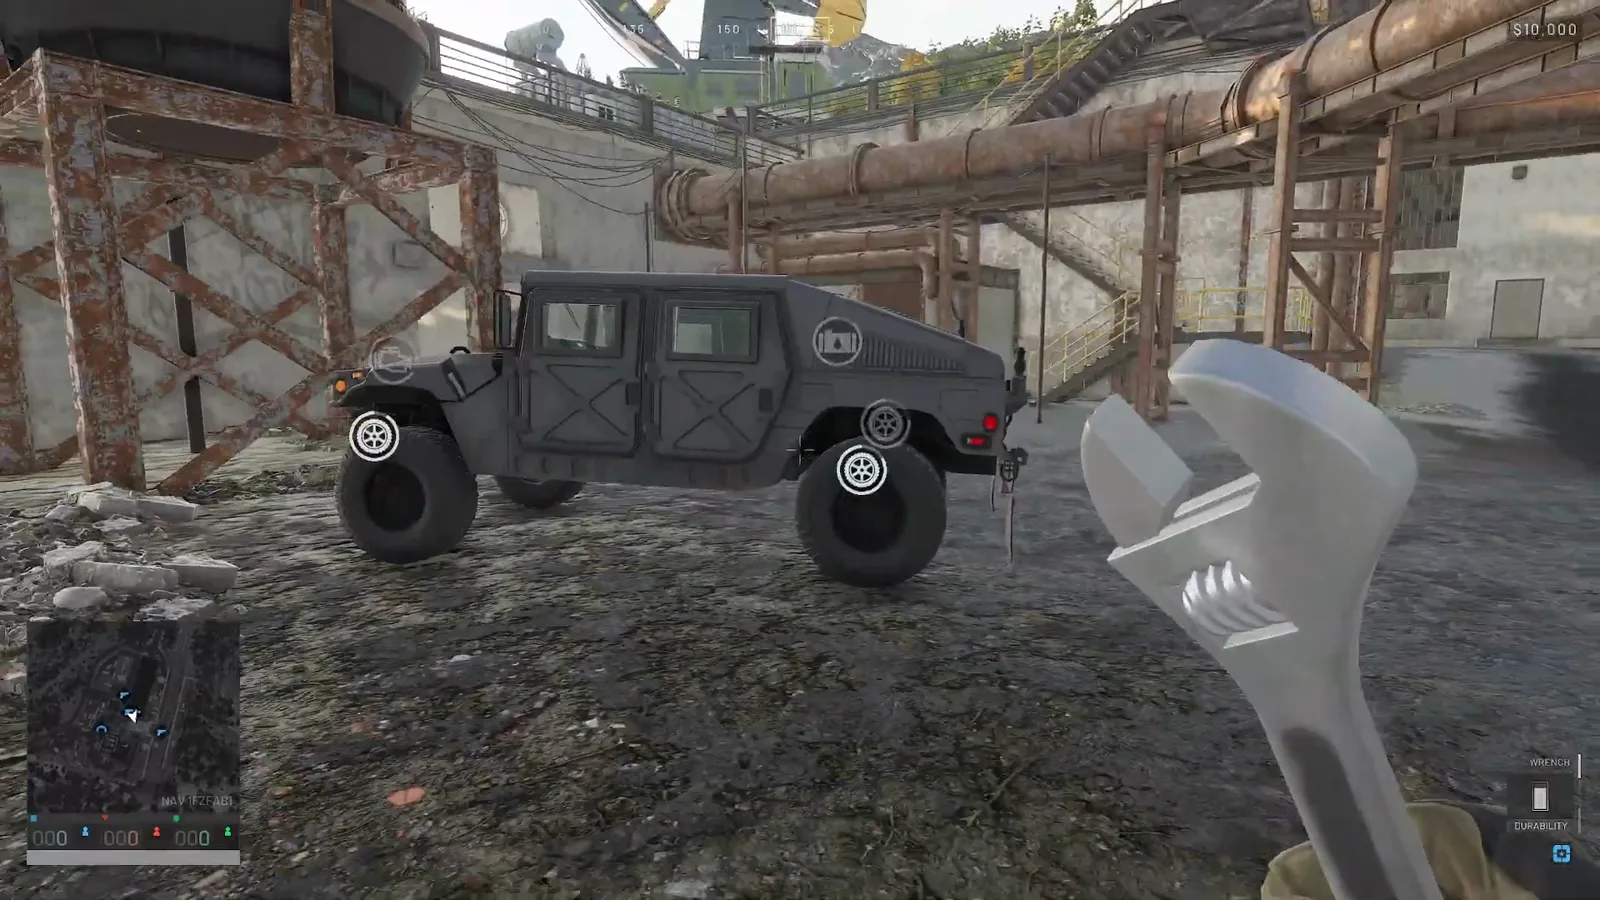 Step 5 (Timestamp: 1:35) — The reward is quiet: the red marker drops out, the smoke stops, and the vehicle is drivable again.
How much health does a field repair give back?
Our tank crew guide records a wrench restoring a compartment to roughly 75%, read from a different creator’s commentary. Our own footage here shows the marker clearing but gives no percentage on screen, so treat the exact ceiling as Community-reported and re-check it on your own HUD. What both sources agree on is the important part: a repaired compartment is not a new compartment.
Watch the repair completing (1:31)
Step 6: Or Just Drive Home — the FOB Repair Radius
The second system needs no tool at all.
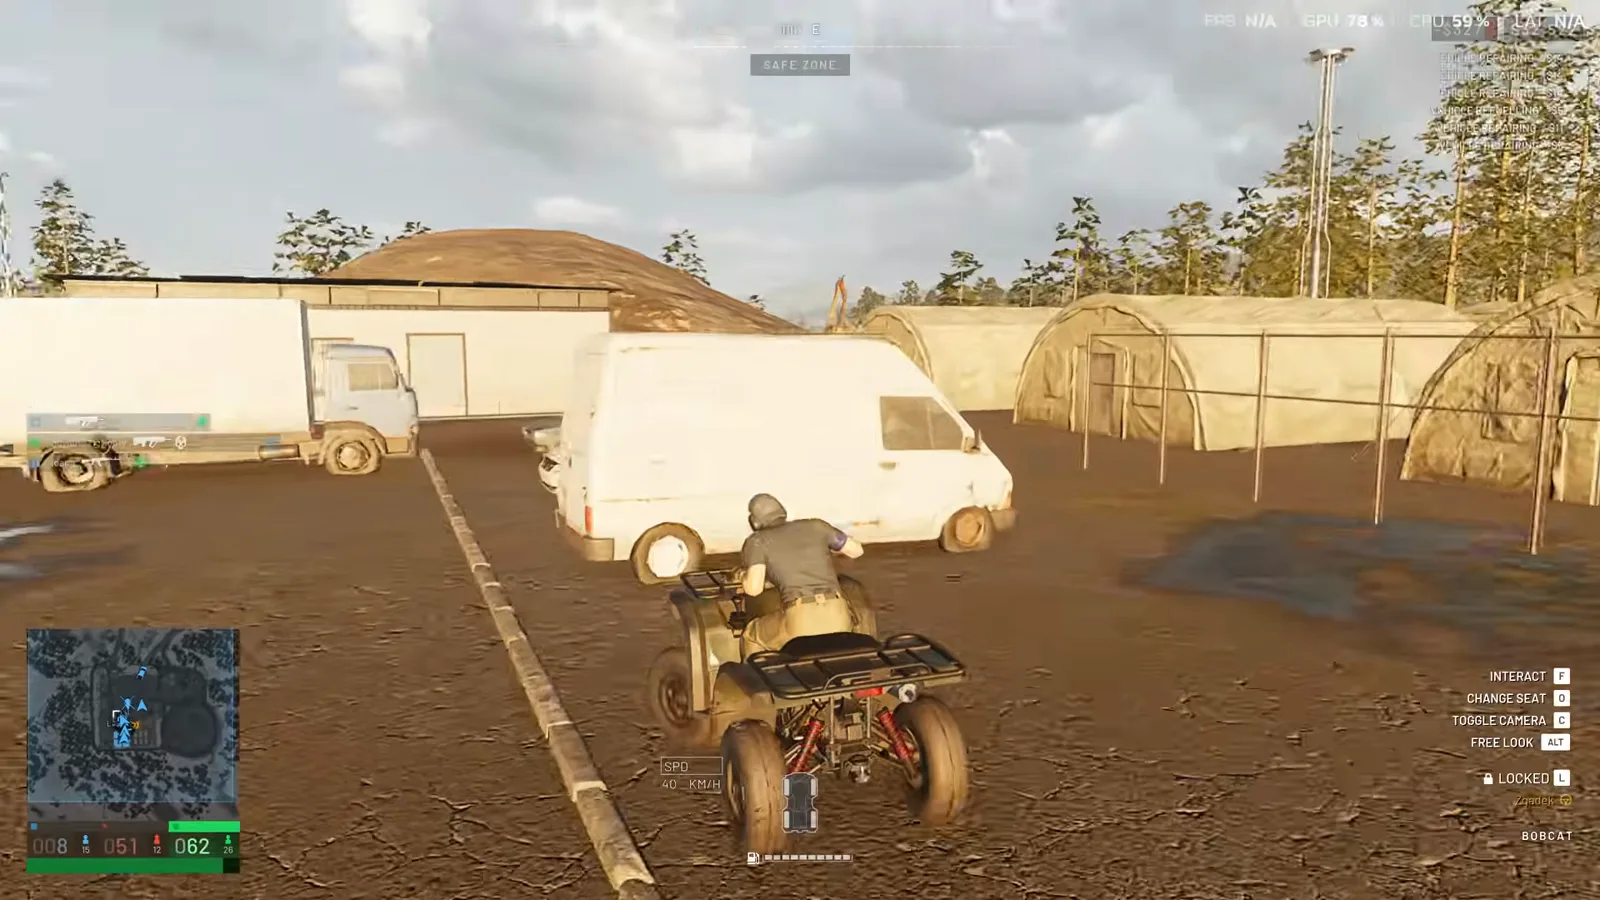 Step 6 (Timestamp: 0:22) — The bar under the vehicle is red. The source’s point in 32 seconds: you do not have to fix it by hand at all.
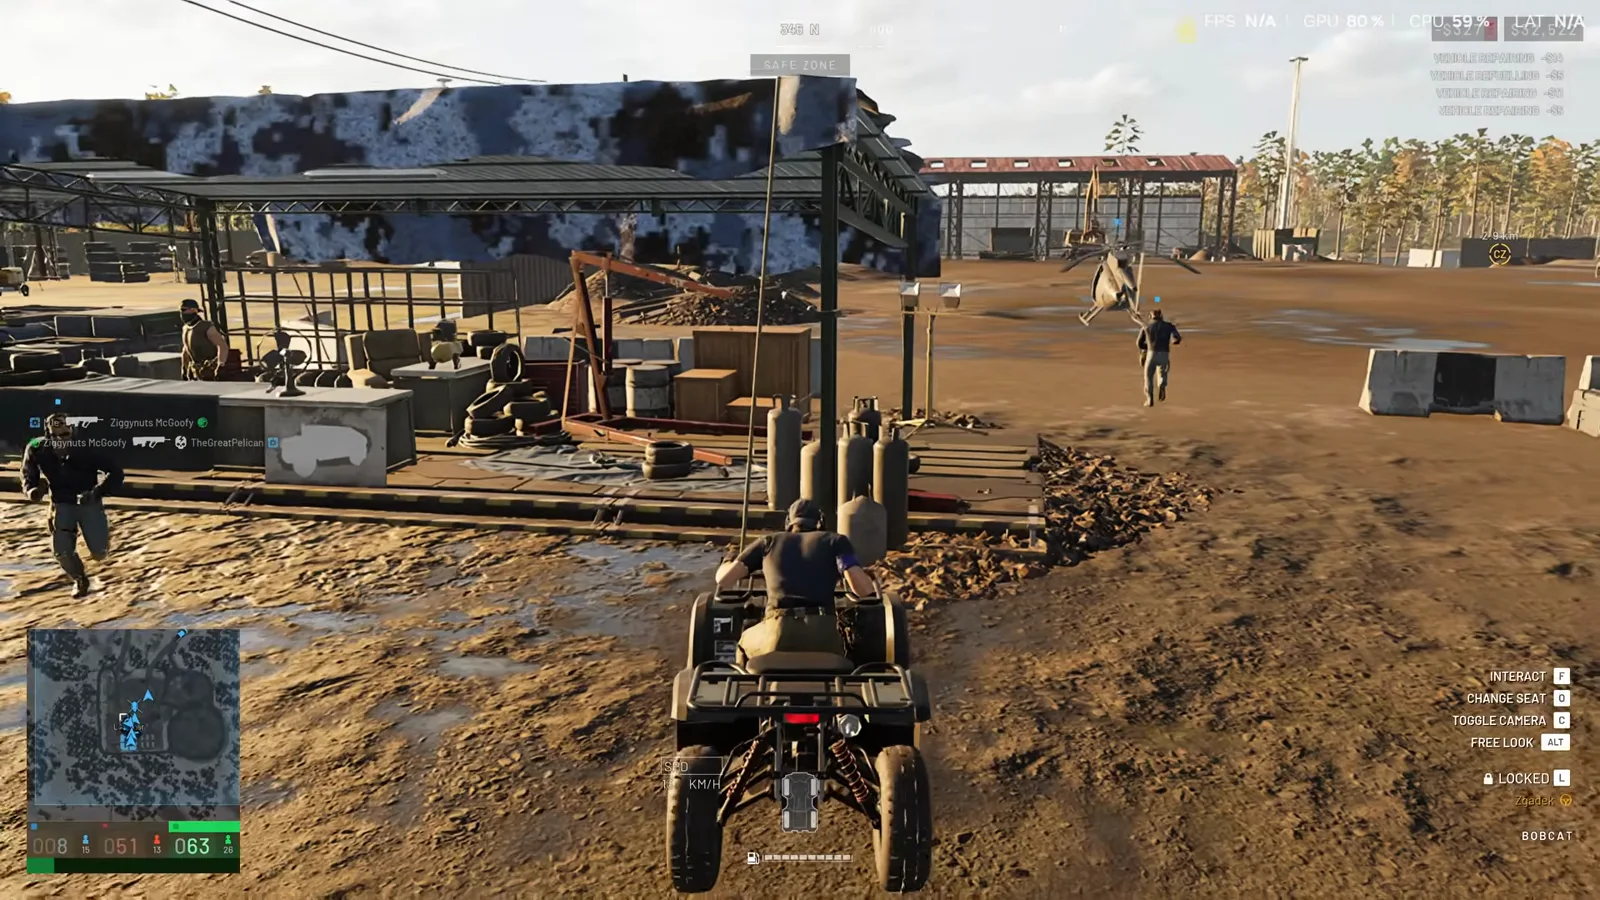 Step 6 (Timestamp: 0:27) — Parked in the circle, engine still running, repairing on its own. “Even while driving,” as the clip puts it, “this vehicle will be repaired.”
That is the tactical difference between the two methods. The wrench is a forward repair — you do it under fire, next to the objective. The FOB radius is a rear repair — it costs you the drive home, and the drive home is where spawn vehicles and anti-tank squads wait.
Step 7: Build a Repair Station So the Radius Exists
None of the above works unless someone on your team has built the station.
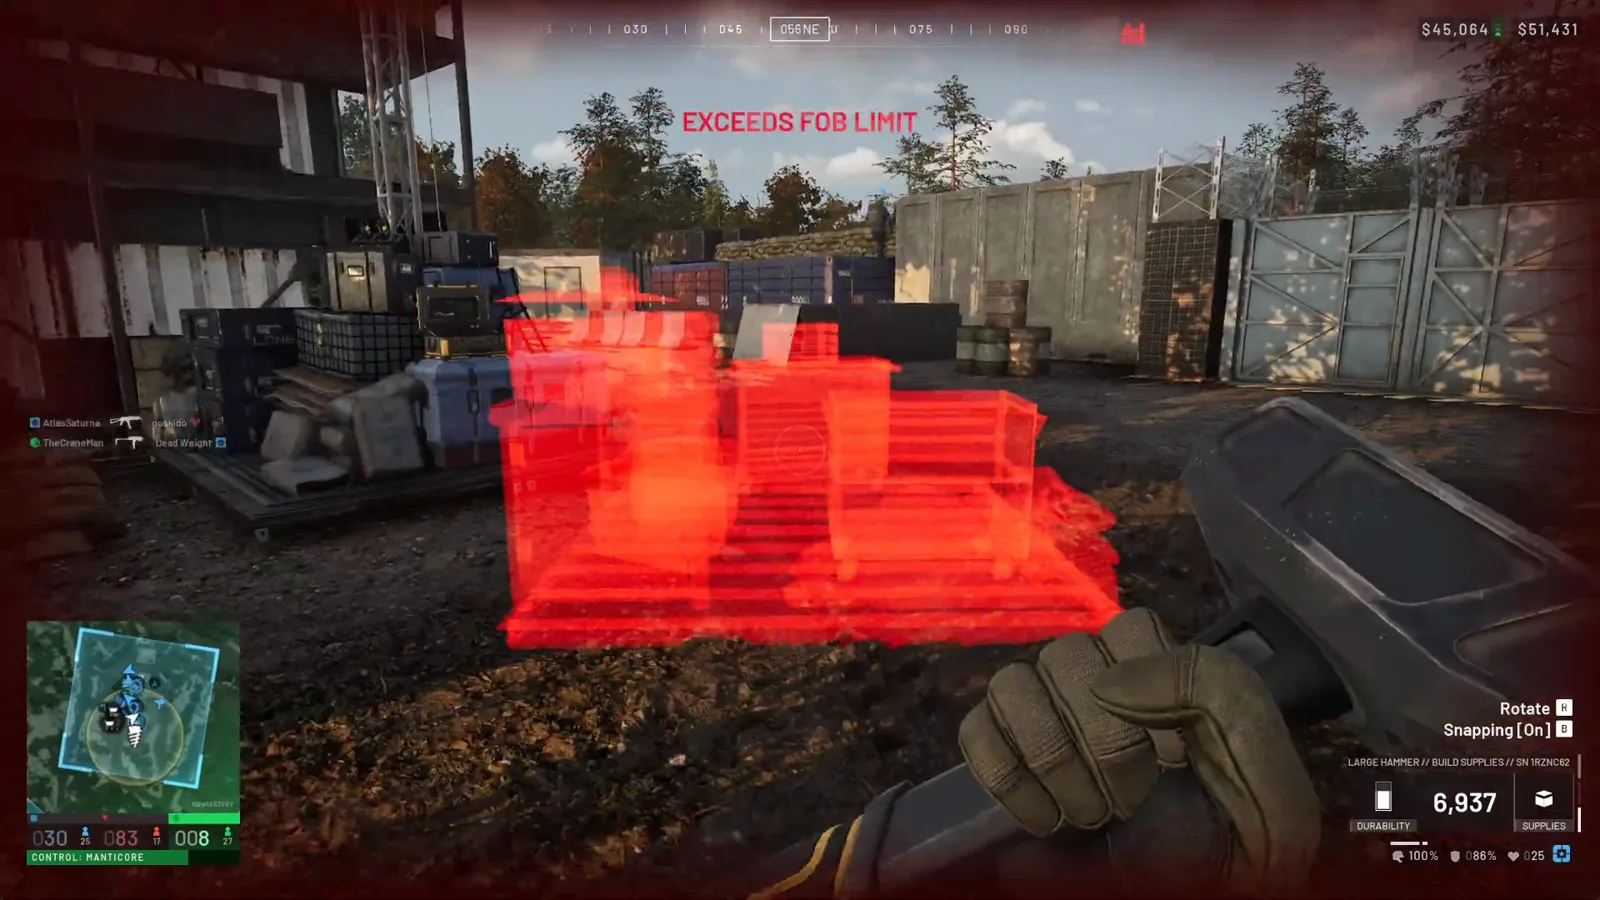 Step 7 (Timestamp: 1:01) — The game will not explain this to you: you cannot stack repair stations. One per FOB, then the radius is simply on.
The build path, from the source recording: get a large hammer (buyable at the item store, or lifted out of a FOB’s own stock — players routinely leave hammers in bases for under-leveled teammates), hold right click, press F until the repair station appears in the build cycle, find a spot inside the FOB, hold left click. The commentary puts the hammer’s own requirement at Scout level 8.
Watch the repair station placement limit (1:01)
Step 8: What Repairs Actually Cost You
Three ledgers, and only one of them is readable on screen:
| Cost | What we know | Status |
|---|---|---|
| Tool purchase | Card reads $0 in a test-range vendor | Unconfirmed |
| Mechanical supplies | The named resource for vehicle repair, drawn from an FOB stockpile | Confirmed on screen (item card) |
| Your time and position | Field repair means standing still in the open | Confirmed on screen |
| Cash return on repairing | Community reports of a negative return exist; we have not verified them | Unconfirmed |
That last row is the honest limit of this page. Several players have reported that repairing costs more than it gives back, and no recording we have checked shows the transaction on screen. If you have footage of the balance moving during a repair, the numbers on our money-making guide and vehicles guide are where it belongs.
Repair Reference
| Item | Value | Status |
|---|---|---|
| Vendor location | Equipment Vendor → EQUIPMENT tab → TOOLS chip | Confirmed on screen |
| Repair tools | WRENCH · LIGHT DRILL · HEAVY DRILL | Confirmed on screen |
| Wrench | Quick slot · all vehicles · slow | Confirmed on screen |
| Light drill | Spec. item · 1.5 kg · moderate · needs batteries | Confirmed on screen |
| XP reward | Support XP on every repair tool card | Confirmed on screen |
| Damage marking | Per-compartment icon, red when destroyed | Confirmed on screen |
| FOB auto-repair | Works while parked, and while driving, inside the radius | Confirmed on screen |
| Repair station | Large hammer, Scout 8 (commentary), one per FOB | Mixed: limit on screen, level reported |
| Station power source | Mechanical supplies + FOB radius | Confirmed on screen (item card) |
| Tool prices | $0 shown | Unconfirmed |
Rules of Thumb
- Read the icons before you spend the trip. One red marker means one short repair; four means you are driving home.
- Carry the wrench even if you never use it. It is the only repair that works away from base, and the tank guide has the crew seats and gunnery that keep you alive long enough to need it.
- Drills are a slot decision. The light drill is only 1.5 kg, but it occupies the SPEC. ITEM slot and drags a battery supply line behind it — the weight is not the cost, the slot is.
- Buy the tools as a squad job. Repair tools pay Support XP, the same track that gates the RPG — see the XP leveling guide.
- Build the station early, not when it is needed. The FOB building guide covers the vendor path; the station has to exist before the radius does.
- Keep the mechanical counter non-empty. The loop is in the logistics guide and the resource itself in the mechanical parts guide.
- Do not budget a repair you cannot price. Every figure on this page that is not on-screen is labelled, and the cash return is not.
Repair tools, tooltips, the per-compartment damage marker, the Repair prompt, the FOB auto-repair radius and the EXCEEDS FOB LIMIT message were read directly off the screen in PazarGamingGuides’ 98-second tool walkthrough, Quick Tips’ 79-second repair-station build, and TimeToFixThis!’ 32-second quad-bike clip. The station’s Scout-level-8 hammer requirement, its per-FOB purpose, and the tires/tracks/engine/fuel-tank breakdown of what it fixes come from Mattzila 999’s 22-minute supplies commentary, which we used as a text source only — that video carries burned-in captions and none of its footage appears here. Tool prices are deliberately unquoted: the vendor in our footage is a test-range screen where every card reads $0. Early Access moves fast — re-check the TOOLS row after each balance patch.
Related videos


Related Articles
guides
WARDOGS Early Access: How Long It Lasts, What It Costs, What 1.0 Adds
Bulkhead says WARDOGS stays in Early Access for around 1 to 2 years at a $39.99 price it plans to raise before 1.0. Every claim here is quoted from the store page.
guides
WARDOGS Mechanical Parts: What the Supply Type Is Actually For
Illustrated WARDOGS guide to mechanical parts: what the item card says, where you buy the supply, how it reaches an FOB stockpile and what it pays for.
guides
WARDOGS Pilot Money: What Flying Actually Pays on Screen
Illustrated WARDOGS guide to pilot income: the on-screen payout feed, logistics pallet and crate rates, attack-helicopter kill money, and what flying costs you back.
Was this helpful?
Thanks for the feedback!