WARDOGS FOB Attack Guide: Scout, Breach & Destroy Enemy Bases
Attack and destroy an enemy FOB in WARDOGS: scout the contested tower, insert by helicopter, breach the gate with C4, and kill the spawn truck.
FAQ
How do you find an enemy FOB on the WARDOGS map?
What should you destroy first when attacking a FOB?
Does the WARDOGS compound bow have arrow drop?
A Forward Operating Base is how an enemy team holds ground in WARDOGS: a spawn truck under a shelter, Hesco walls, a mortar pit, and a tower full of riflemen. This page is only about the attack side — how one player scouts, breaches, and dismantles somebody else’s FOB. For the mirror-image skills, our FOB building guide covers where to site your own base, our advanced fortifications walkthrough covers the kill boxes you will be breaching, and our FOB combat walkthrough covers the defenders’ point of view.
The technique below is reconstructed from Omaha’s live raid on Tower Three and Tower Five — a single engineer running a compound bow, blowing gates, and repeatedly wiping fortified bases. It is broken into seven actionable steps, each paired with a verified in-game frame and a deep link to the moment it is demonstrated.
Source and Verification Card
| Field | Detail |
|---|---|
| Objective | Attack and destroy an enemy-owned FOB |
| Loadout | Compound bow + arrows, C4 charge + remote detonator |
| Insertion | Friendly helicopter (spec-ops drop / fly-by) |
| Priority targets | Spawn vehicle → AA gun → mortar pit → medics |
| Source channel | Omaha (WARDOGS Early Access, Aug 2026 build) |
| Source video | Destroying enemy FOBs as Rambo in Wardogs (49 kills with Compound bow) |

Omaha — Destroying enemy FOBs in WARDOGS (compound bow raid)
Step 1: Scout the Tower Before You Commit
Do not run at the first base you see. From a rocky overlook, read the map for the towers that already have tents, Hesco walls and full gates — that is a developed FOB. Then watch the sky: a tower where helicopters keep landing is an active, contested point worth raiding, and a base that keeps getting air traffic will keep respawning you a fight. Omaha notes he did not even bring a rangefinder or binoculars and still picked Tower Three purely off the landing pattern.
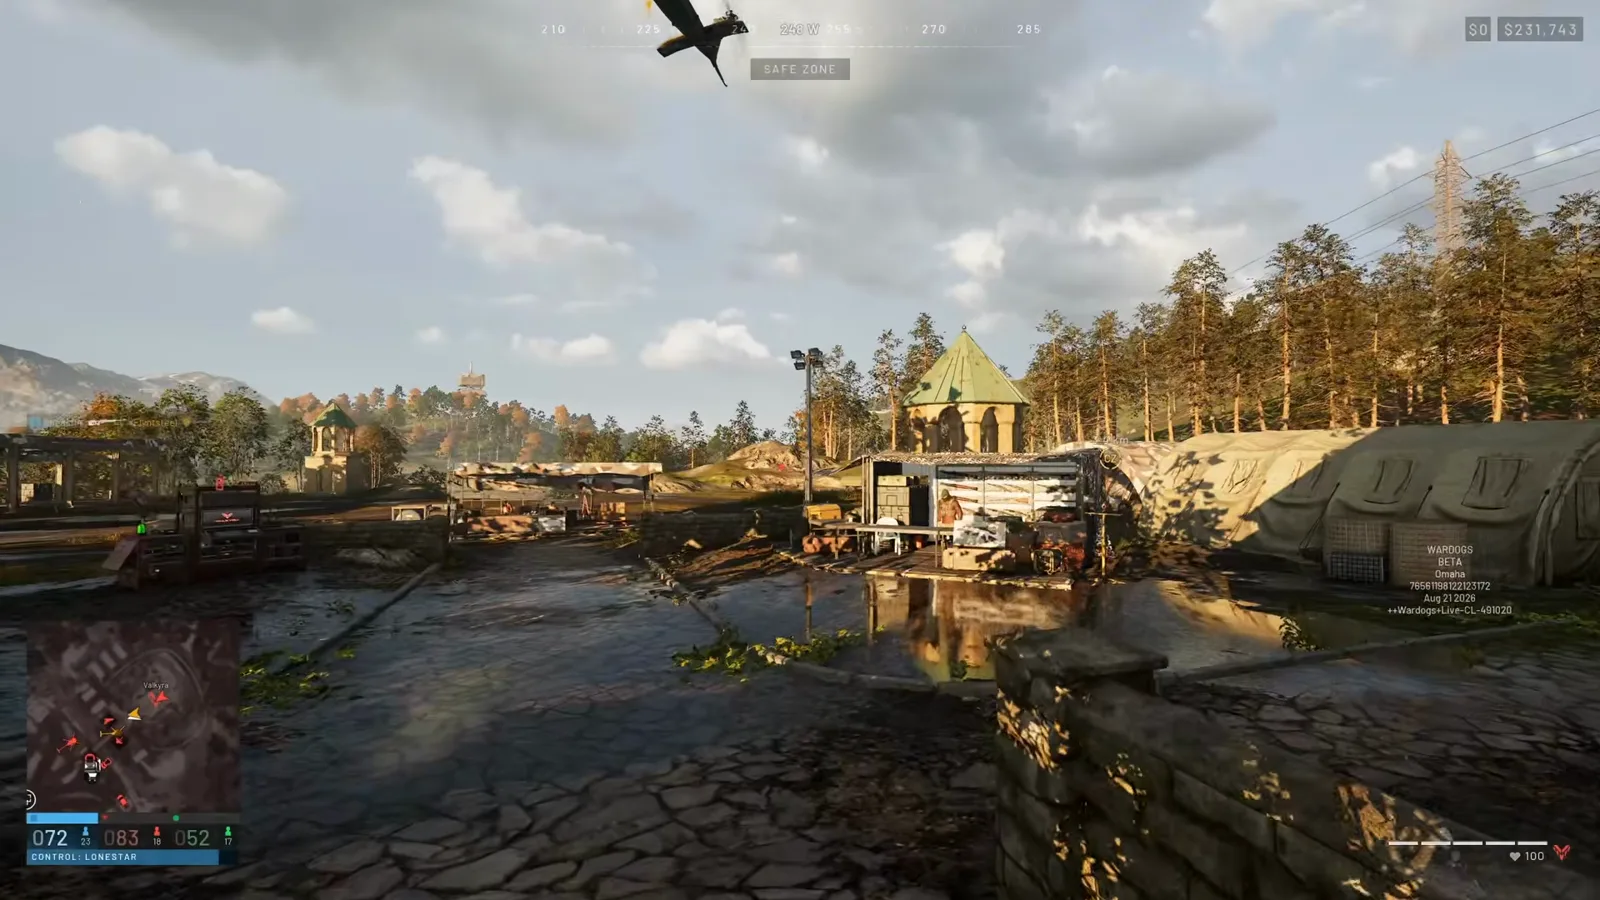 Step 1 — Timestamp: 43:40. Constant helicopter traffic over a tower is the tell: that is a live FOB, and it is the one to break.
Step 2: Request a Spec-Ops Insertion Behind the Lines
Walking across the whole map gets you shot in the open. Instead, ping a pilot on local chat and ask for a spec-ops insertion a few hundred meters from the objective — Omaha asks to be dropped “southeast of Tower Five” so he can sneak in and blow up their supplies. Open the map from the cockpit to hand over a clean grid coordinate. When you jump, note that a mid-air exit awards the same tactical deploy points as a full landing (Community-reported), so the pilot never has to touch down.
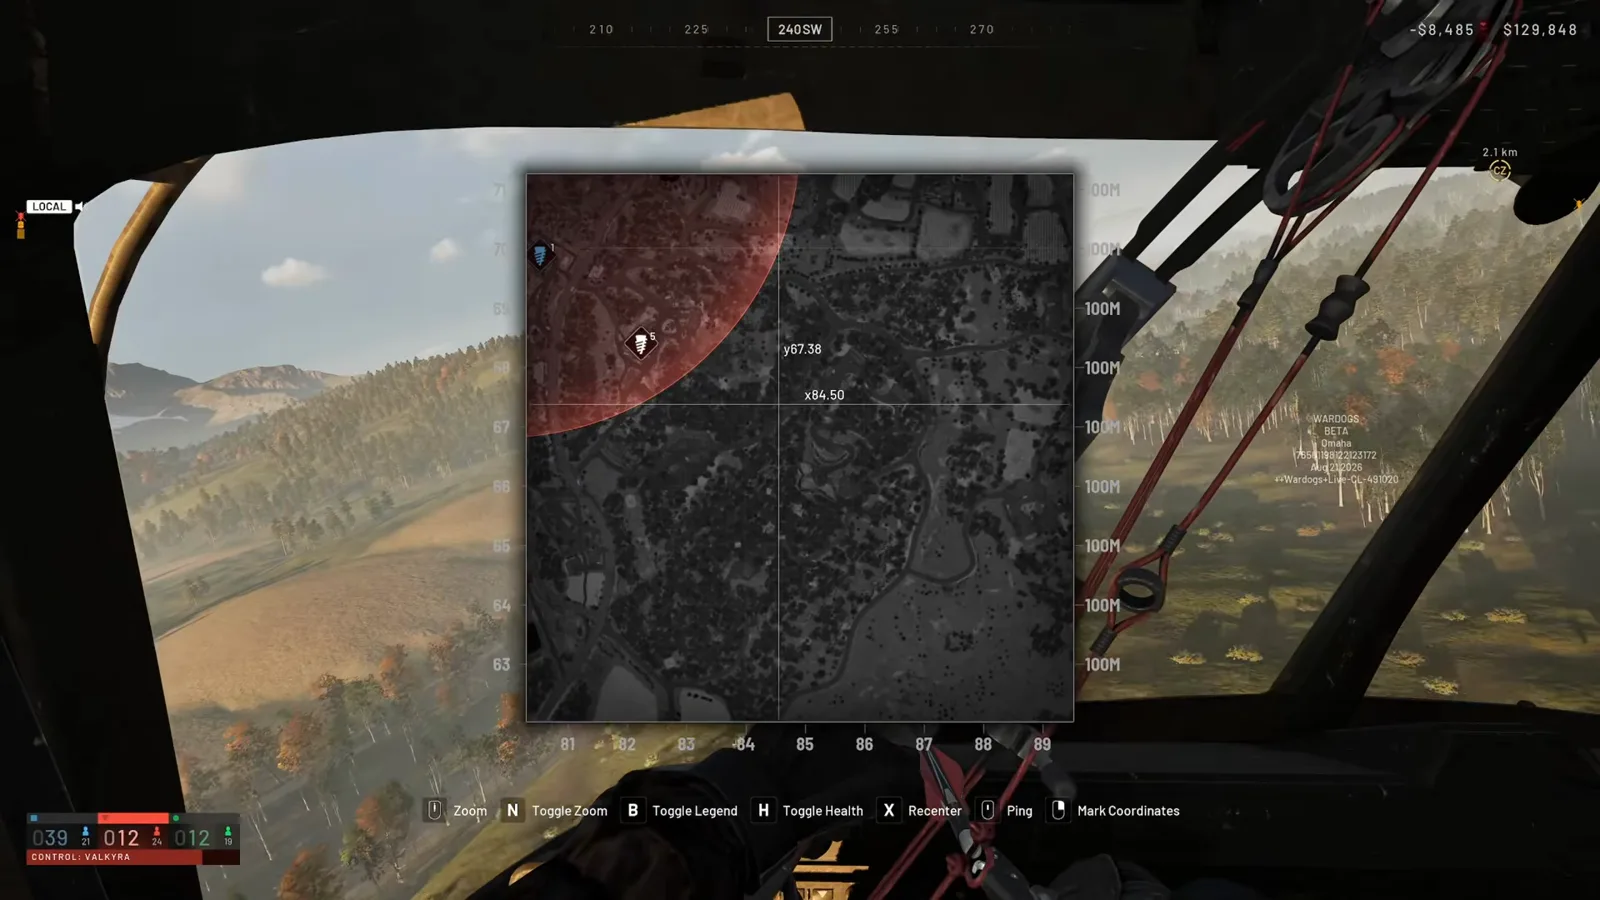 Step 2 — Timestamp: 10:20. Read the grid from the cockpit map and call the drop; a good pilot flies the whole raid for you.
Watch the insertion call (10:20)
Step 3: Hike the Last Stretch Under Cover
The approach is where raids die. Omaha’s rule of thumb: prefer a FOB you can reach through foliage, and skip the exposed ones — “there’s no foliage to get when you’re on your way there” is what makes a base “a hard one to get into.” Move wreck-to-wreck, crouch behind bus shells and berms, and go prone the instant a hostile Huey is overhead. If the tower is already “in shambles from last time,” it is a soft target; a freshly built wall line is not.
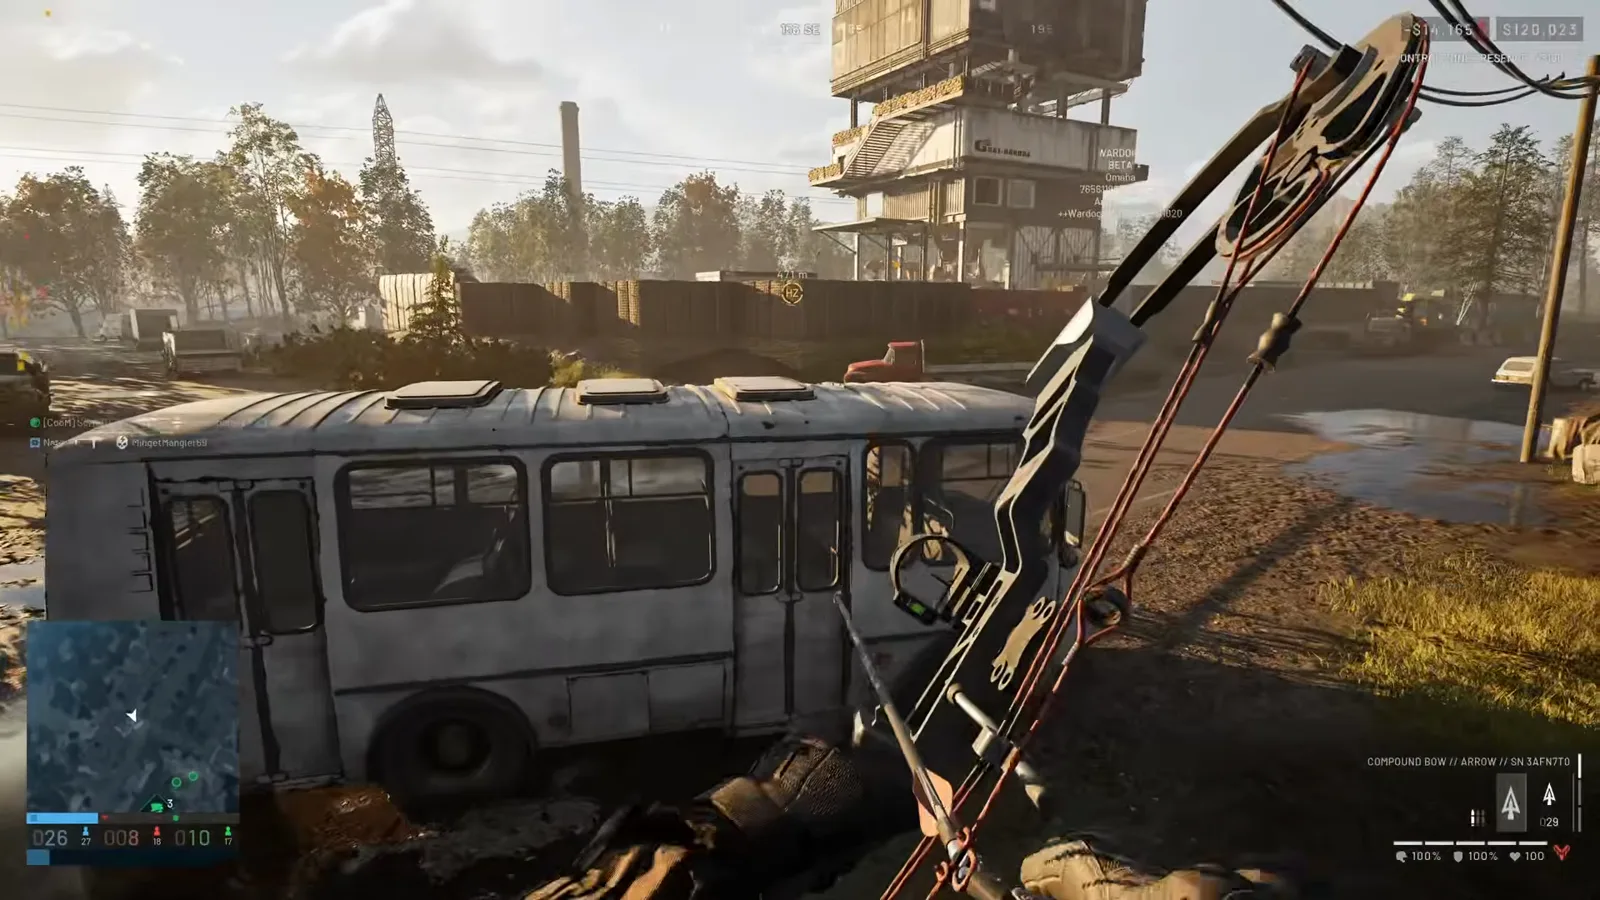 Step 3 — Timestamp: 03:32. Bound from cover to cover on the final approach; going prone under an overhead helicopter saves the whole raid.
Step 4: Blow the Gate and Pull Them Into the Open
Do not duel a defended gate. Place a C4 charge and step back onto the remote detonator, then blow the front gate or a container wall. The point is not just the hole — it is that “they might start running towards it,” so the breach drags defenders out of their firing slits and into your arrows. If a gate is already standing open, walk straight through it; a base with unlocked doors is half-breached already.
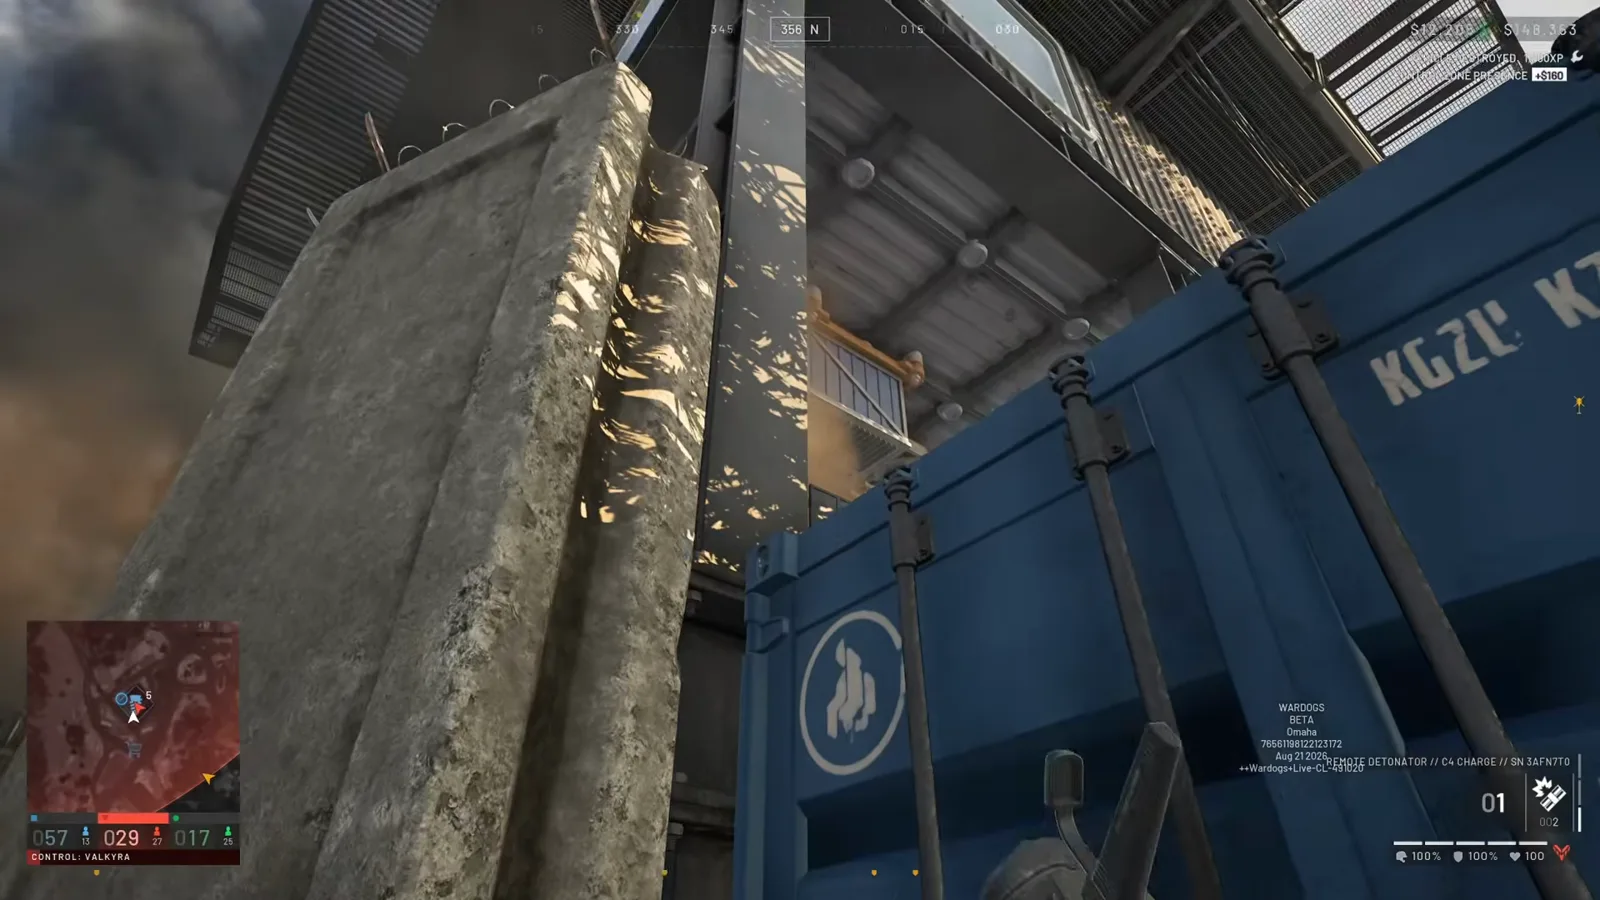 Step 4 — Timestamp: 16:20. One C4 charge on the gate line opens the base and flushes the garrison toward you.
Step 5: Clear the Bunkers One Embrasure at a Time
Inside the wire, slow down. Work the sandbagged bunkers through their camo-net firing slits, and check the corners and the space under platforms — that is exactly where Omaha finds a defender “underneath the platform” and a machine-gunner behind a door frame. The compound bow is the right tool here: it is silent, the arrows are cheap, and it does not give your position to the next room. Hunt the enemy mortar crew on the sandbags and any medic reviving downed defenders as you go.
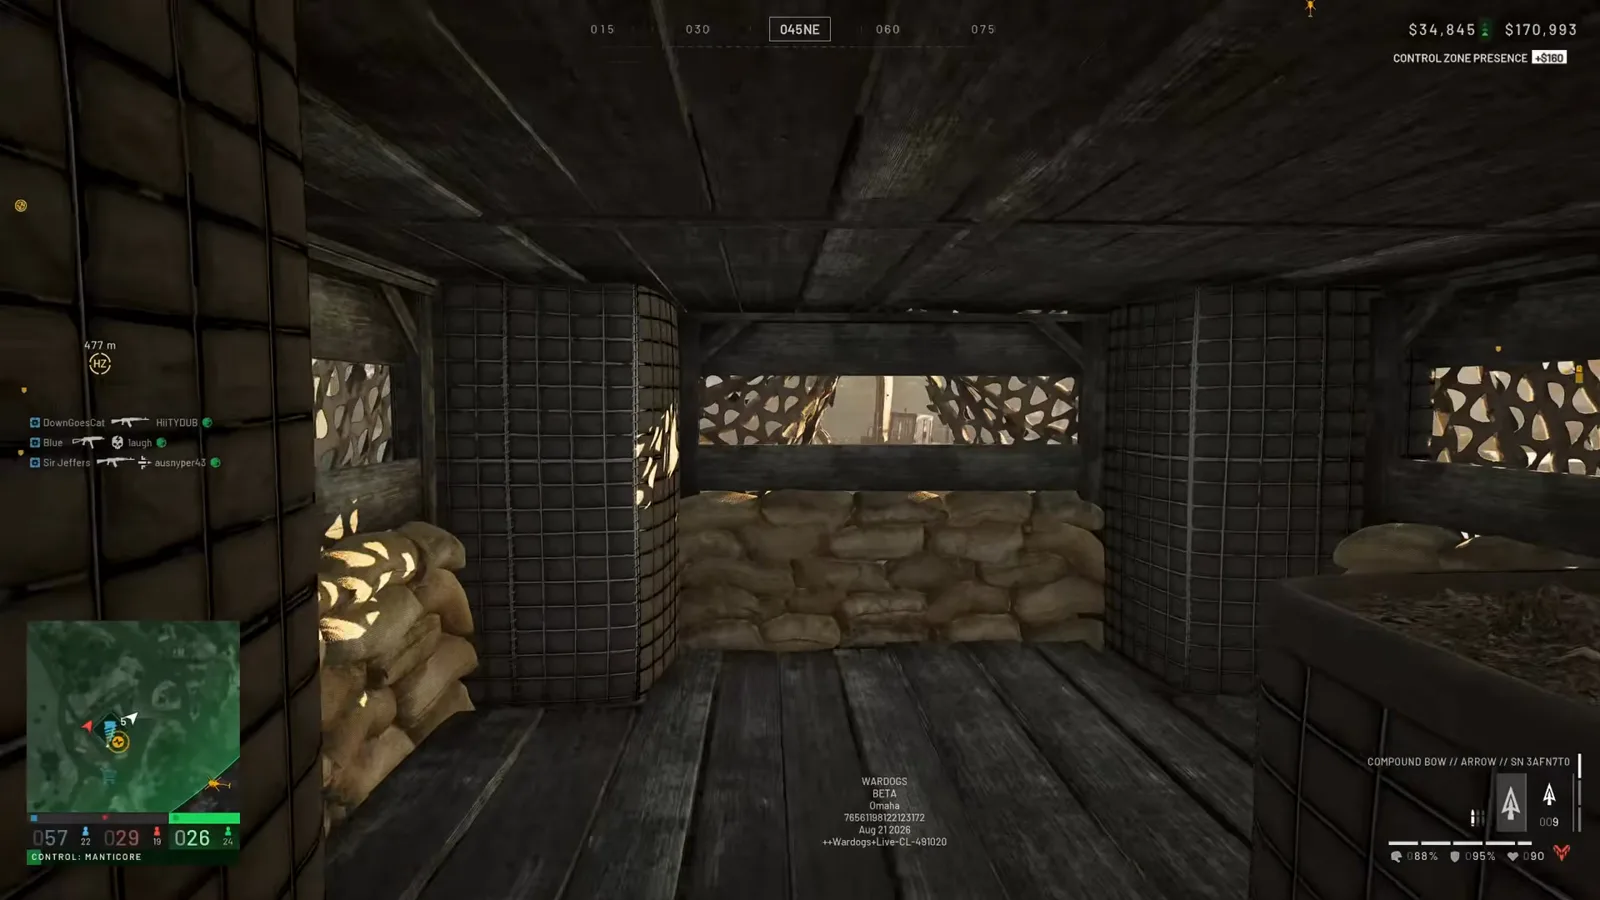 Step 5 — Timestamp: 20:20. Peek the embrasures, clear under the platforms, and the whole base falls room by room.
Watch the bunker clear-out (20:20)
Step 6: Kill the Spawn Vehicle to Cut the Base Off
The single highest-value shot at a FOB is the spawn truck. “I blew up their spawn vehicle already — these guys are oblivious too,” and from that point the defenders are the last wave they will ever get. Do it early and the whole fight shrinks to the people already standing there. While you are in the yard, also take out the anti-air gun so your own helicopters can keep operating over the objective.
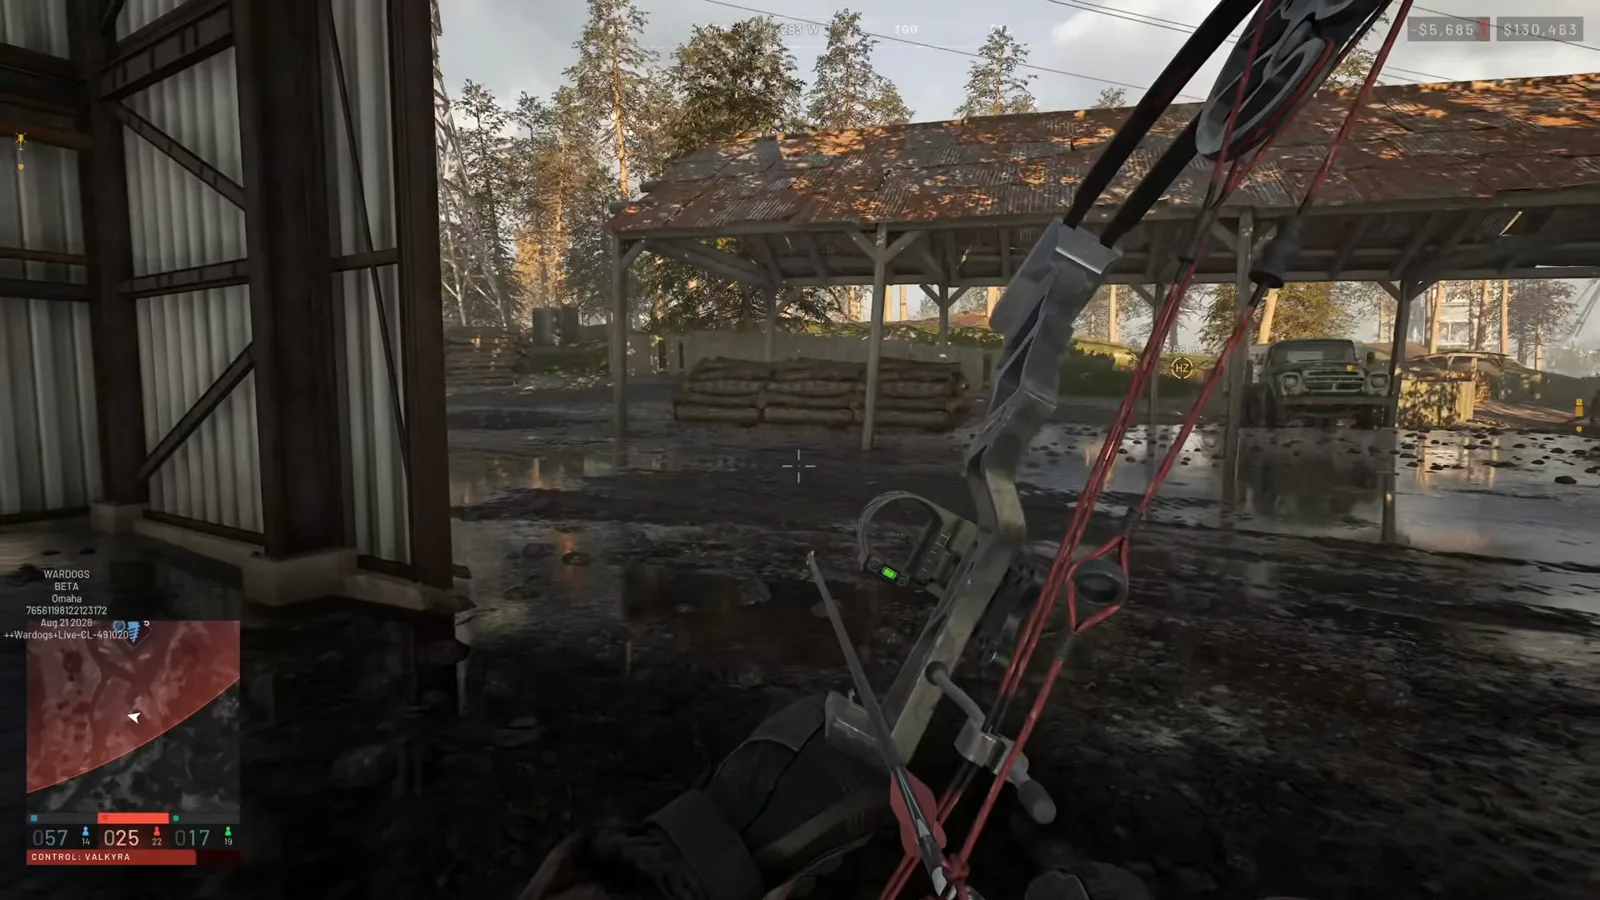 Step 6 — Timestamp: 15:20. Destroy the sheltered spawn truck and the FOB stops respawning; the garrison you see is all you get.
Watch the spawn-vehicle kill (15:20)
Step 7: Hold the High Ground and Shoot What Lands
A cleared FOB gets counter-attacked. Climb the tower and take the overwatch view out over the treeline, because “they’re landing here — get ready.” Reinforcements arrive by helicopter and on parachutes, and Omaha snipes a man still descending “probably 100–200 meters out” with the bow. If the defenders keep holding a corner, read it as a signal that more are inbound; if they start reviving each other, keep them dead rather than trading. Then either consolidate or call your own fly-by and raid the next tower.
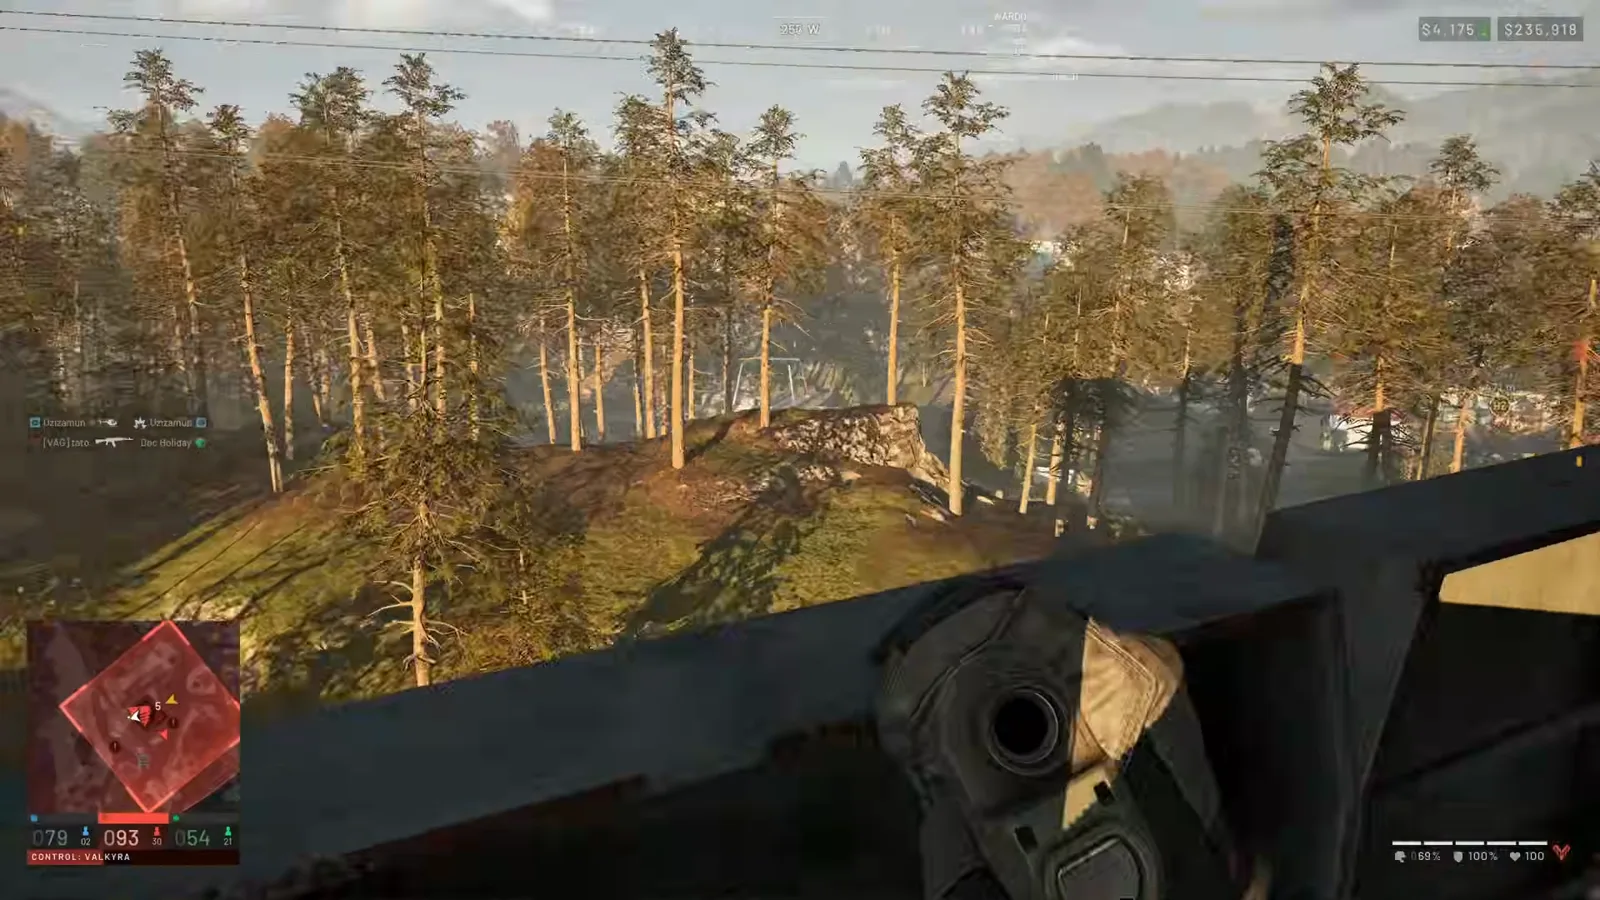 Step 7 — Timestamp: 47:20. Own the tower top after the clear; shoot the heli and parachute reinforcements before they regroup.
Watch the overwatch hold (47:20)
Breaching Tools & Numbers
| Tool / Target | What the video shows | Status |
|---|---|---|
| C4 + remote detonator | One charge blows a gate or container wall and flushes defenders out | Demonstrated |
| Spawn vehicle | Destroy it early to stop the FOB respawning | Demonstrated |
| Anti-air gun | Kill it so friendly helicopters can operate over the tower | Demonstrated |
| Enemy mortar pit | Spot the crew on the sandbags; some pits sit out in the open | Demonstrated |
| Compound bow cost | Omaha cites ~$800 for the bow, “about three kills to make up my loadout cost” | Community-reported |
| Bow arrow drop | ~100 m headshots with no hold-over; “there’s no drop to the bow” | Unconfirmed |
| Mid-air exit | Jumping out gives the same tactical deploy points as landing | Community-reported |
| Repeat raids | Third pass on the same tower; C4 noise warns the defenders you are back | Demonstrated |
Loadout economics: is a bow raid worth the cash?
Omaha runs the bow as a low-cost, high-kill raid loadout: he quotes the bow at roughly $800 and says he only needs about three kills to break even on the whole loadout. The trade-off is ammo — he runs a full base dry of arrows (“I’m out of ammo now”), and a smart enemy will loot his body clean so a revive leaves him with nothing. Cheap to field, brutal when you get surrounded empty.
Attacker’s Rules of Thumb
- Read the sky, not just the map. Helicopter traffic tells you which tower is a live FOB — see the grid and tower system in our maps and tactics guide.
- Spawn vehicle first, then AA, then the mortar. Killing the truck collapses the fight; for the gun you are hunting, follow our mortar walkthrough.
- Soften before you breach. If the base is dug in with IDF shelters and kill boxes, crack it with indirect fire from our artillery walkthrough or scout it with the Stingray drone before a body goes in.
- Expect armor on the counter-attack. When they roll a tank back through the gate, switch to the loadout in our anti-tank guide.
- Pick the right class to run the raid. Engineer carries the C4 and the detonator; see which fits your play in our best class guide.
- Know the other side of the wall. The same Hesco lines you are breaching are explained from the defender’s seat in our FOB building guide, FOB combat walkthrough, and advanced fortifications walkthrough.
This attack guide was reconstructed frame-by-frame from Omaha’s live raid and will be revised as FOB durability, spawn-vehicle rules and compound-bow ballistics shift through Early Access. Every number tagged Community-reported or Unconfirmed is a player claim from the source footage, not a verified game value.
Related Articles
guides
WARDOGS Best Class Guide: Which Career to Play First
WARDOGS has six careers and no single best class — your level is the sum of all of them. Here is which career to build first and the level gates that decide it.
guides
WARDOGS Driver Tank Guide: Drive, Aim & Protect the L2A6
Illustrated WARDOGS guide to driving and fighting the L2A6 tank as the Driver class: crew seats, hull-down gunnery, ammo modes, fuel, repairs and protection.
guides
WARDOGS Game Modes Explained: Control Zones, Ticks & How to Win
New to WARDOGS? Learn how matches are won: three teams fight over one control zone, a 30-second tick scores points to 100, and the hot zone doubles cash.
Was this helpful?
Thanks for the feedback!