WARDOGS Support Class Guide: Weapons, Bipod Doctrine & Anti-Vehicle Play
The full WARDOGS Support career playbook: shotgun and LMG unlock ladder, the bipod recoil trick, XP sources beyond shooting, and vehicle kill data.
FAQ
What are the best Support weapons in WARDOGS?
How do you level up Support fast in WARDOGS?
Can an RPG destroy a tank in WARDOGS?
What is the bipod trick on WARDOGS LMGs?
The Support career is WARDOGS’ heavy hand: shotguns and machine guns at the front, and the entire build-repair-refuel economy running through its tools. Most new players treat it as “the big gun class” and never touch half its XP sources. This page is the career playbook — the weapon ladder with real vendor prices, the bipod trick and its cost, the XP you farm without firing a shot, and the community-collected anti-vehicle hit data.
It deliberately does not repeat our other pages: ammo buying and resupply covers the logistics mechanic, XP leveling math covers the six-career ladder, and which career to pick covers class choice. This one starts after you have picked Support.

StratzFPS — MASTER the Support Class in WARDOGS (War College Ep. 6)
The Support Weapon Ladder (Vendor Card Data)
All four prices, weights and gates below are read directly from the in-game equipment vendor stat cards captured in the source video — screen-confirmed at EA launch build and subject to balance changes.
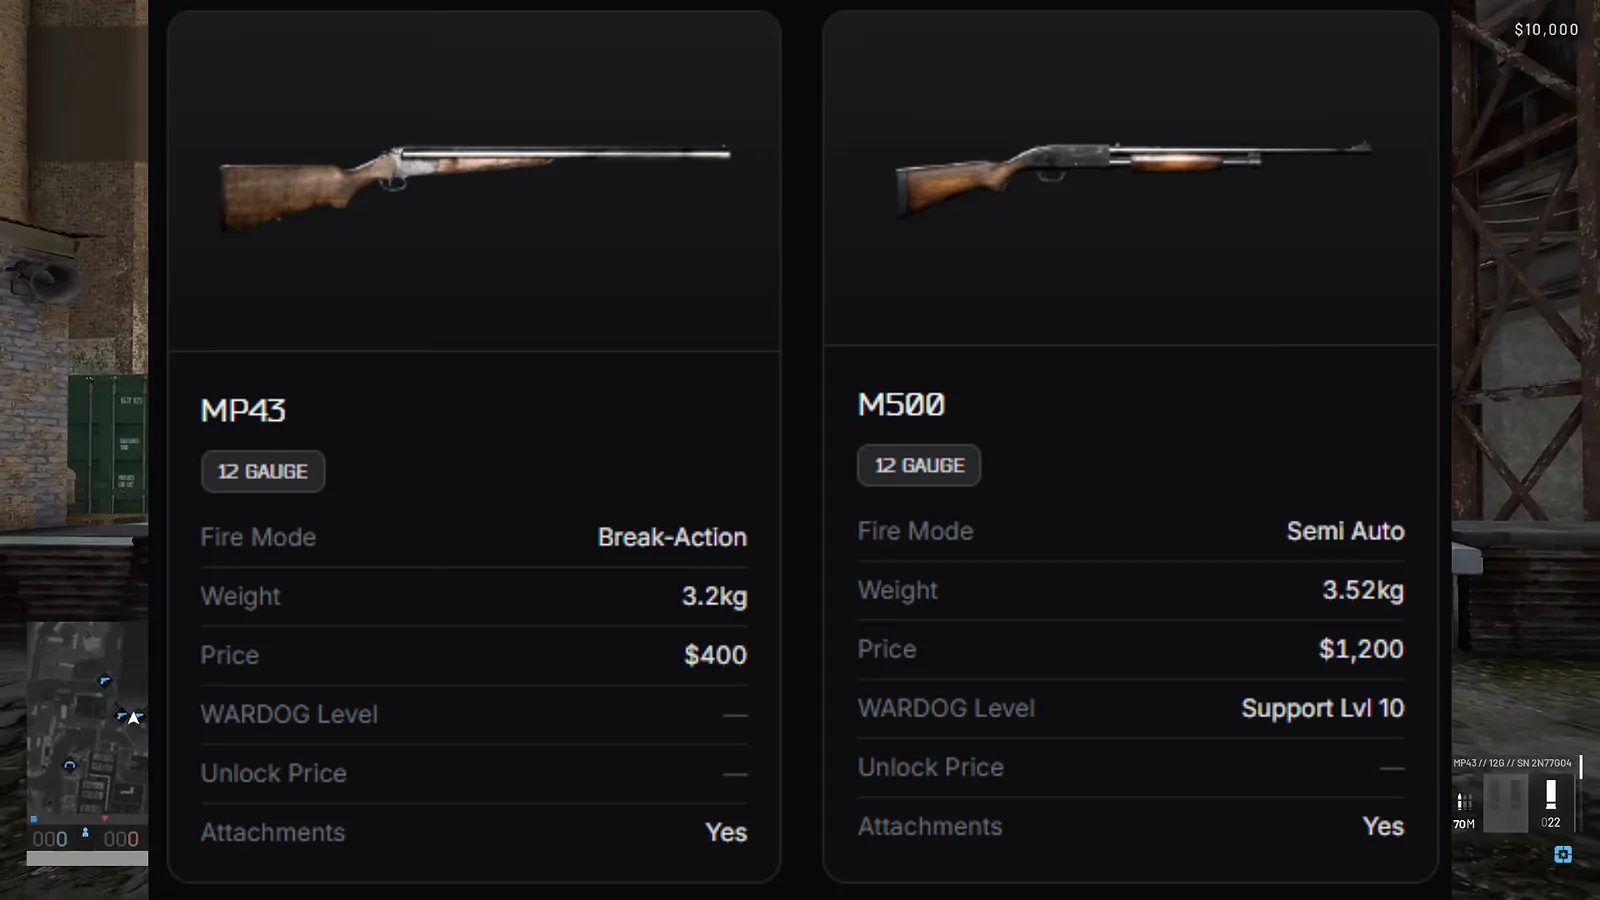 The shotgun tier: the MP43 double-barrel needs no unlock at $400; the M500 costs $1,200 and opens at Support Lvl 10. Note the card lists the M500’s fire mode as Semi Auto. Frame: StratzFPS on YouTube.
- MP43 double-barrel — 12 gauge, break-action, 3.2 kg, $400, no unlock. The presenter’s advice (opinion): run buckshot, not slugs — the break-action’s tiny magazine punishes a missed slug reload.
- M500 pump — 12 gauge, 3.52 kg, $1,200, Support Lvl 10. Best-in-slot attachments per the video: muzzle brake (tightens buckshot spread, extending effective range) and the angled grip once unlocked (faster aiming, slight spread cut).
- M249 SAW — 5.56×45, 7.5 kg, $3,200, Support Lvl 15. “Shoots incredibly accurate, especially with a bipod” (presenter). The customization king of the two LMGs.
- PKM — 7.62×54, 7.5 kg, $4,500, Support Lvl 30. Insane raw firepower, but the underbarrel rail takes only bipods and it has no magazine-swap options like the SAW.
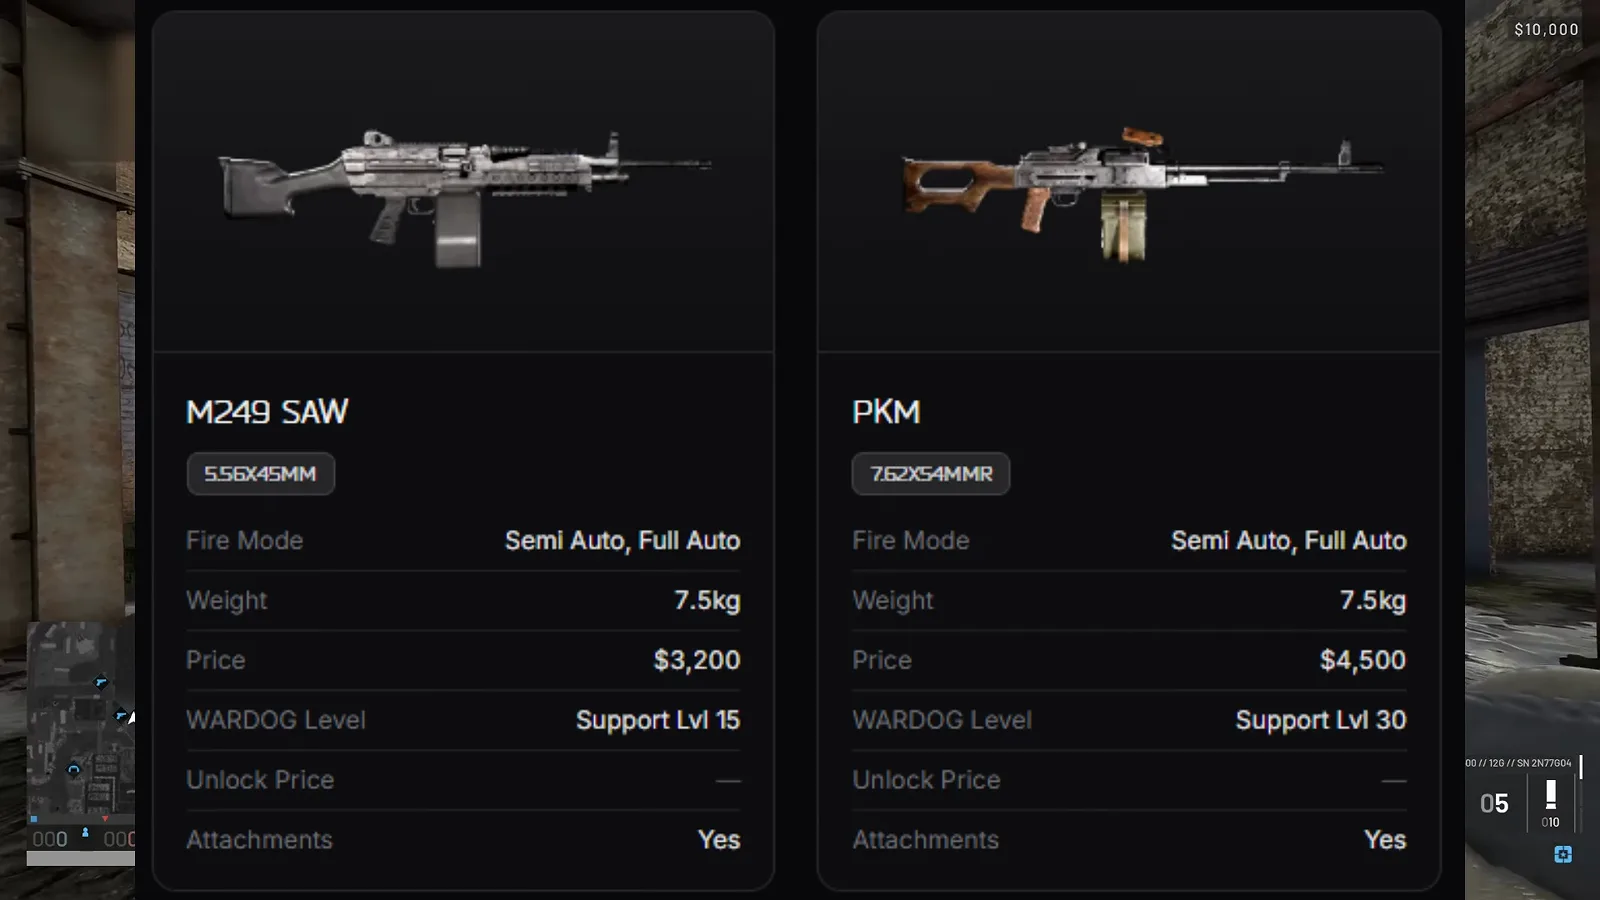 The LMG tier: SAW at Lvl 15, PKM at Lvl 30 — identical weight, different trade: customization versus raw 7.62 firepower. Frame: StratzFPS on YouTube.
Buckshot versus slug, once, from the video: buckshot is a scattering cloud of pellets across an area; a slug is one solid rifle-like projectile. Both shotguns can run either cartridge.
The Bipod Trick: Zero Recoil, Zero Mobility
The single biggest LMG lesson in the source video is a range test, shown for both machine guns: firing standing, recoil is brutal; deploy the bipod and the weapon “doesn’t move at all” — a small mouse correction is all that remains. The presenter calls it the game’s balance lever: the gun is only tame if you accept being frozen in place.
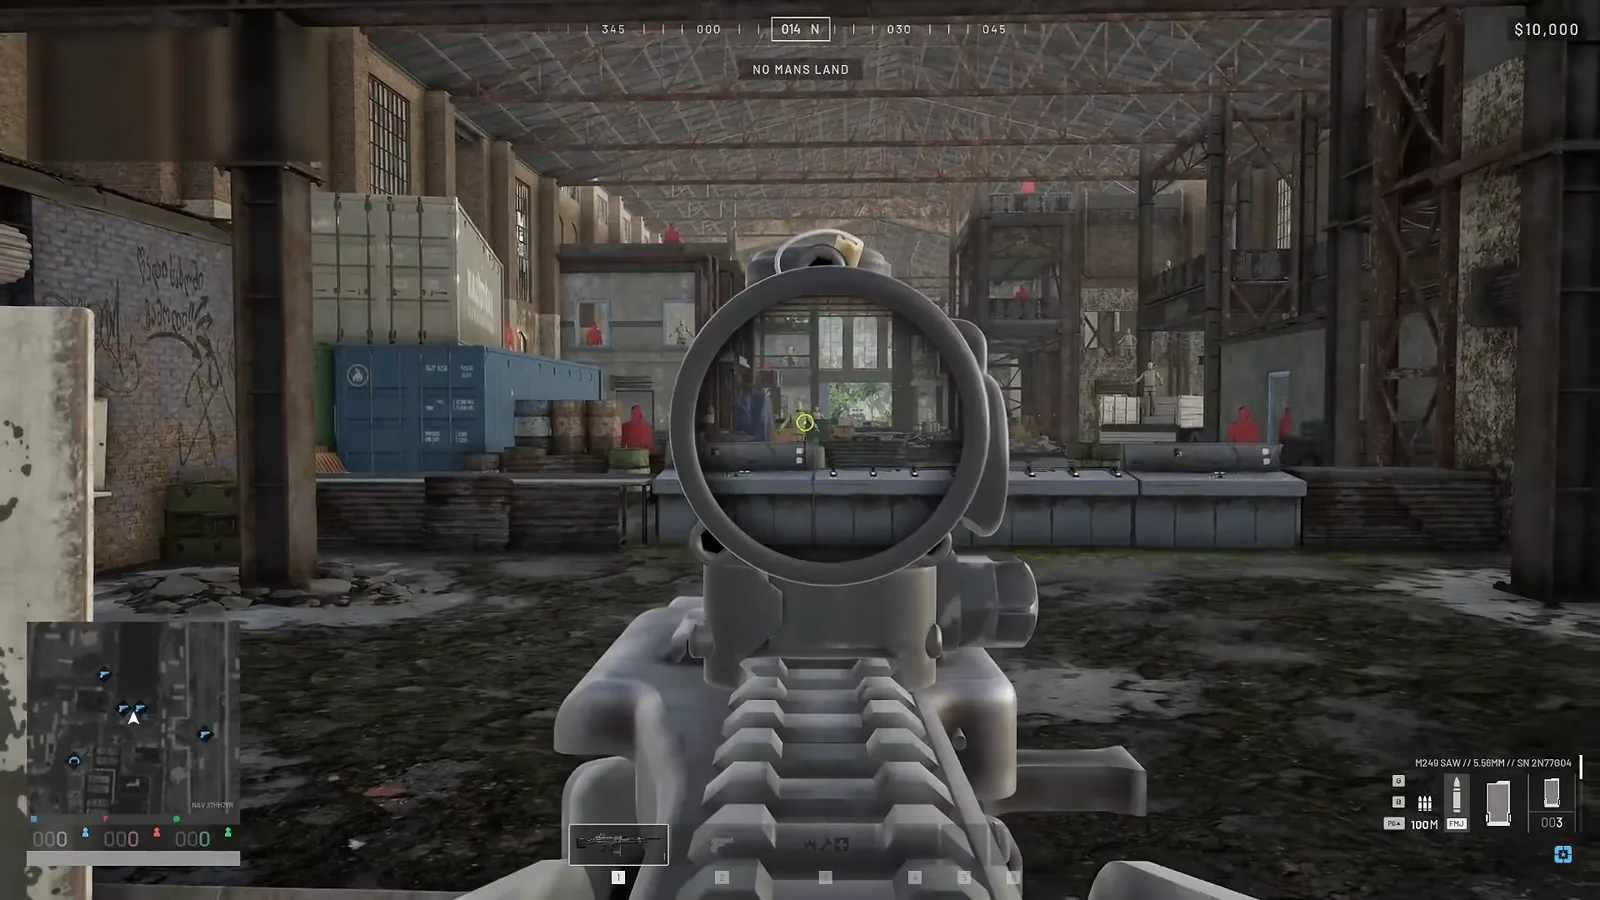 The range where the bipod comparison is run: SAW on the bag, 100 m zero, FMJ loaded. Deployed-bipod fire holds this group with almost no correction — until someone flanks the position. Frame: StratzFPS on YouTube.
The cost, stated plainly in the video: from a deployed position you cannot move, and enemies read your origin from the shot stream. The doctrine that follows — pick, fire, relocate before the position is solved — is the same concealment-and-reposition discipline we document for recon snipers.
Leveling Support Without Shooting
The career’s quiet superpower: most of its XP does not come from kills. Demonstrated in the video and consistent with the career XP model:
- Hammers — every build material you place for your team’s FOB earns Support XP.
- Repairs, refuelling, drills and wrenches — servicing vehicles feeds the meter.
- IEDs and C4 — blowing up machinery, gates or any destructible earns Support XP, not just kills.
- Every launcher — MANPADS, RPG, MAAWS and grenade launchers all level Support.
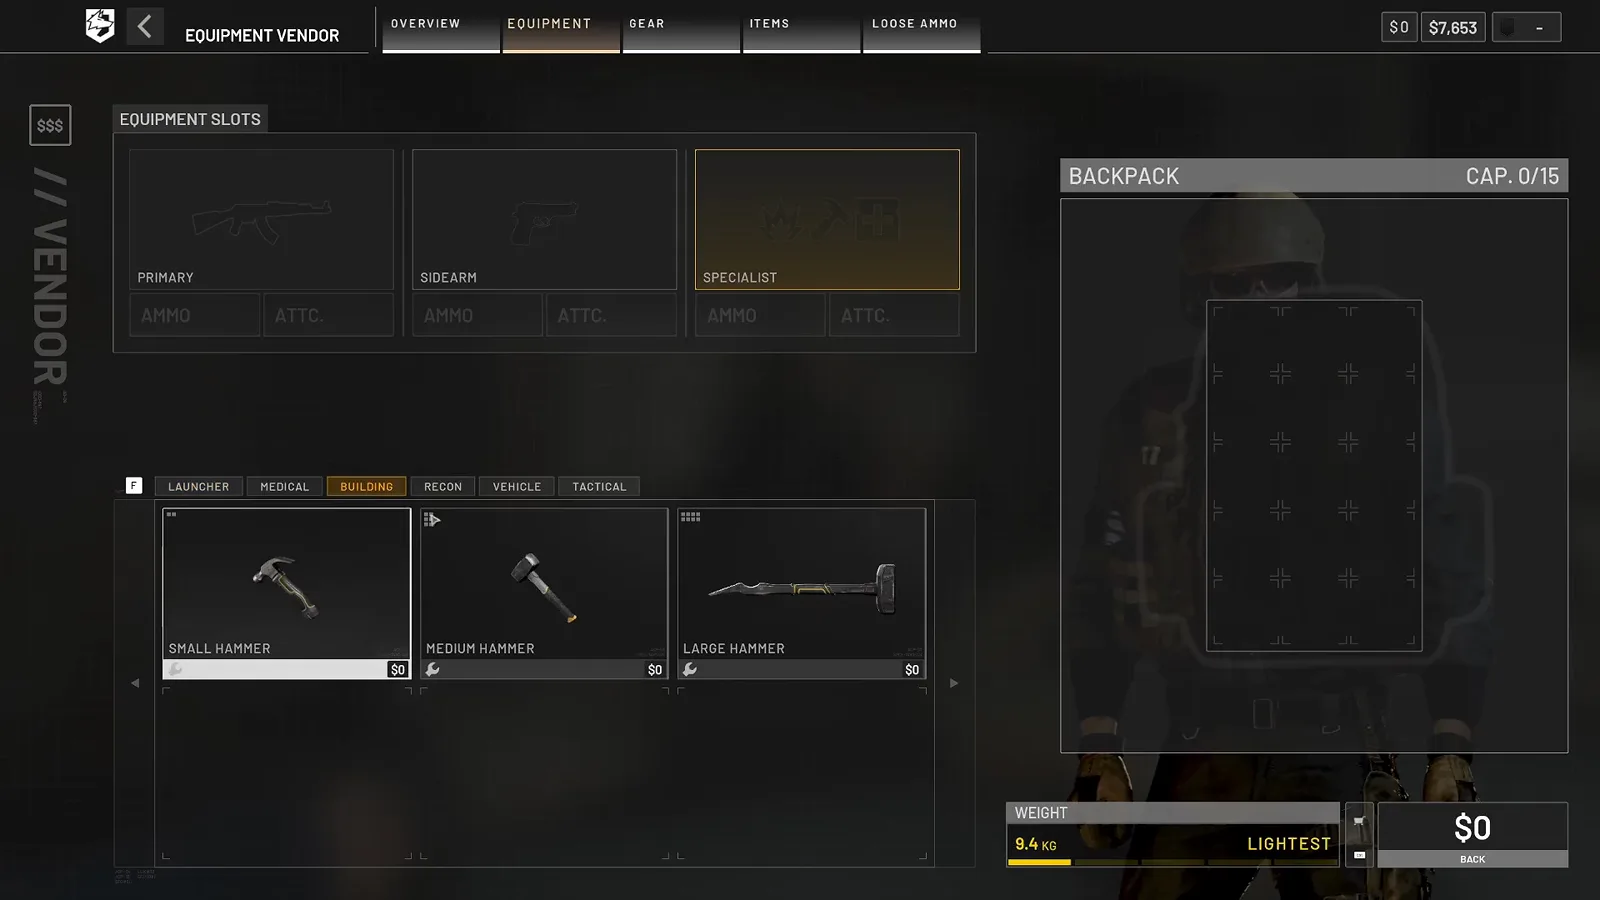 The non-gun half of the career: the hammer lineup in the vendor’s Items tab. Building your team’s FOB is Support XP you pay for with materials, not trigger time. Frame: StratzFPS on YouTube.
The 10-metre arming rule. One warning the video puts early: WARDOGS projectiles need distance to arm their fuzes. A grenade launcher or rocket fired at a target closer than roughly 10 metres does not detonate — running up to point-blank range with an RPG is a wasted shot and a wasted life.
Anti-Vehicle Play: Hit Location Is the Whole Game
The most-referenced segment of the source video is the tank damage chart: eight annotated vehicle renders mapping required RPG and MAAWS hits per armour zone on main battle tanks. The data was collected by community player Atheist2134 and submitted via Not a Muffin — community-reported, not an official table, and re-verify it against your own matches.
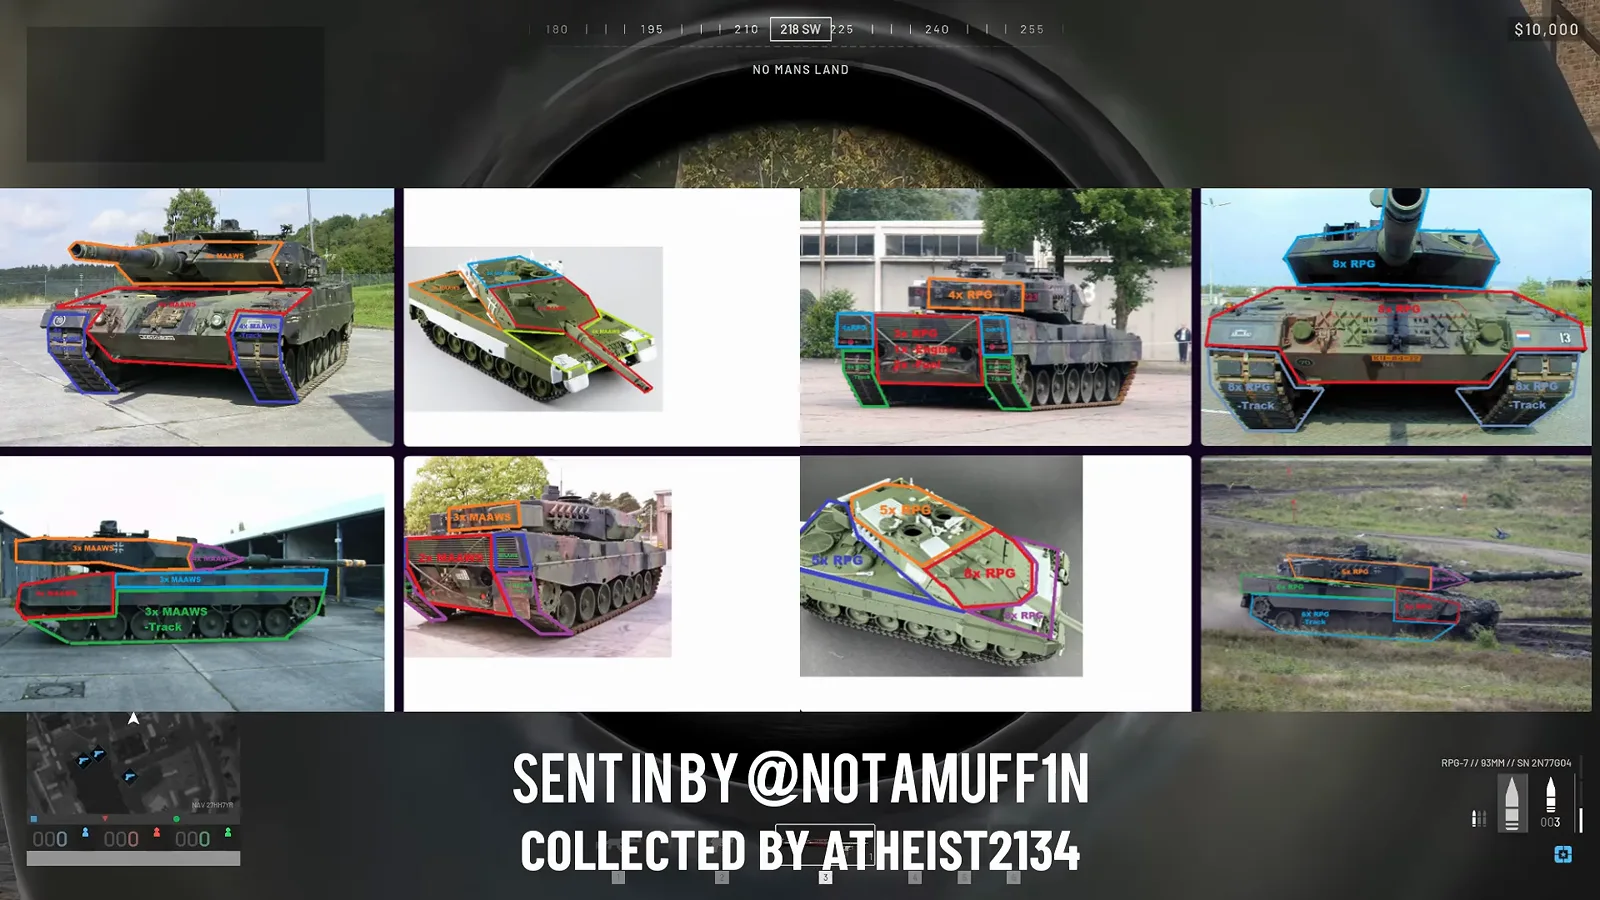 The hit-location chart, screen-captured as credited: “SENT IN BY @NOTAMUFFIN, COLLECTED BY ATHEIST2134”. Screenshot it, but treat it as one player’s range data — patch notes move these numbers. Full weapon-vs-armour math lives in our TTK damage chart. Frame: StratzFPS on YouTube.
Helicopters follow the same principle even harder:
- Black Hawk — the hull absorbs two RPG hits; a tail-rotor hit cripples control instead. The presenter’s logic: a crippled pilot either crashes or lands, while a hull shot that fails to kill lets the helicopter simply fly away.
- Attack helicopter — roughly three RPG hits to the hull, and a tail-rotor hit does not auto-kill it. With its 30 mm cannon picking off RPG gunners, the video’s verdict is blunt: bring an SAM/MANPADS instead. (The EA attack-heli sightings are rare — presenter-reported from range testing.)
- Little Bird — one shot. Light airframes die immediately.
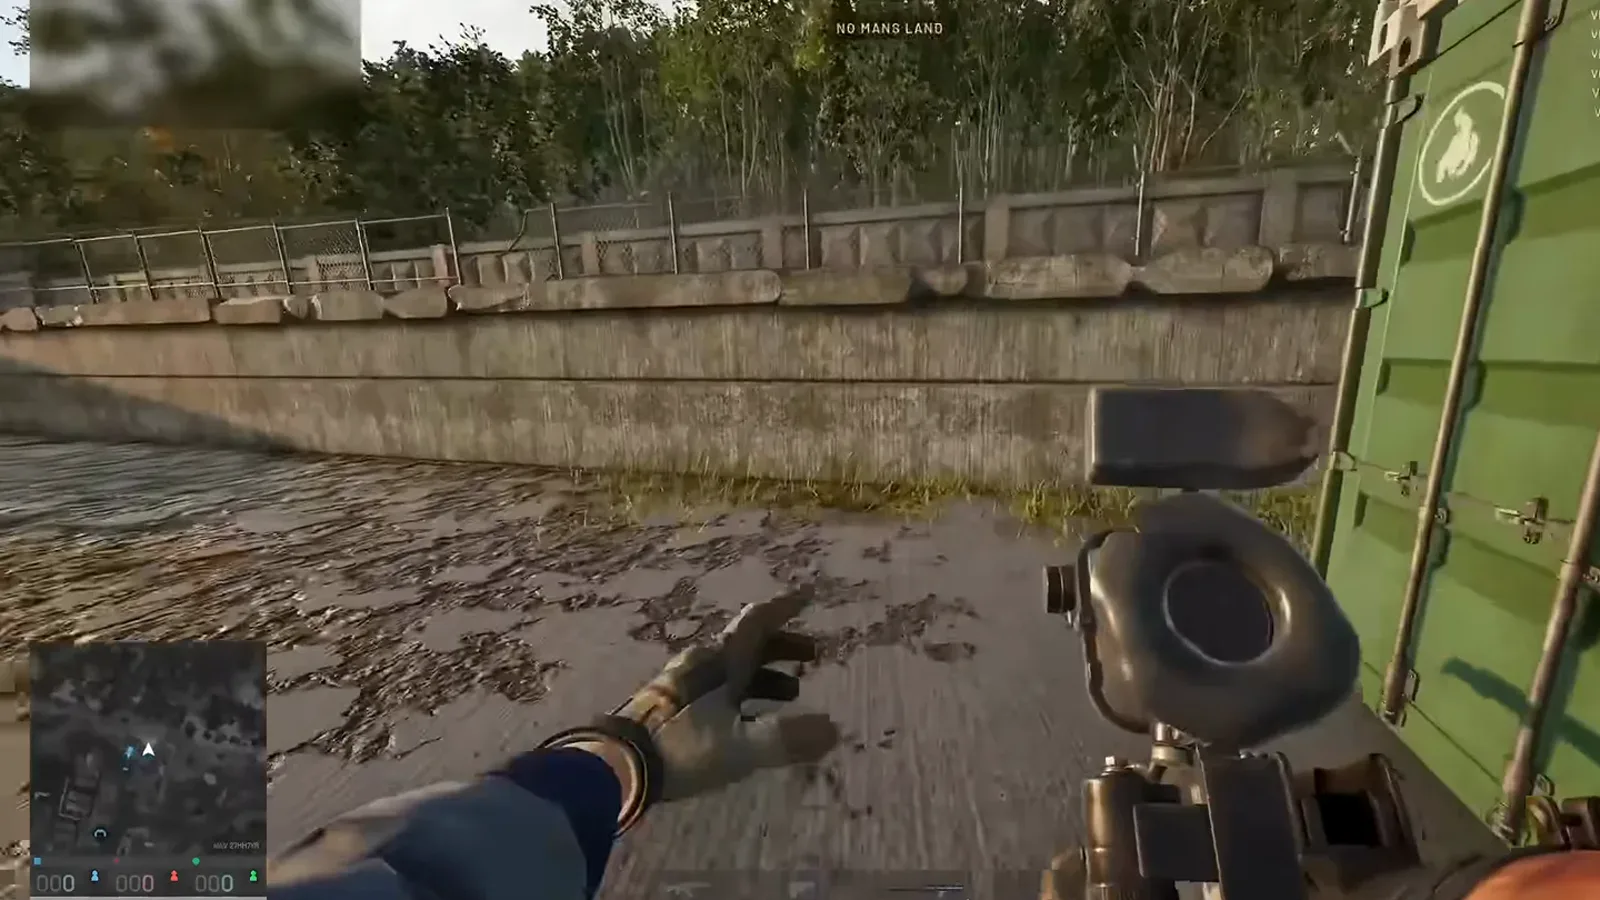 What two failed hull shots plus one good tail-rotor hit buys: a grounded Black Hawk on its own helipad. Frame: StratzFPS on YouTube (seat-HUD column cropped).
For the infantry-vs-armor fundamentals this chart builds on — armour zones, C4 and mine placement — see the anti-tank guide, and for which vehicles are worth hunting, the vehicles guide.
What We Deliberately Do Not Claim
Every price and unlock gate above is read from vendor cards on the EA launch build — balance changes ship with every season, and Season 1 already moved career gates once (see the patch mirror). The tank chart is one community player’s range data. “Scout rifle is the worst weapon” energy aside, opinions in the source video are labeled as the presenter’s, and nothing here is Bulkhead doctrine.
Where to Go Next
Run the numbers on your career grind with the XP leveling guide, pick your loadout against the weapons tier list, and learn what your Support kit should cost at best loadout.
Weapon data screen-confirmed from vendor cards in the source video (StratzFPS — WARDOGS War College Ep. 6); anti-vehicle hit counts credited in-video to community player Atheist2134 via Not a Muffin. Bipod and arming-distance behaviour is presenter-demonstrated at the range; treat all numbers as EA-launch-build, community-reported and patch-sensitive.
Related Articles
fixes
WARDOGS Tutorial Not Loading: Fix the Training Hang & Post-Tutorial Crash
WARDOGS tutorial stuck on loading, black screen, or an Unexpected Error crash after the tutorial? A verified fix ladder from file verification to config reset.
guides
WARDOGS Helicopter Pilot Guide: What Your Team Needs Each Phase
The WARDOGS pilot playbook by match phase: passenger lifts early, FOB logistics mid, fuel for the drill, scouting and CAS late — with on-screen payouts.
guides
WARDOGS Sniper Guide: Rifle Choice, Spotting Economy & Positioning
A WARDOGS recon sniping playbook: which rifles to buy and skip, the binocular XP loop, 100 m ranging discipline, and concealment-first positioning.
Was this helpful?
Thanks for the feedback!