WARDOGS FOB Building Guide: Placement, Supplies & Defense Layout
Illustrated WARDOGS FOB building guide: buy the FOB unit and supplies, plant it anywhere, feed it with pallets, then lay out gates, choke points and overwatch.
FAQ
How do you place a FOB in WARDOGS?
What are the four supply types in WARDOGS?
Which hammer should you buy for base building?
Can enemies take over your FOB?
A Forward Operating Base is the brain of every build in WARDOGS: nothing can be placed outside a FOB’s area, and every wall, gate and coil of wire you raise is paid for out of its supply stash. Plant it well and feed it properly, and your squad respawns into a fortress; plant it carelessly and you have built a gift for the enemy.
This guide covers the construction and supply side only: how to place a FOB, how the build area and supplies work, and a defense layout that holds. For the fighting side — smoke assaults, bunker breaches and holding the perimeter against a full lobby — jump straight to our FOB combat walkthrough. Everything below is reconstructed from StratzFPS’ War College episode 3 into eight steps, each paired with a verified in-game screenshot and a deep link to the exact moment it is shown.
Source and Verification Card
| Field | Detail |
|---|---|
| Topic | FOB placement, supply logistics, base and perimeter layout |
| Items covered | FOB unit, small/medium/large hammers, four supply types, pallets |
| Source channel | StratzFPS (War College series, Ep. 3) |
| Source video | How To Build Bases, FOBs, and Supply Guide! War College Ep.3 |
| Runtime | 5:37 |

StratzFPS — How To Build Bases, FOBs, and Supply Guide! War College Ep.3
Step 1: Buy the FOB, Supplies, and a Hammer at the Vendor
Every build starts at the equipment vendor. Under the Items and Building tabs you can buy all four supply types — ammo, build, fuel and mechanical — plus the three hammers and the FOB unit itself. Buy the FOB before you roll out with a bag full of supplies: without one down, nothing you carry can be placed at all.
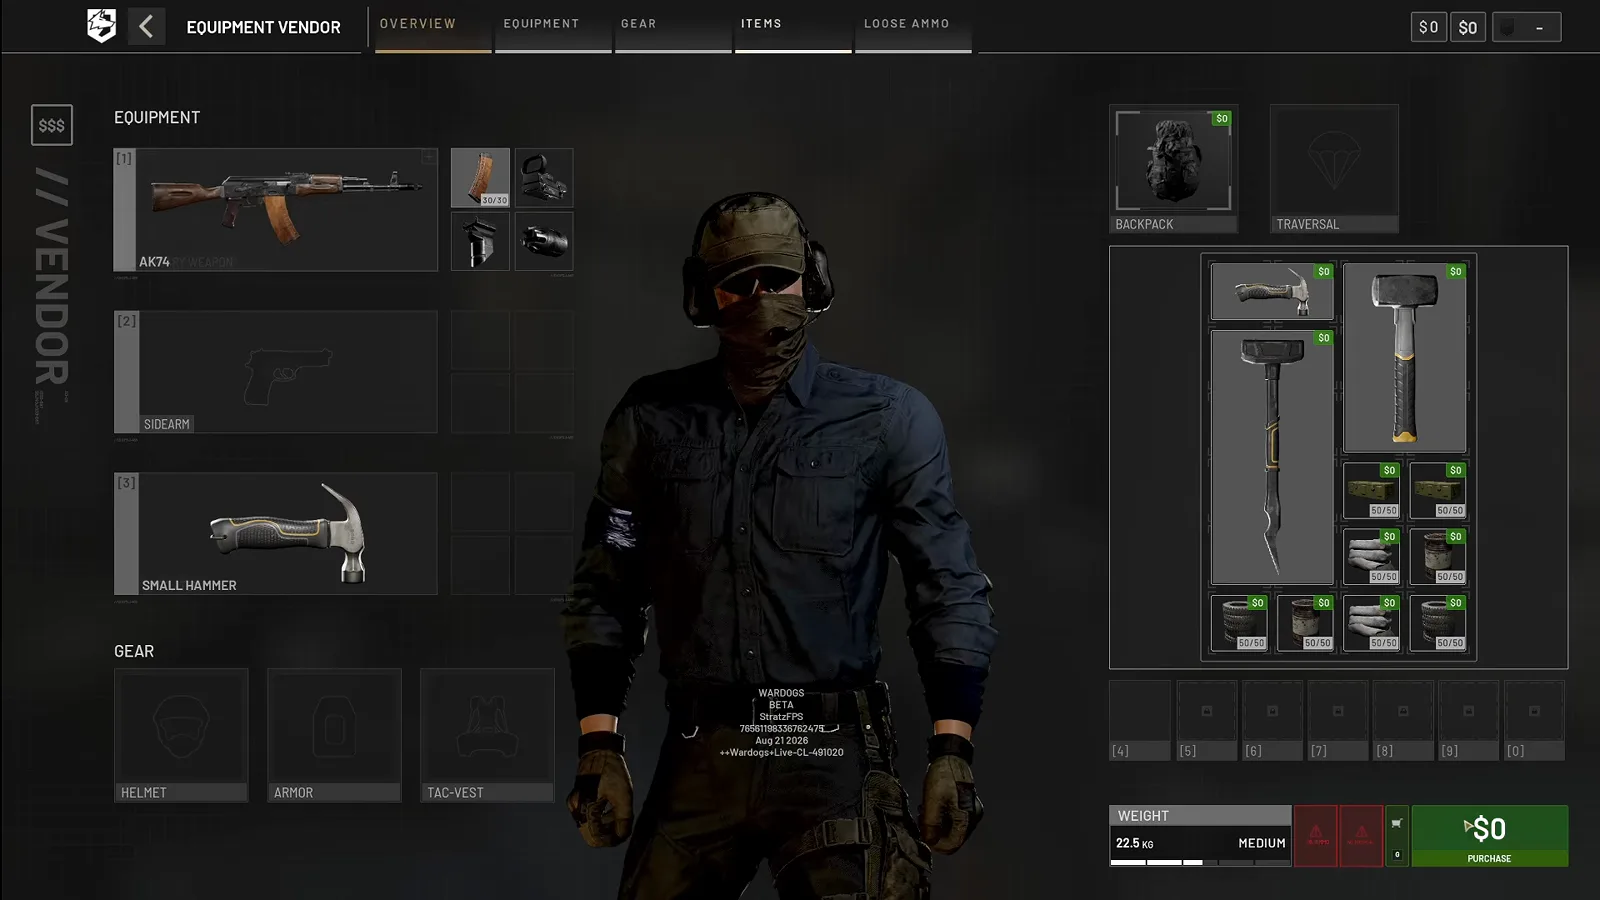 Step 1 (0:45) — Hammers, all four supply types and the FOB itself come out of the vendor’s Items and Building tabs.
Step 2: Plant the FOB Anywhere and Read the Blue Square
Take the FOB out and plant it — you are not restricted to the control zone, and the episode demonstrates by dropping one on an open bridge. The moment it sits down, a blue square appears around you. That square is your build area: anything you want to construct must fit inside it, so give the hologram enough room for walls, a gate and your stockpiles before you commit.
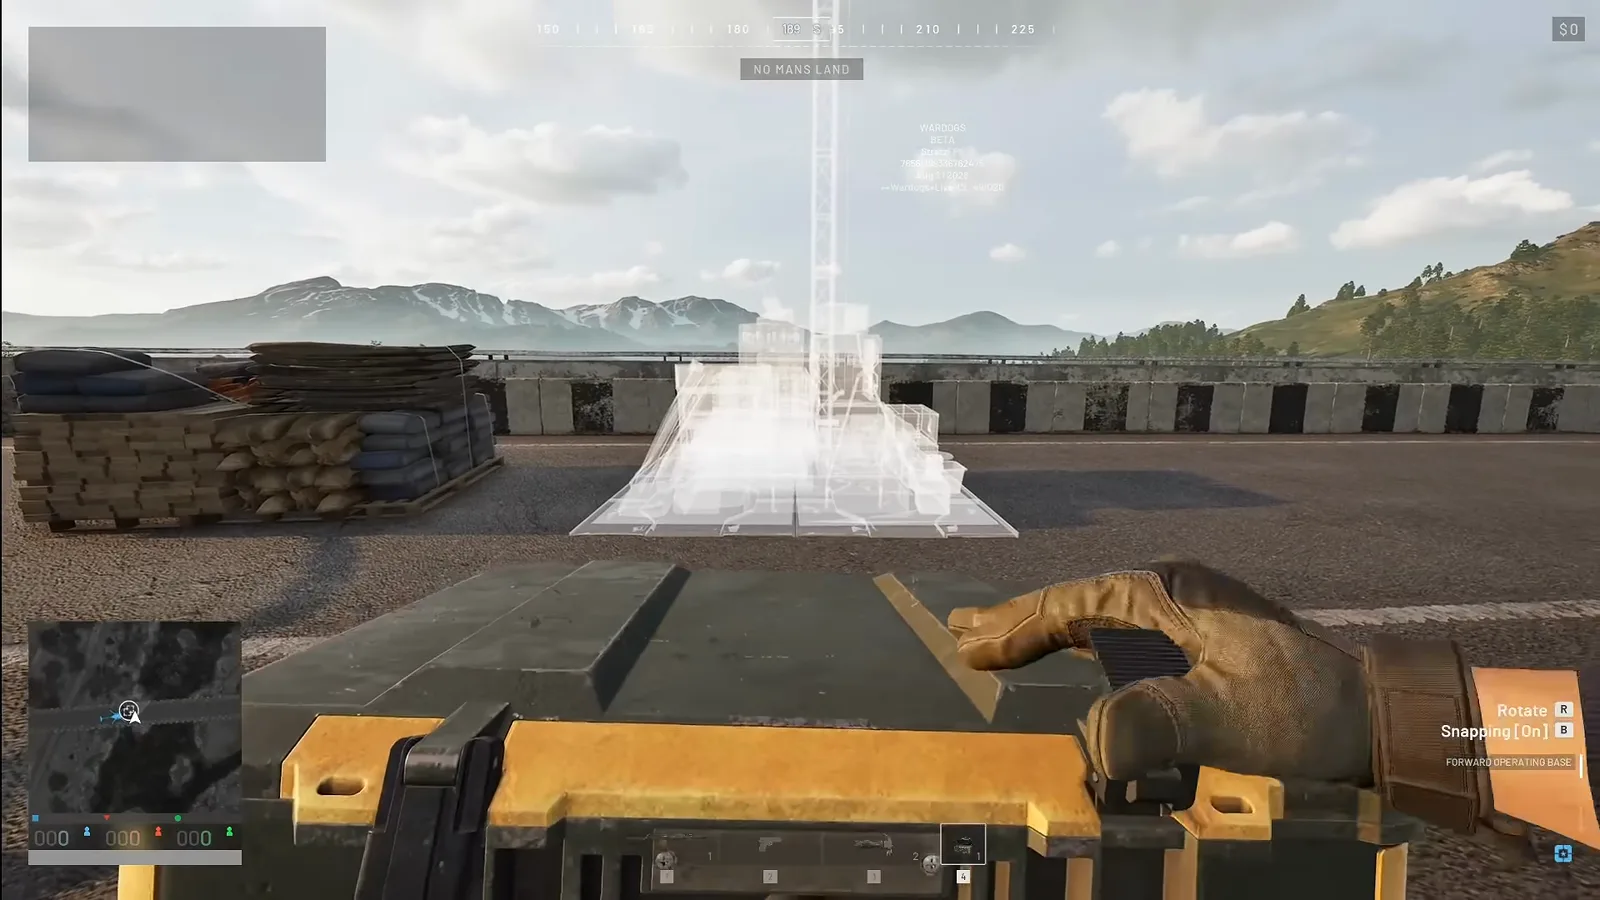 Step 2 (1:17) — Rotate and snap the hologram into place; the blue square it creates is the only area where building is allowed.
Step 3: Check the Starter Stash Before You Plan
A fresh FOB lands with a small amount of supplies — enough to begin, nowhere near enough to finish. Open the FOB panel and you will see four counters (build, fuel, ammo, mechanical) plus the FOB inventory where hammers and stock are stored. Read those numbers first, then shop to fill the gaps instead of guessing.
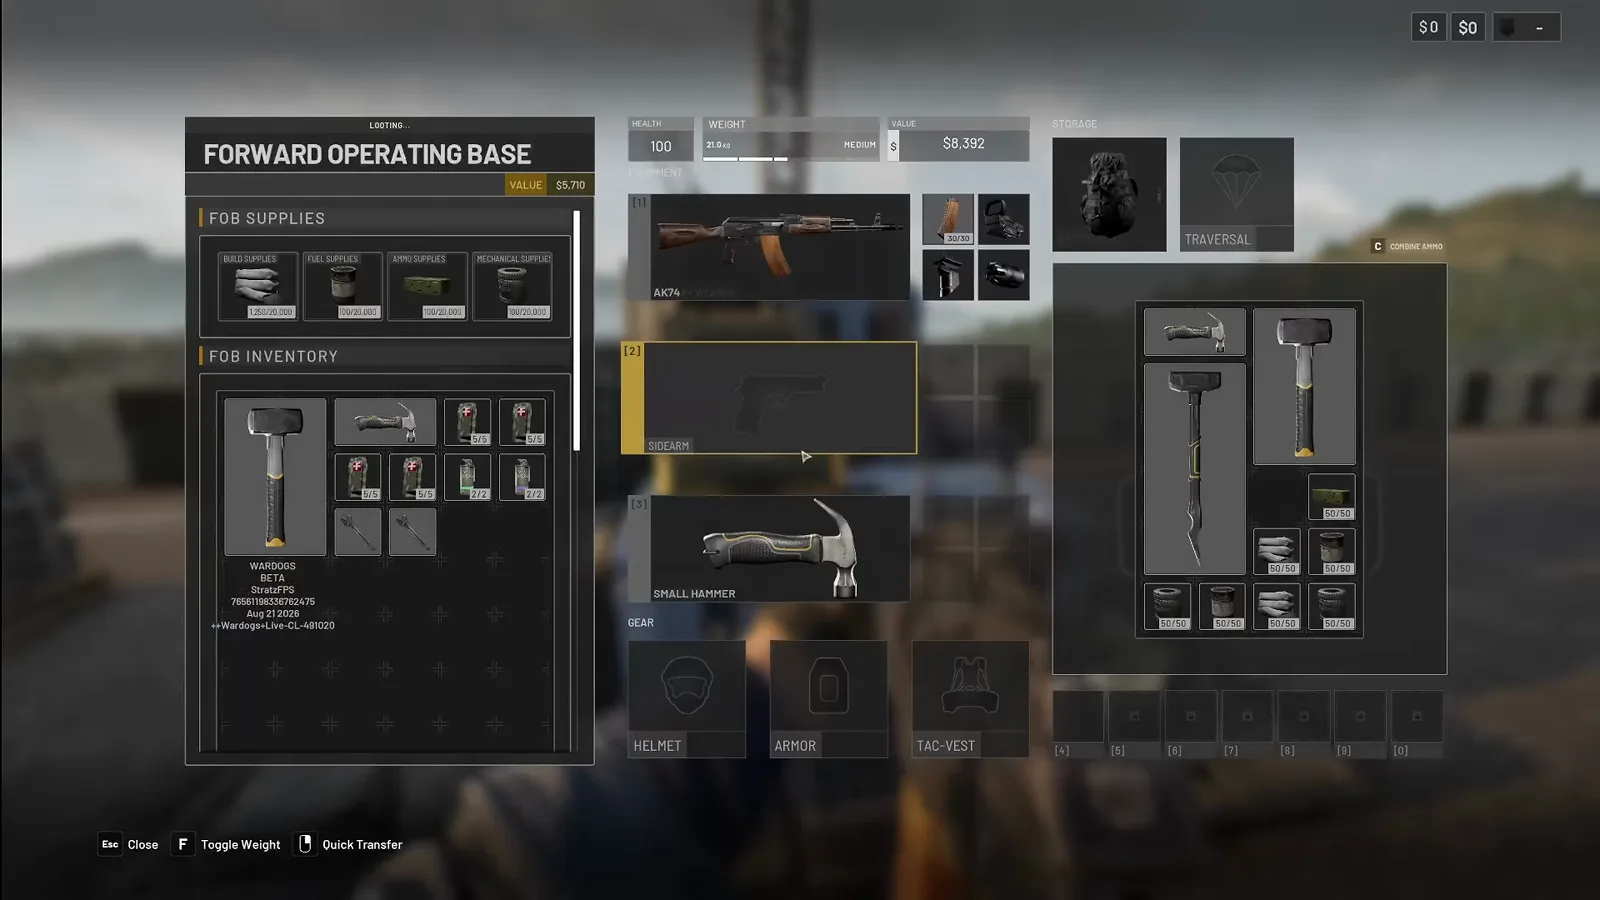 Step 3 (1:27) — The Forward Operating Base panel is both your shopping list and your warehouse ledger.
Step 4: Ship Supplies Forward with a Vehicle and Pallet
Supplies reach the front line by air, by land, or on your back — but a vehicle is far more effective, because your soldier’s bag stays free for guns, ammunition and medical items while the vehicle hauls the build stock. Every slot of supplies you buy carries 50 items. The efficient loop: buy a pallet from the vehicle’s logistics tab, deploy it while flying or driving, drop it near the FOB, then walk up and press the Unload Supplies button — the stock moves straight into the base.
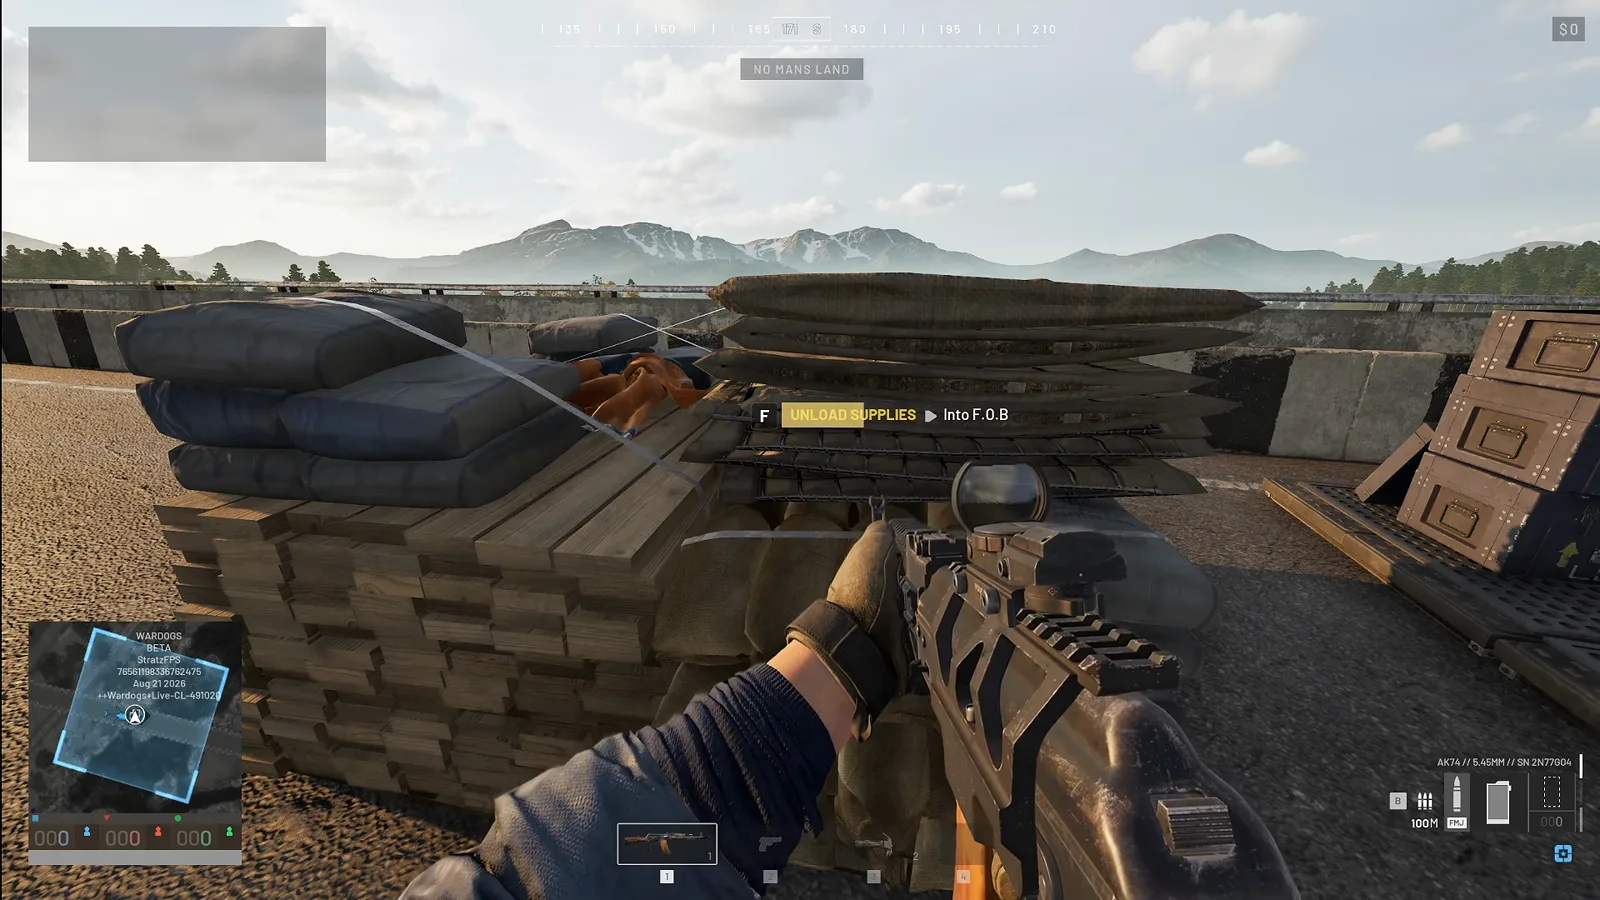 Step 4 (2:31) — One prompt moves a whole pallet of stock into the FOB — no hand-carrying trips required.
Watch the pallet resupply (2:31)
Step 5: Pick the Right Hammer and Swing at the Yellow Xs
Structures cost supplies, and the hammer in your hand decides what you are allowed to build and how fast. Construction itself never changes: swing at the piece and hit the yellow X marks that appear on it — the same tap-the-X trick we break down in the L81 mortar walkthrough, where a mortar pit is really just a mini FOB.
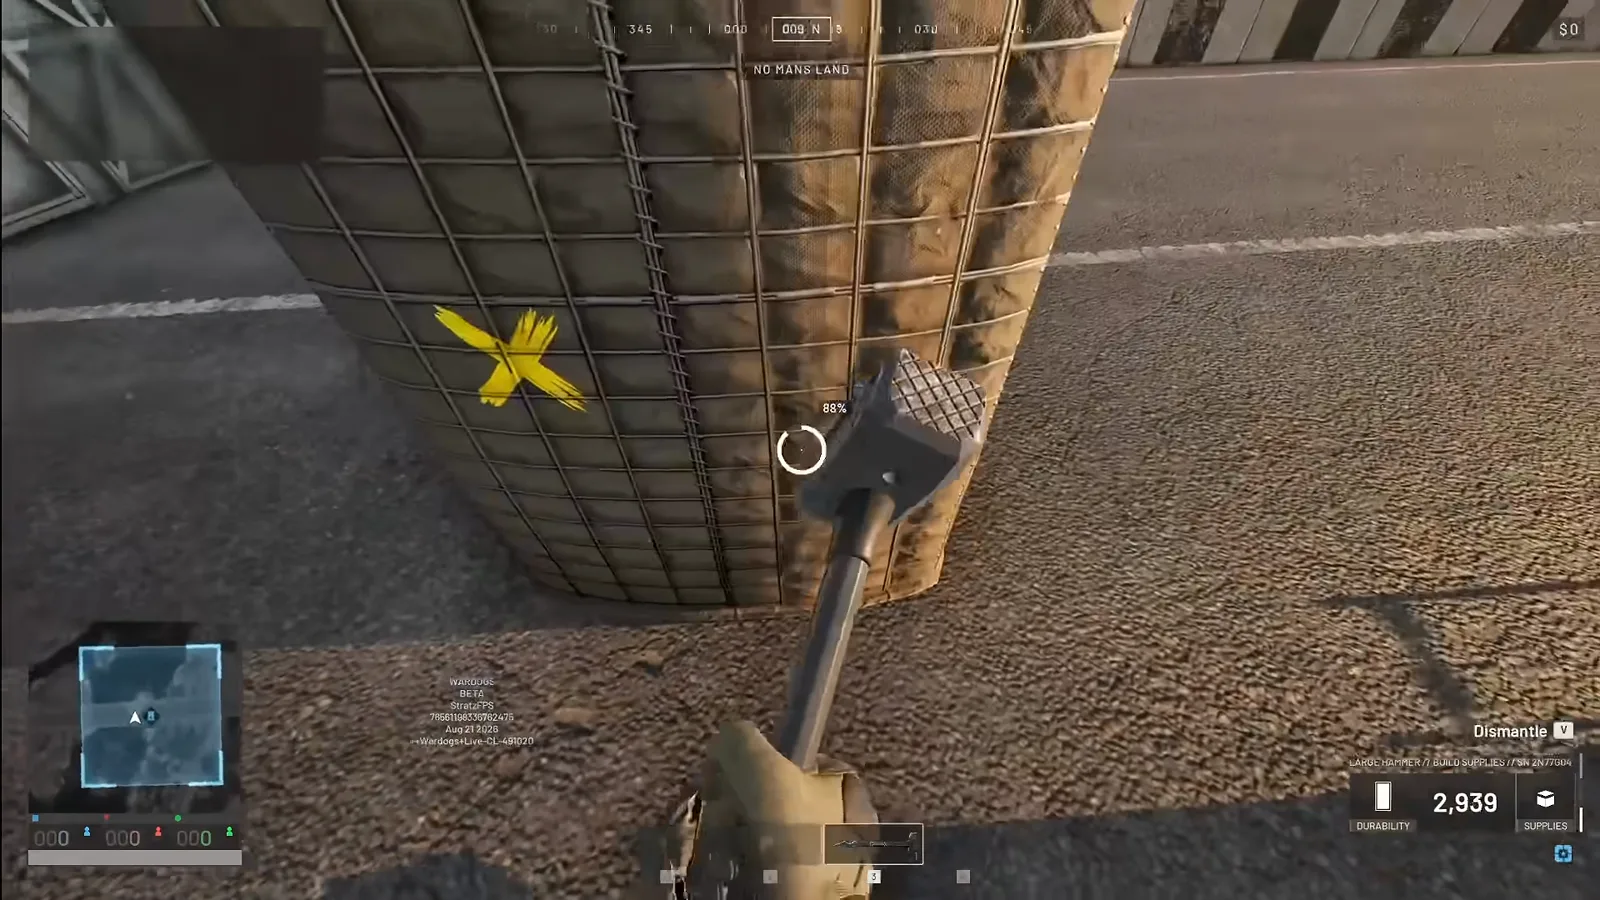 Step 5 (3:58) — The yellow Xs are the fast-forward button; the counter in the corner is the supplies each swing spends.
Hammer tier cheat sheet
- Small — basic buildables such as simple barriers and barbed wire, at the slowest build speed.
- Medium — everything the small hammer builds, plus base defenses, gates, Hesco walls and doors.
- Large — the jack-of-all-trades: all of the above plus complicated structures, at the fastest build speed in the game.
Watch the hammer breakdown (3:04)
Step 6: Build Walls, Gates, and One Ugly Choke Point
With the FOB down and the hammer out, start on walls, gates and fences. The episode’s rule for gates: only build a couple of entrances — every extra door is one more place enemies can sneak through. Then deliberately make those entrances painful: the demo walls off a main gate and doors it into a choke point, so when enemies push through — and they will — your team controls who gets in and when.
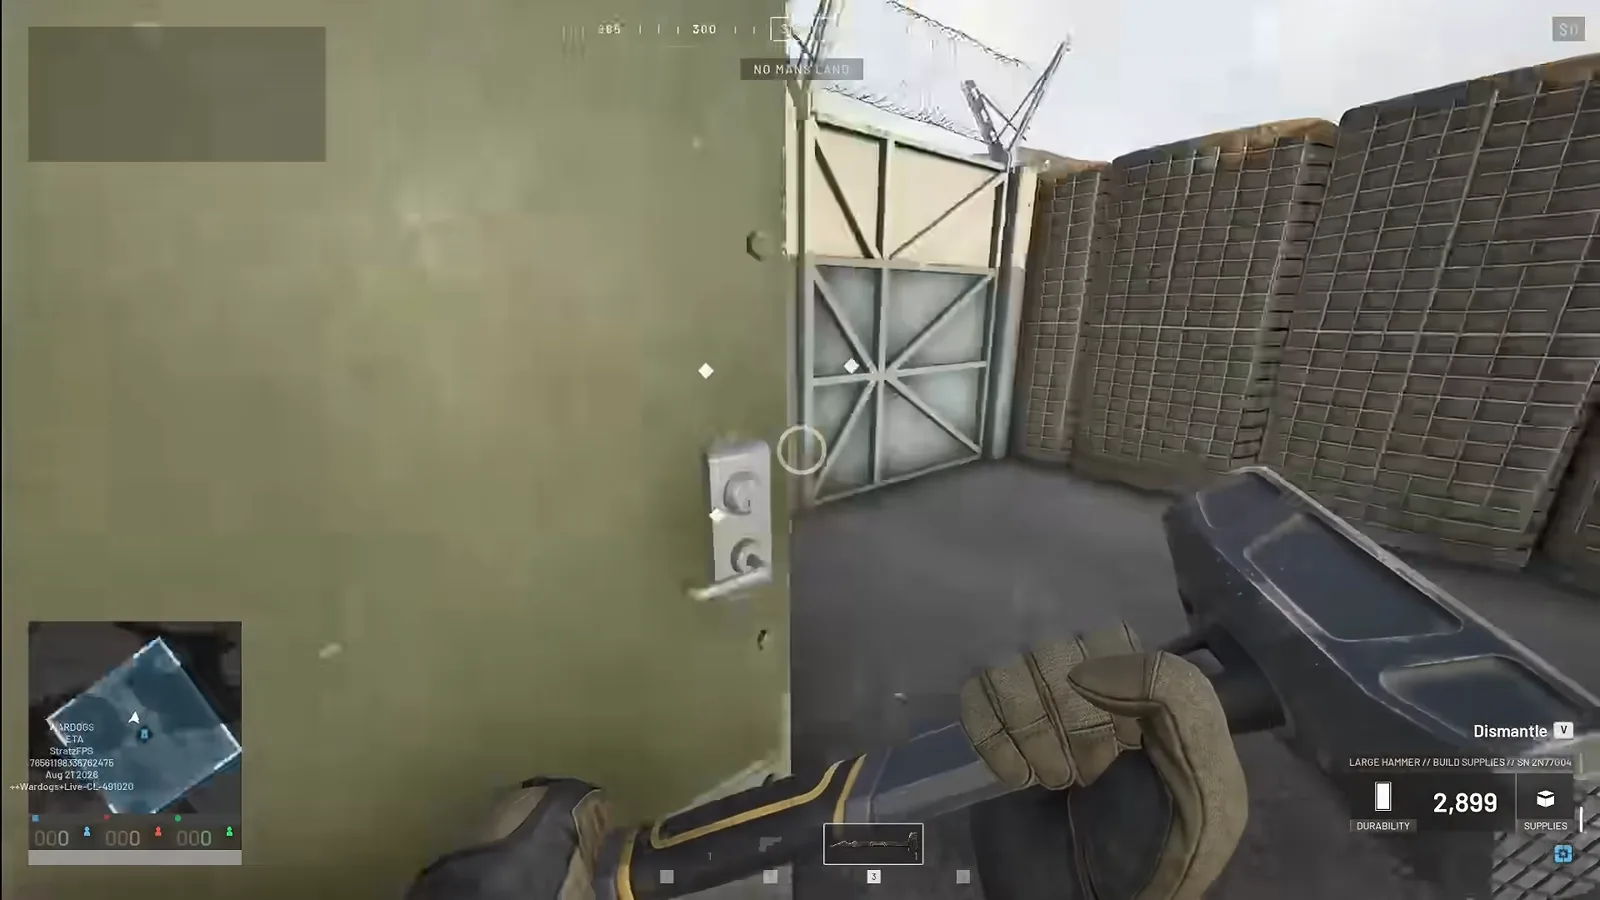 Step 6 (4:19) — One door in the wall line turns every enemy push into a predictable, defensible funnel.
Watch the choke point build (4:05)
Step 7: Add Overwatch and Wire the Wall Tops
A cool trick from the episode: build a recon tower just behind the wall by your gate. Climb it and you can look straight down at the entrance and hold off an enemy advance from safety — no more babysitting the drill rig all match. Then run barbed wire along the tops of your walls so enemies cannot drive a truck up against them and hop over. For serious perimeters, upgrade Hesco runs to the large concrete walls: super tall, wire on top already, and they go up in about two swings of the large hammer.
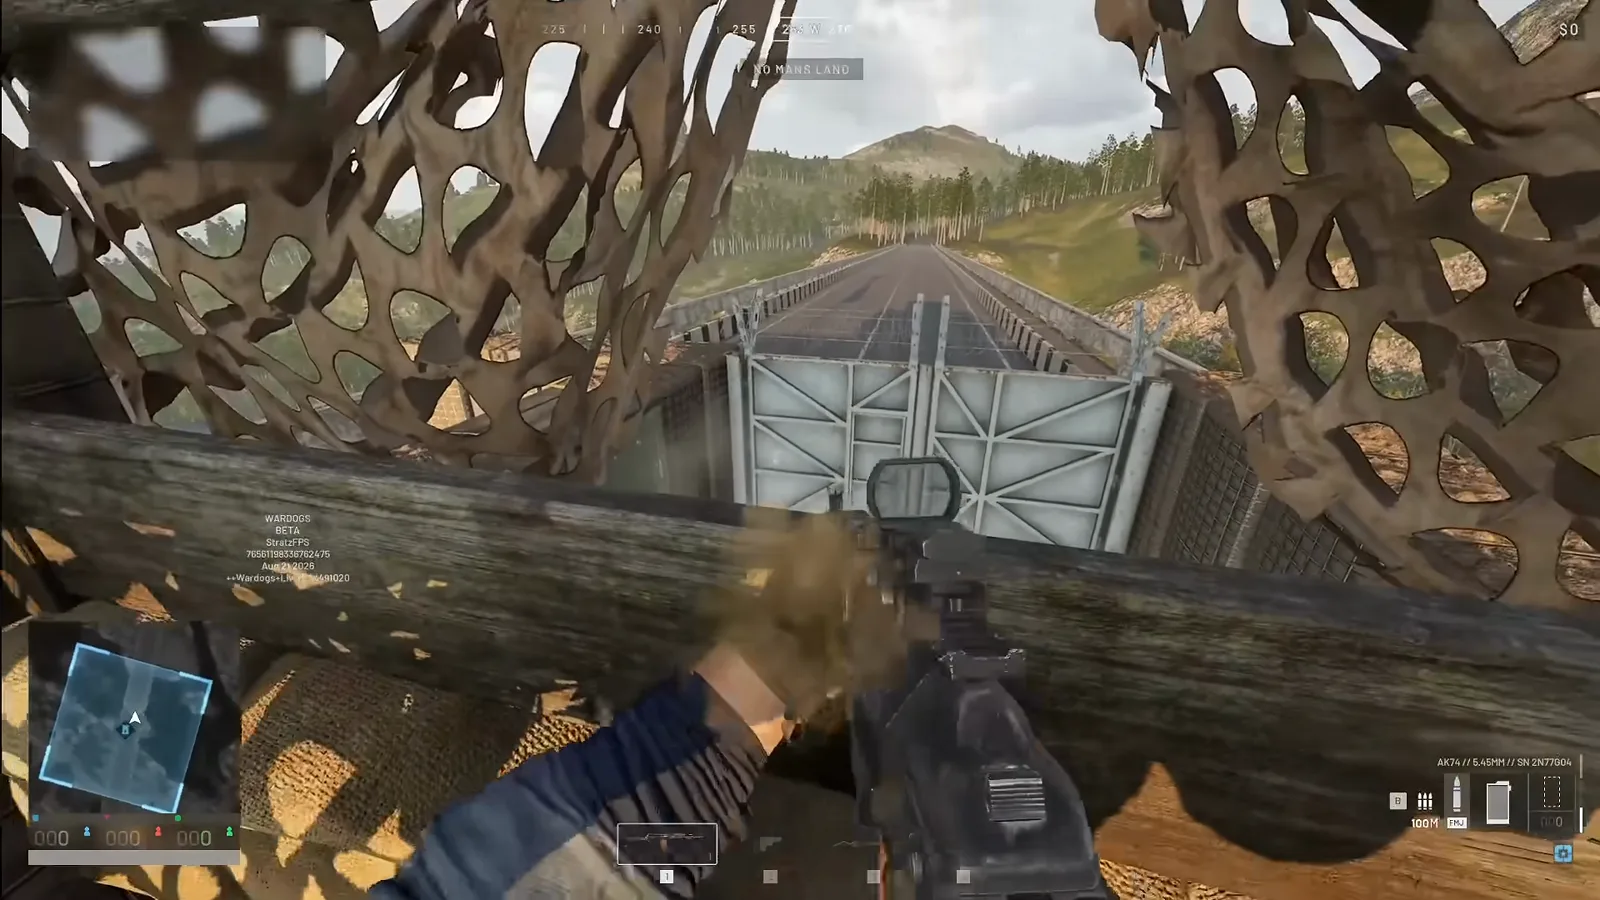 Step 7 (4:38) — The tower’s firing view: gate watched, wall at your back, drill free to keep working.
Watch the recon tower trick (4:36)
Step 8: Wall In the FOB Unit Itself
The episode closes with its most common failure: walking into an enemy base and finding the FOB sitting naked in the open. If an enemy reaches your FOB they can plant an explosive on it or hack it, take control, and you lose the entire advantage of that base. Build walls around the unit and put barbed wire over the approaches — just leave yourself an access path so supplies can still move in and out during a fight.
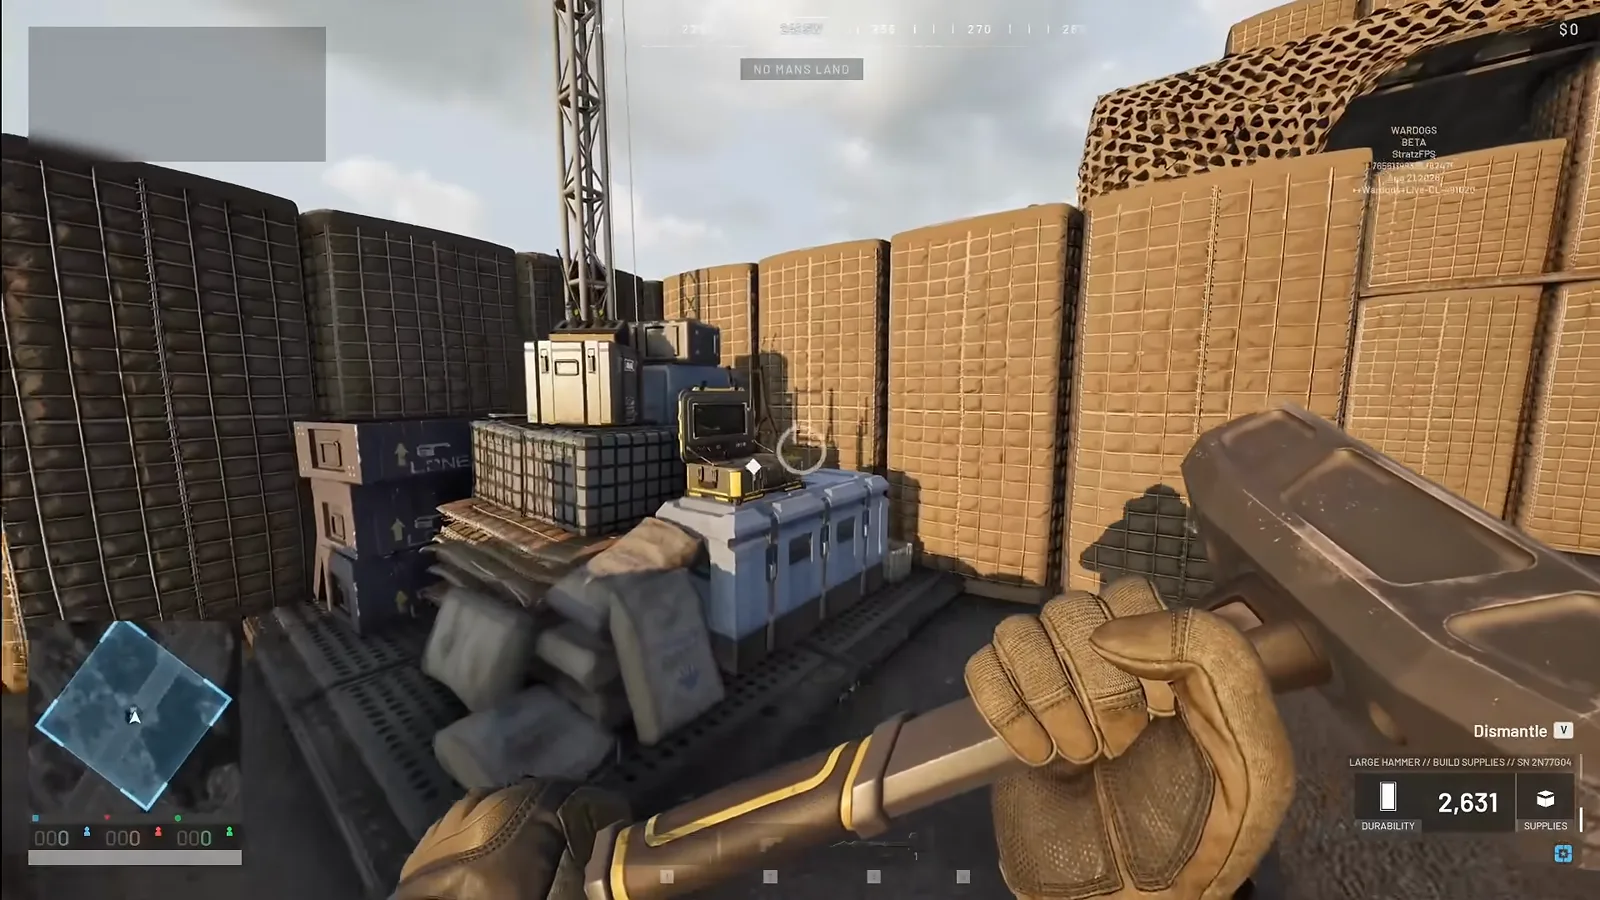 Step 8 (5:19) — The finished product: a ringed FOB with its stockpile one prompt away, not a gift waiting to be hacked.
Watch the FOB protection advice (5:06)
FOB Building Rules of Thumb
- FOB first, hammer second — nothing places without one down, so buy and plant it before hauling supplies.
- Two doors beat five — few entrances, each turned into a choke point, means fewer walls to hold.
- Wire the wall tops — it is the cheap answer to truck-ramp tricks; when armor shows up proper, escalate with our anti-tank guide.
- Choose ground deliberately — the blue square can go anywhere, so use the terrain-reading habits from our maps and tactics guide before you commit the hologram.
- Never leave the FOB naked — walls and wire around the unit, always, because a hacked FOB is a lost base.
Supplies are money in material form, and a base burns through both — our money-making guide keeps the vendor runs funded. Once the perimeter holds, take the next step and learn to fight from it in the FOB combat walkthrough.
This FOB building guide was reconstructed frame-by-frame from StratzFPS’ War College episode 3 and will be updated as placement rules and build costs shift through Early Access.
Related Articles
fixes
WARDOGS Connection Error and Server Down Fixes: Queue, Ping, Disconnects
Fix WARDOGS connection errors, stuck queues, high ping and match disconnects in Early Access with a server-first triage ladder before you touch your PC.
guides
WARDOGS Money Guide: Fastest Cash Methods in Early Access
Illustrated WARDOGS money guide: helicopter passenger drops, logistics pallets, supply crates, spawn-vehicle runs and medic income for fast early-game cash.
guides
WARDOGS Medic Revive Guide: Defibs, Bandages & Payouts
Illustrated WARDOGS medic guide: charge the defibrillator, bandage live teammates, drag downed players to cover, and bank revive payouts and tips.
Was this helpful?
Thanks for the feedback!