WARDOGS Logistics Guide: Supply Pallets, Crates and FOB Deliveries
A frame-checked WARDOGS logistics guide: open the B menu, load pallets and crates, check what a FOB is short on, drive to the contested zone and unload.
FAQ
What key opens the logistics menu in WARDOGS?
How do you unload supplies into a FOB?
How much do supply pallets pay in WARDOGS?
What is the difference between a supply pallet and a supply crate?
What Actually Counts as Logistics in WARDOGS?
Four things, and only four: a vehicle with a cargo bed, the pallets you buy for it, a FOB that is short of something, and the last hundred metres between the truck and that FOB. Everything else in the supply loop — the drive, the map, the contested circle — is just getting those four things next to each other before the enemy artillery works out where you are.
Most players only ever touch the money side of this. This page covers the mechanism instead: which chassis carries what, the two separate inventories hiding behind the B key, the four pallet types, when a crate beats a pallet, and how to read a FOB’s actual shortage before you load up.
Source and Verification Card
| Field | Detail |
|---|---|
| System | Vehicle logistics: pallets, crates, FOB unloading |
| Core keys | B logistics menu · G drop cargo · hold F unload · C first-person camera |
| Runtime | 10:58 |
| Source channel | SC Haulers (“Sax”) |
| Source video | How Vehicles & Cargo Work in WARDOGS |

SC Haulers — How Vehicles & Cargo Work in WARDOGS (full tutorial)
Step 1: Buy a Chassis That Actually Carries Cargo
Pressing B on the wrong truck does nothing useful. Walking the vehicle vendor from the cheap end: the Bobcat hauls people only, the buggy hauls nothing, and the Kodiak, Kodiak pickup and Humvee take the smaller containers. Pallets need a Ural — and the flatbed is the point of the whole exercise.
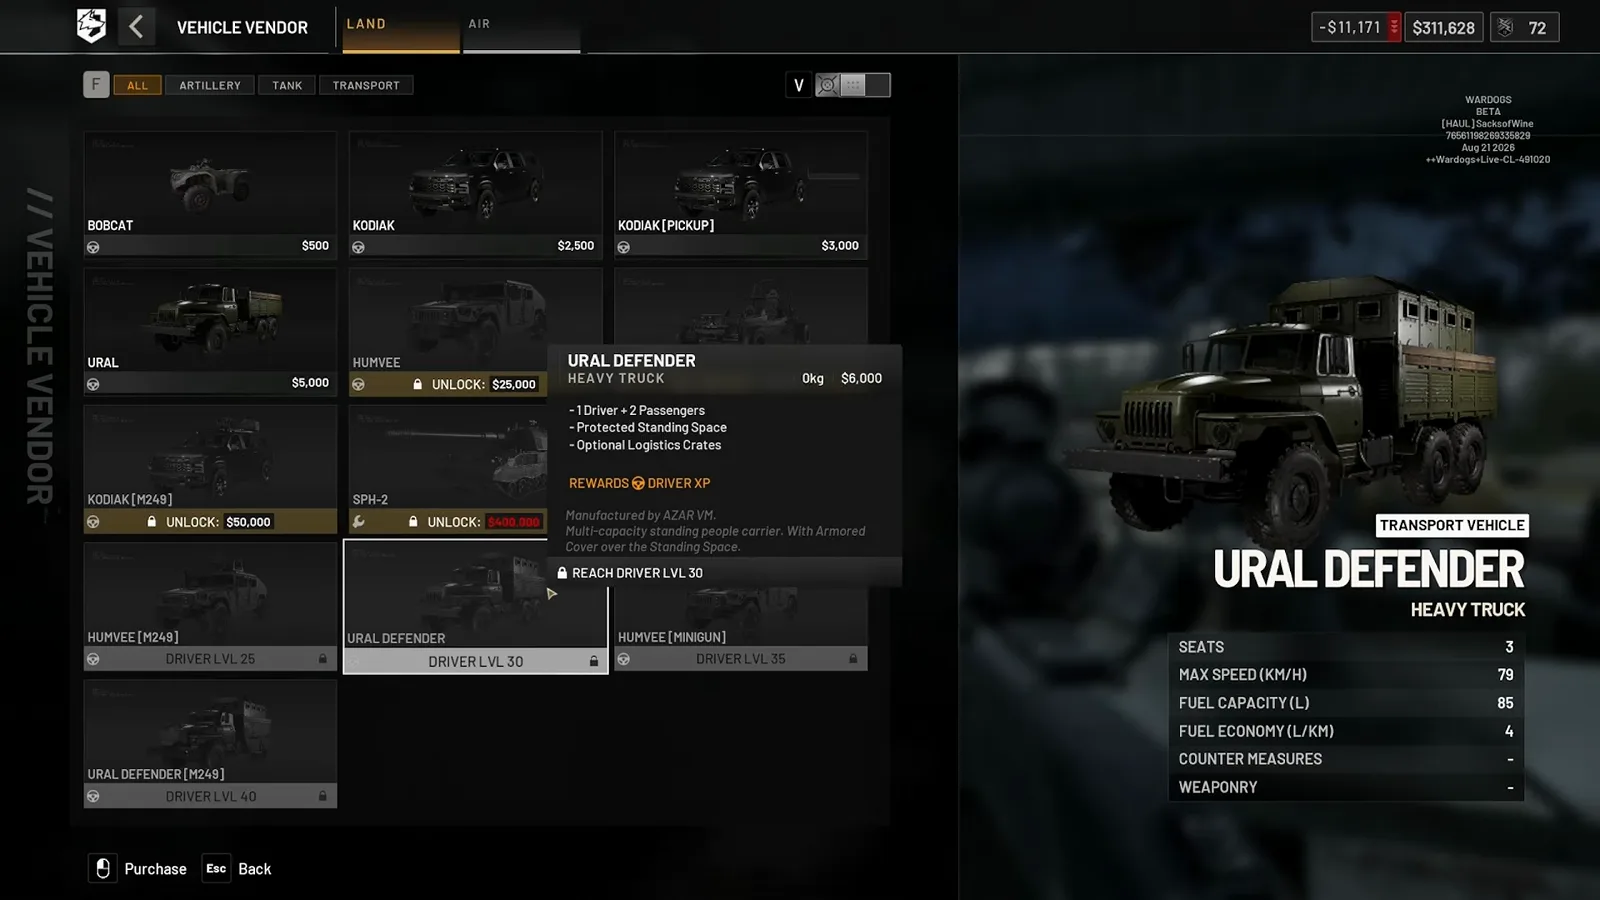 Step 1 (1:30) — The vendor tooltip is the honest source here: the Ural Defender is the first chassis that advertises logistics crates as an option rather than an afterthought.
Watch the chassis run-down (1:30)
Step 2: Learn That There Are Two Inventories, Not One
Open the logistics screen and you get two separate storage areas on one screen. The logistics slots are the truck bed — pallets and crates live there. The vehicle inventory is internal storage, four or six slots depending on the truck, and it is where you keep the large hammer, the FOB kit, spare ammo and anything you want to survive being blown up.
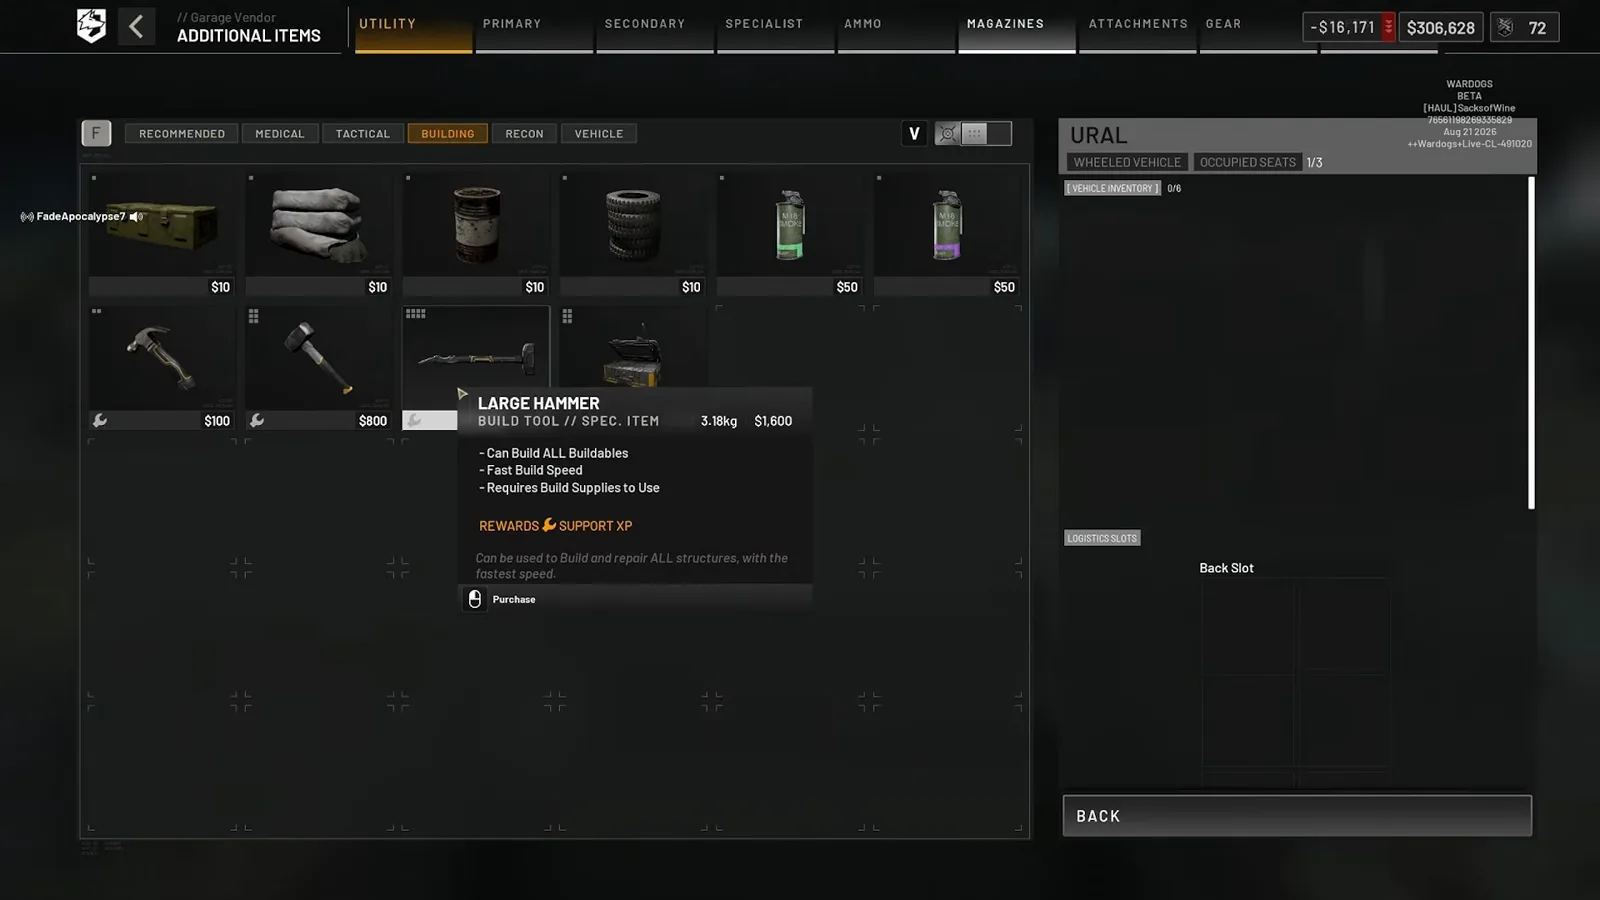 Step 2 (2:40) — Stuff your tools into the internal slots and keep the bed clear: a bed full of hammers is a bed that delivers nothing.
Watch the two inventories (2:40)
Step 3: Know the Four Pallet Types Before You Spend
The PALLETS tab sells exactly four things: build supply, ammo supply, fuel supply and mechanical supply. Each one feeds a different FOB counter, and the game says so on the item card — an ammo pallet lists its round count and a free-fall height limit, and every pallet card shows Rewards: Support XP, which is why hauling is quietly a class-leveling job too.
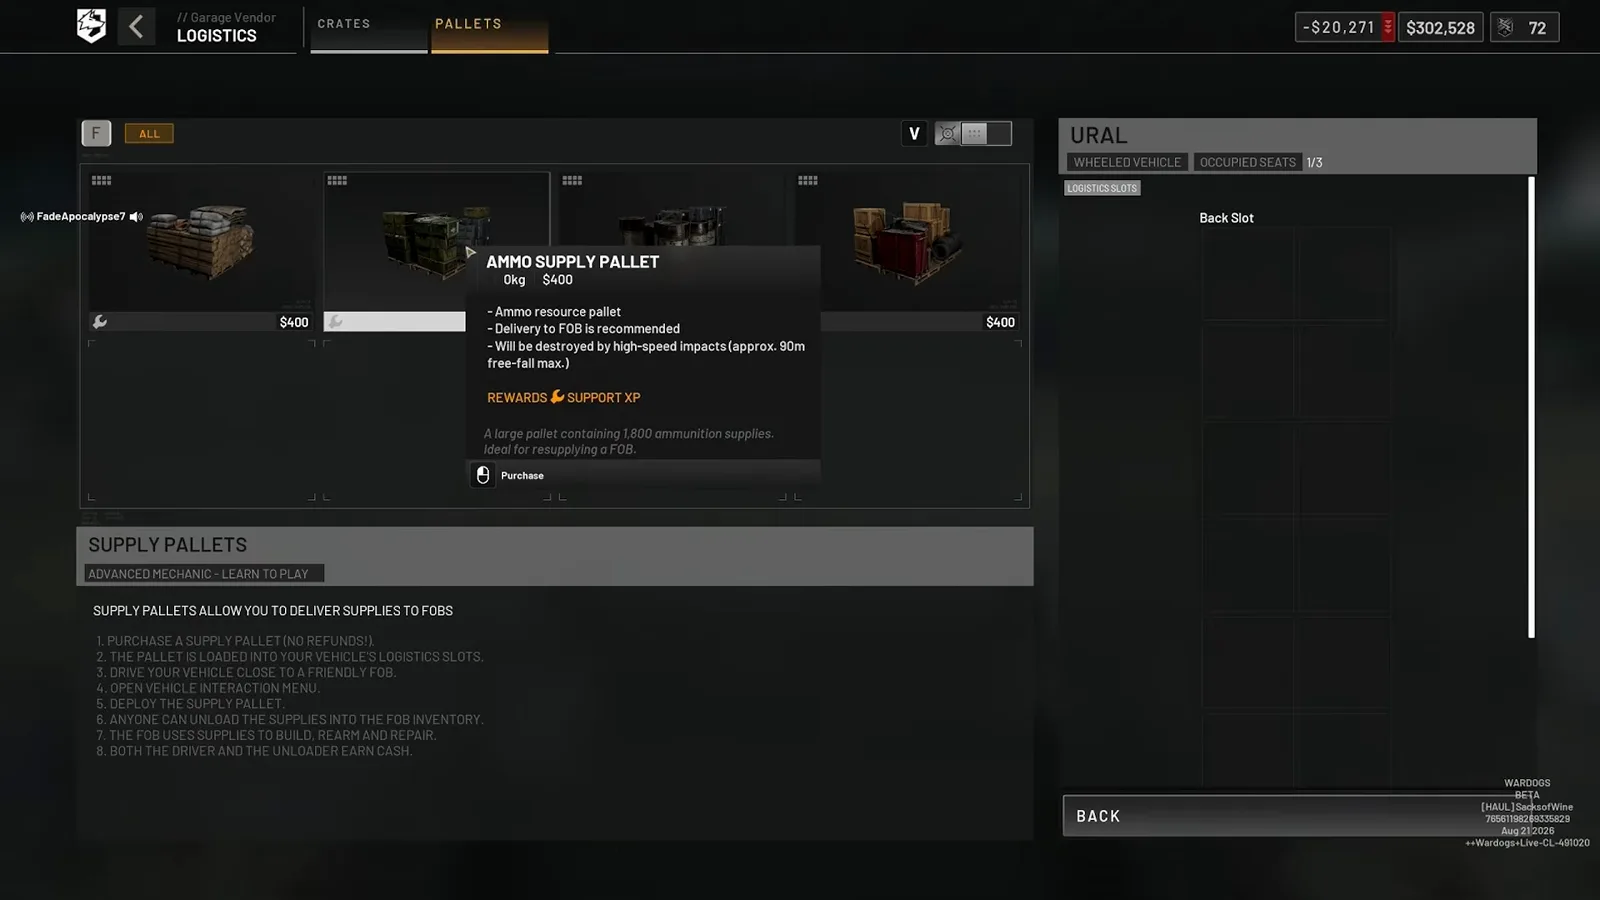 Step 3 (3:25) — Read the pallet card, not the tab name: the card tells you which FOB counter it fills and what it pays.
What the in-game help text says about pallets
The pallet screen ships with its own numbered instructions, and it is worth quoting because it settles the keybind question the subtitles leave open: you load the pallet into the vehicle, drive to the FOB, open the vehicle interaction menu, deploy the supply pallet, and then anyone can unload the supplies into the FOB inventory. That last line matters — the person who paid for the pallet does not have to be the person who holds F on it.
Watch the pallet purchase (3:25)
Step 4: Use Crates for Items, Pallets for Stockpiles
The CRATES tab sells a small crate ($150) and a large crate ($300), plus armoured versions of both that unlock at pilot level 2 and pilot level 15. Armoured crates take the same contents and survive a hit. The catch is delivery: a crate is not a stockpile injection. You break it open, move the item into your backpack, and carry it to the laptop station belonging to that FOB — a full inventory screen, and the only place a crate item actually counts.
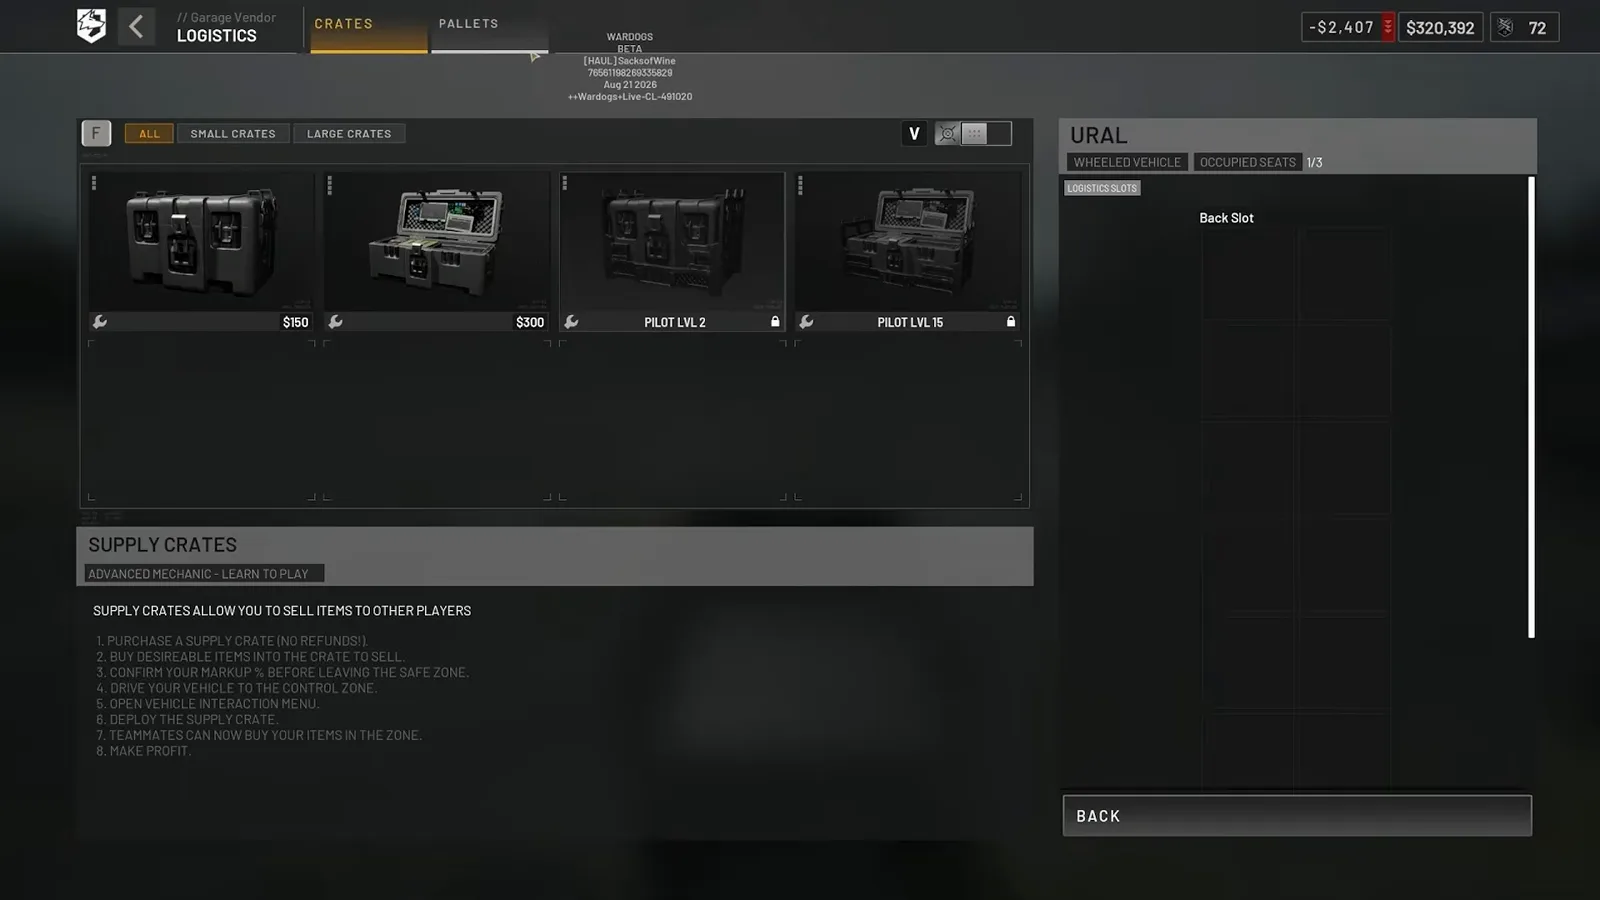 Step 4 (9:10) — Crates are for a specific object — a hammer, a defibrillator, a build kit. If you are topping up a counter, you want a pallet instead.
Step 5: Check What the FOB Is Short On Before You Load
This is the step almost nobody does, and it is free. Open the map, find your team’s FOB — the castle icon sitting in the middle of your coloured circle — and hover over it. A supplies panel appears with four counters: build, fuel, ammo and mechanical, each against a 20,000 cap.
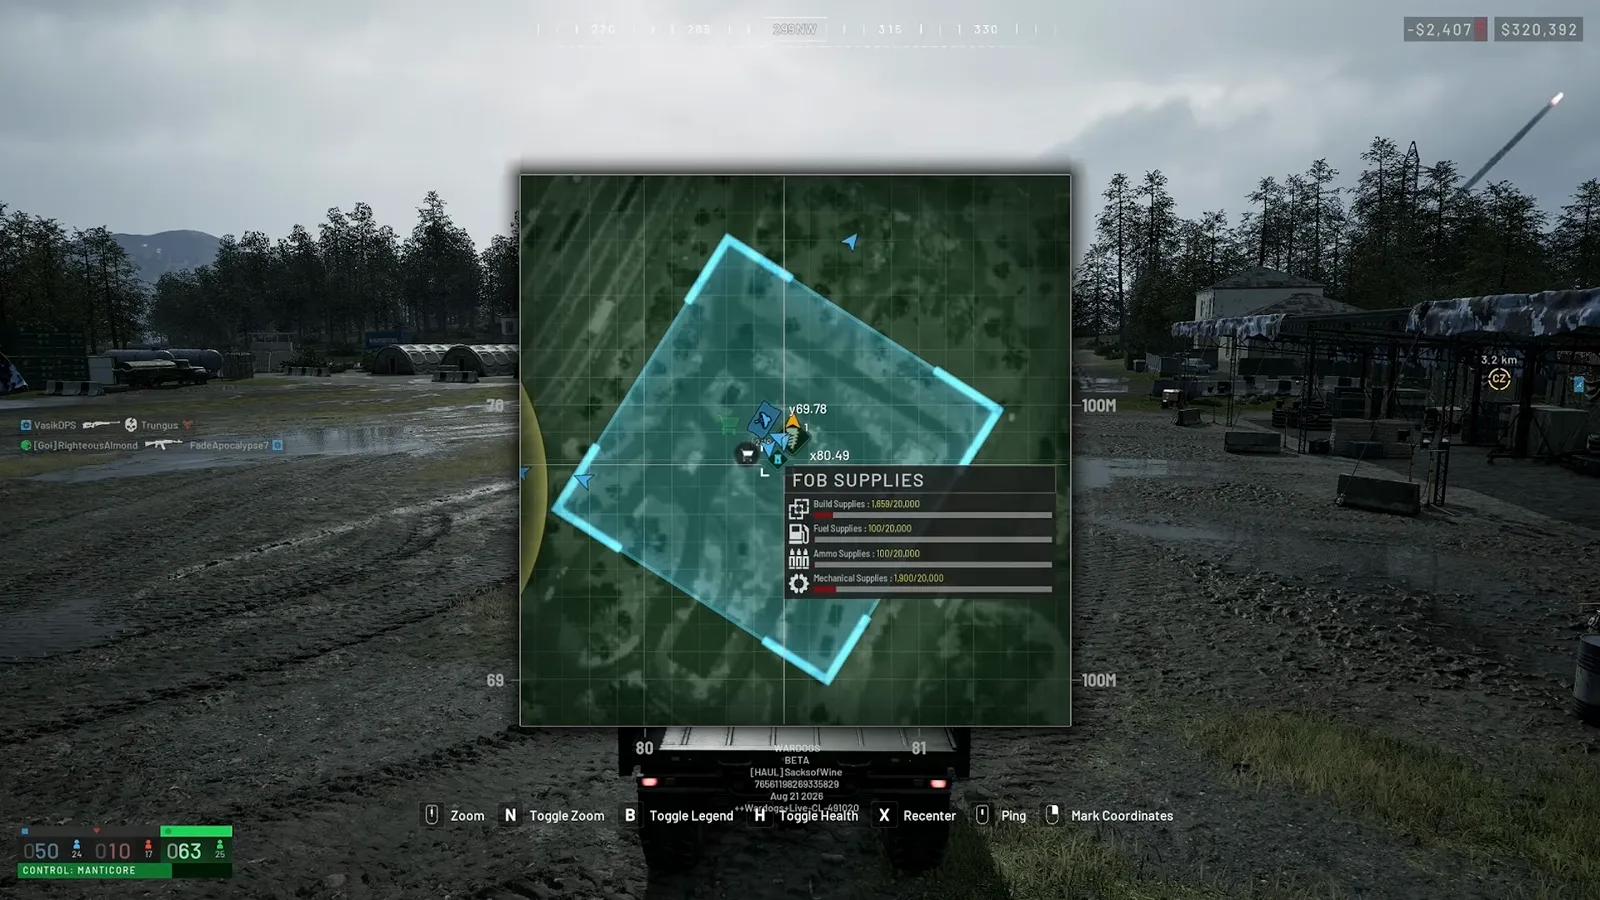 Step 5 (8:50) — Two of the four counters were sitting at 100 out of 20,000 in this match, which told the driver exactly which two pallets to buy next.
Watch the FOB supply check (8:50)
Step 6: Drive Freight, Not a Race
Terrain decides everything. The Ural copes with off-road and tarmac about equally well, but mud will spin any vehicle into a spiral — brake before the corner, not in it. Pressing C drops you into a first-person cab view, which is dramatically easier to place on a wooded track than the default third-person camera.
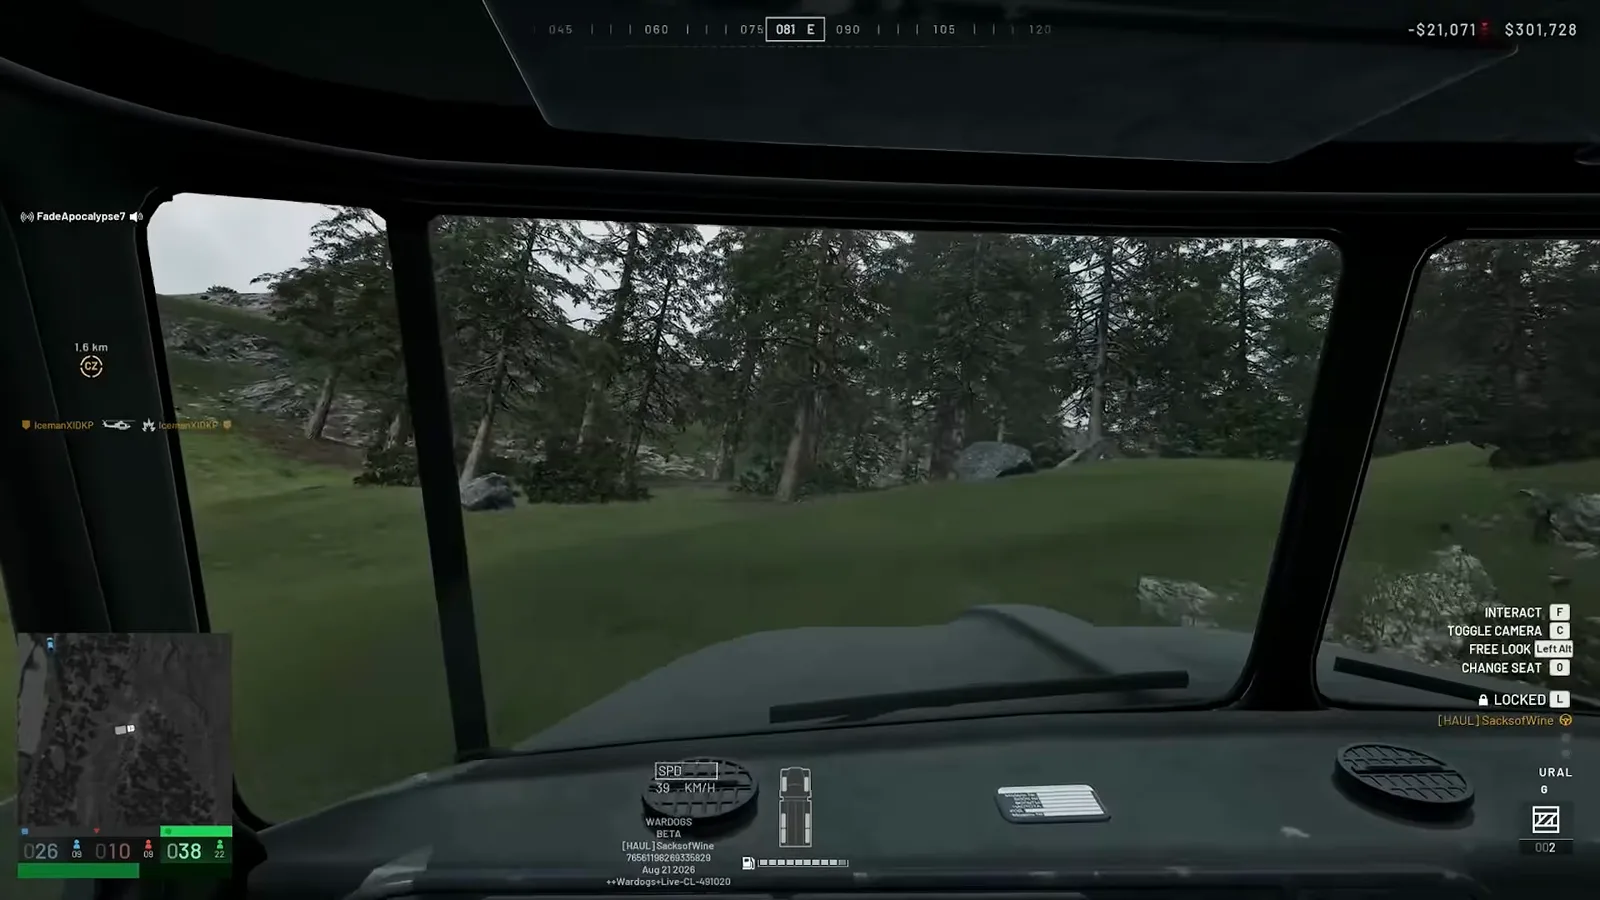 Step 6 (5:22) — The keybind strip on the left of the screen is the authoritative list: Interact F, Toggle Camera C, Free Look Left Alt, Change Seat O, Locked L.
Step 7: Deliver Inside the Contested Circle, Not Outside It
Drop a pallet in open ground with no FOB around and you earn almost nothing — the video demonstrates this deliberately to show the difference. The big circle on the map changes colour with whoever controls it, and the best payout comes from delivering into the contested zone, ideally right beside one of your own FOBs so the crew can get the pallet unloaded before it is destroyed.
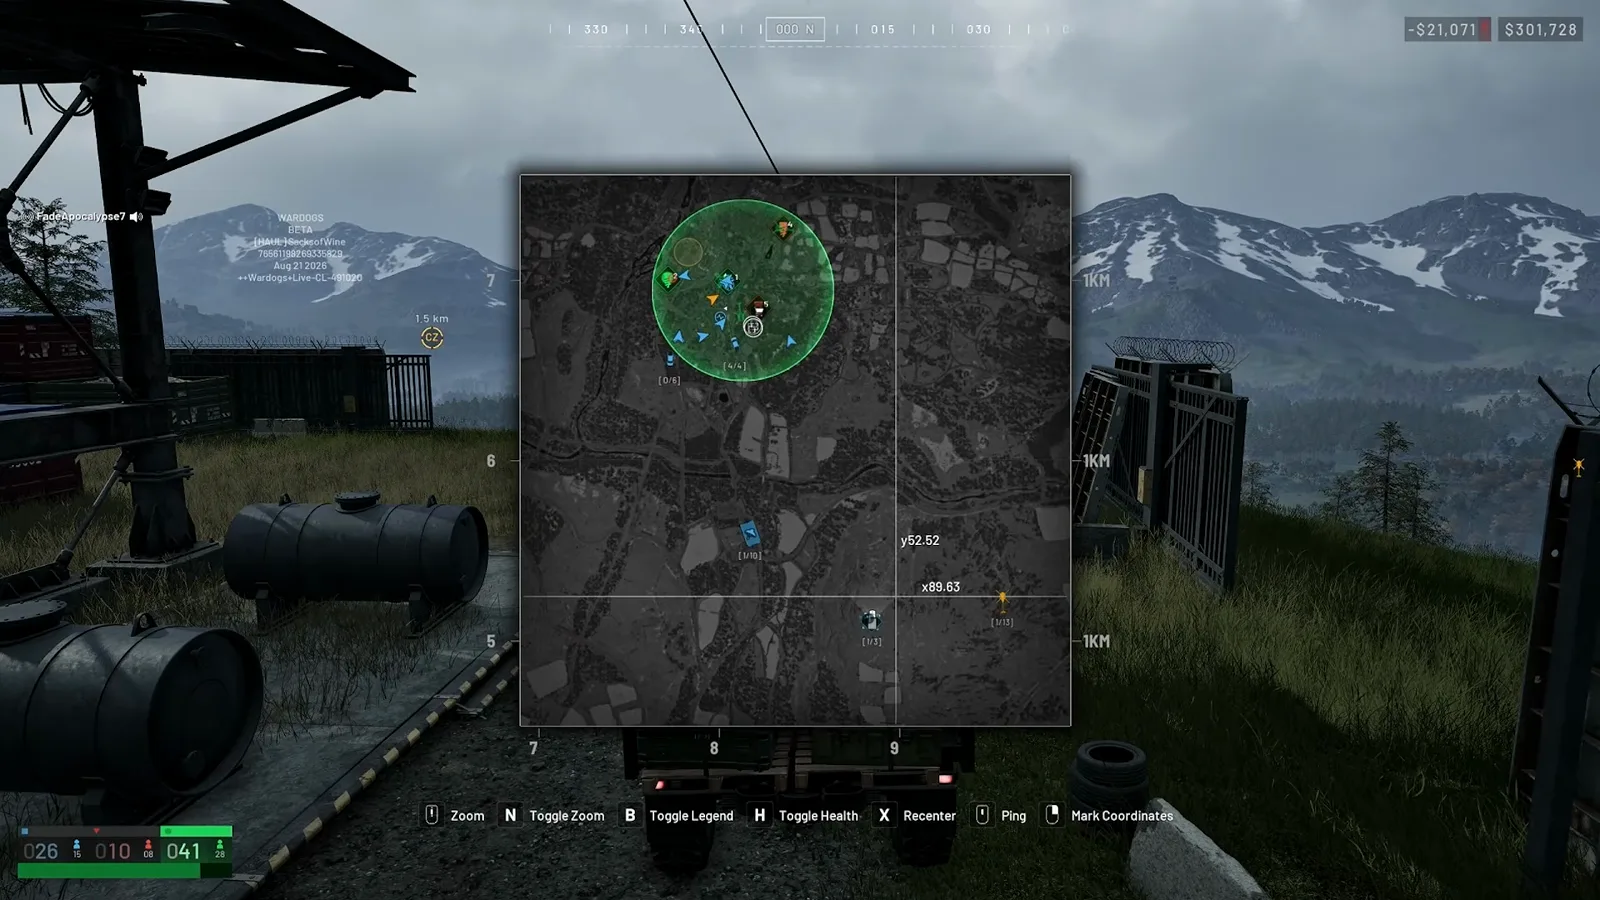 Step 7 (6:12) — Read the circle colour before you commit: green means friendly control, and the grid coordinates are what you call out over voice.
Watch the contested-zone drop (6:12)
Step 8: Park, Drop, Hold F
The delivery itself is three inputs. Park inside the FOB, press G to shove the pallet out of the bed, then press and hold F next to it to unload into the FOB inventory. In the playtest that split the payment in two: money on drop, more money on unload, plus support XP for both.
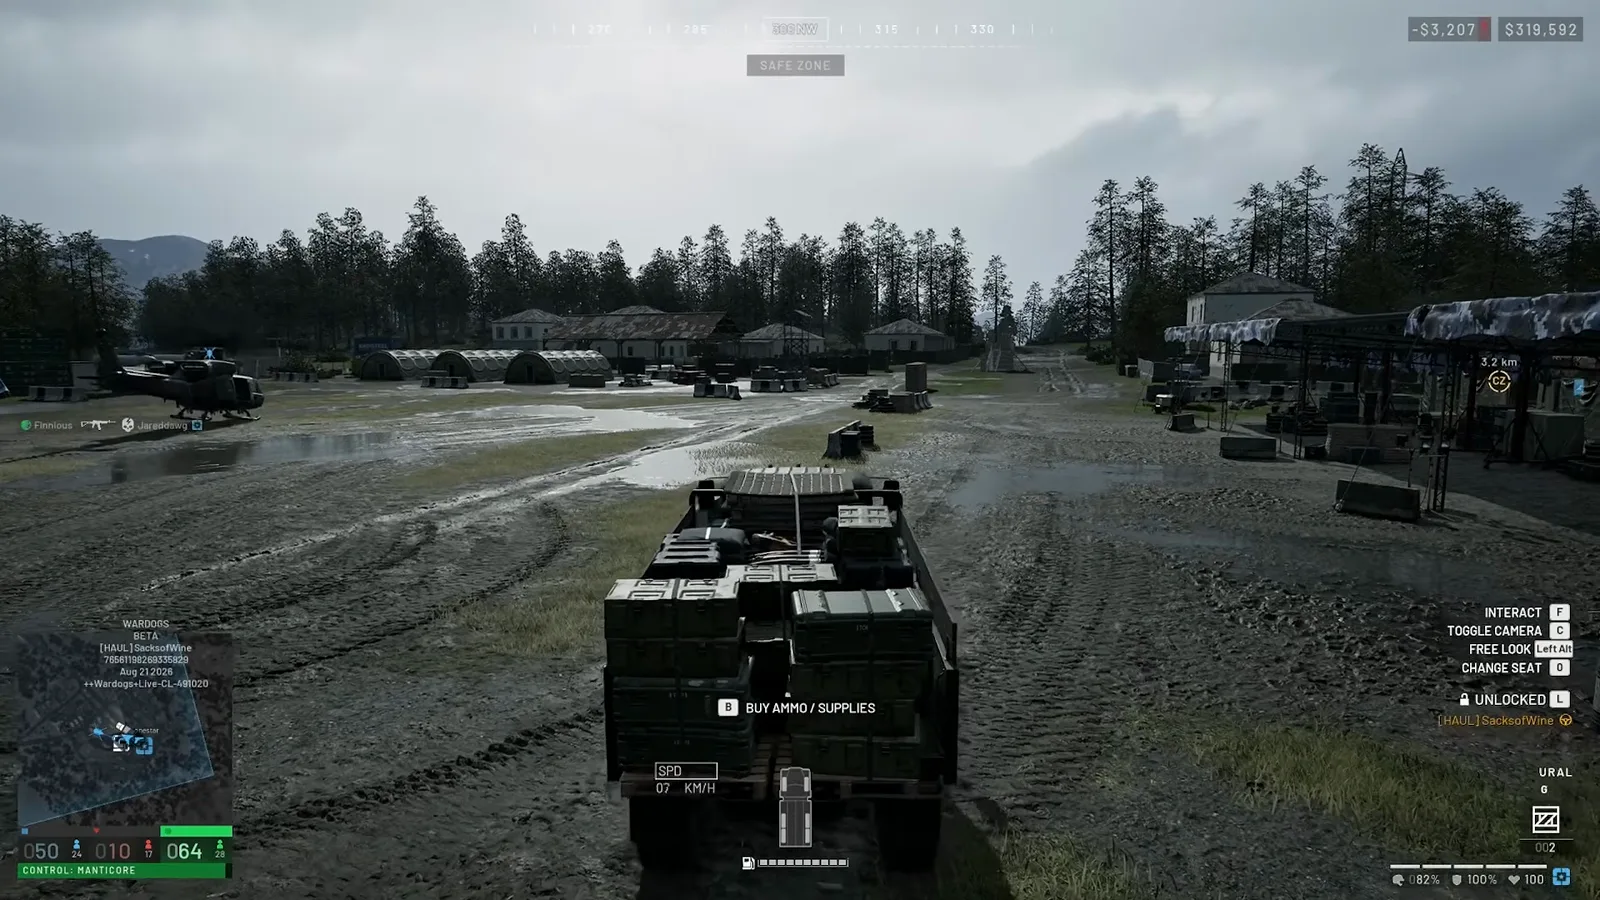 Step 8 (9:20) — A loaded bed is visible from a distance: expect the enemy to shell the truck, not the infantry.
Logistics Rules of Thumb
- Pallets for counters, crates for objects — never buy a crate to fill an ammo deficit, and never buy a pallet to deliver someone a hammer.
- Hover before you buy — the FOB supplies panel on the map costs one second and stops you hauling a fuel pallet into a fuel-rich base.
- Two payments, two chances to fail — the drop pays, the unload pays more, and both need the FOB to still be standing.
- Hauling is leveling — every pallet card lists support XP, which is why the truck is the least glamorous way up the class ladder; the full route is in our XP and unlock leveling guide.
- Know when to stop hauling — a $2,500 delivery that costs you a $6,000 truck is a loss; compare against the riskier routes in our money-making guide.
Reconstructed frame-by-frame from the SC Haulers cargo tutorial. For which chassis are worth the insurance, see the vehicles guide; for keeping the FOB alive long enough to receive the delivery, see the FOB building guide and the FOB combat walkthrough; for reading the circle itself, the maps and tactics guide; and for what a fat mechanical stockpile actually buys you, the Stingray drone walkthrough.
Related Articles
guides
WARDOGS Season 1 Patch Notes: Every XP, Price and Unlock Change
Full WARDOGS Season 1 changelog, dated and sorted: XP bands 40-124% slower, FOB raised to $7,500, Artillery to Career 90, plus the 0.11 server-browser patch.
guides
WARDOGS Stingray Drone Walkthrough: Build, Launch and Kill From the FPV
A frame-checked WARDOGS Stingray drone walkthrough: place the launcher, pay 900 spare parts and $5,000 a flight, then fly yaw and pitch only.
guides
WARDOGS How to Level Up Fast: XP Curve, Class Unlocks and Shortcuts
A frame-checked WARDOGS leveling guide: read the six-class XP curve, hit the cheap early levels first, and unlock the AK74, SKS, RPG-7 and Ural faster.
Was this helpful?
Thanks for the feedback!